blog-hero-background-image
Cyber Security

Security Triage: Which Cyber Initiatives to Cut (And Which to Keep)

backdrop
Table of Contents

Join thousands of professionals and get the latest insight on Compliance & Cybersecurity.


You've just been handed another budget cut while your threat landscape continues to expand. Your team is already stretched thin, alerts are piling up, and executives expect perfect security despite slashing resources. Sound familiar?

Welcome to the unwinnable war of modern cybersecurity—where you're expected to defend everything with increasingly limited means.

The hard truth: some things are naturally going to slip through the cracks. It's not a failure of your abilities; it's the reality of our profession. But there's a crucial difference between things falling through cracks randomly and making calculated decisions about what risks your organization will accept.

The Triage Mindset: From "Doing Everything" to "Doing What Matters"

Security professionals have borrowed the concept of "triage" from emergency medicine—the systematic prioritization of patients based on injury severity and survival likelihood. In cybersecurity, we need to extend this concept beyond incident response to our entire security program.

Consider these sobering statistics:

  • Up to 62% of security alerts are ignored due to alert fatigue
  • The average time to exploit a new vulnerability has dropped to just five days in 2024
  • Most organizations can only address a fraction of their known vulnerabilities

The foundation of security triage lies in risk-based security, expressed by the fundamental equation:

Risk = Likelihood × Impact

This simple formula will guide our framework for making defensible decisions about which initiatives to fund and which to defer.

A Framework for Triage: The Three Pillars of Prioritization

Effective security triage requires understanding three critical inputs that form the foundation of your decision-making process:

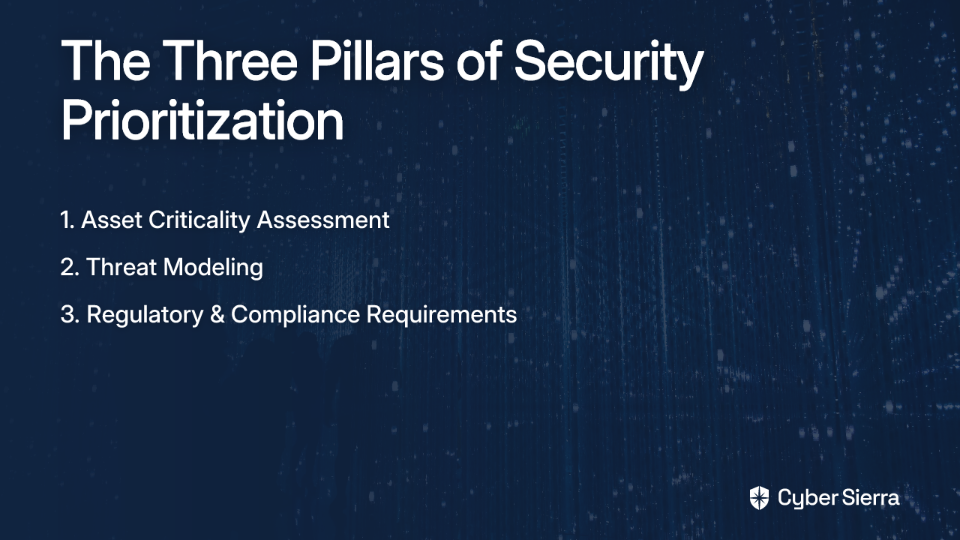
Pillar 1: Asset Criticality Assessment ("What am I protecting?")

Begin by inventorying and classifying your "crown jewels"—the systems, data, and processes most vital to your operations. This addresses the common pain point where "execs store docs in all kinds of places like their own Dropbox" by helping you focus protection efforts on what truly matters.

Action steps:

  1. Create an asset inventory with business impact ratings
  2. Identify dependencies between systems
  3. Categorize assets by criticality (Critical, High, Medium, Low)

Pillar 2: Threat Modeling ("What am I protecting it from?")

Not all threats are equally likely or relevant to your organization. Threat modeling helps you focus on the most probable attack vectors targeting your critical assets.

Action steps:

  1. Leverage threat intelligence like CISA's Known Exploited Vulnerabilities (KEV) catalog
  2. Assess which threat actors are most likely to target your industry
  3. Review your IDP/IPS logs to identify actual attack patterns

Pillar 3: Regulatory & Compliance Requirements ("What are my non-negotiables?")

While compliance isn't security, it creates a baseline of mandatory controls that cannot be cut. Understanding your obligations under frameworks like GDPR, PCI DSS, or NIST helps establish your security floor.

Action steps:

  1. Inventory all applicable regulatory requirements
  2. Work with your cyber insurance provider to understand their requirements
  3. Identify the minimum viable security posture needed for compliance

The Decision Matrix: Your Tool for Objective Prioritization

To move beyond gut feelings and make data-driven decisions, you need a systematic approach to evaluating security initiatives. A decision matrix provides this structure by weighing multiple factors to produce an objective priority score.

Here's how to create and use your security decision matrix:

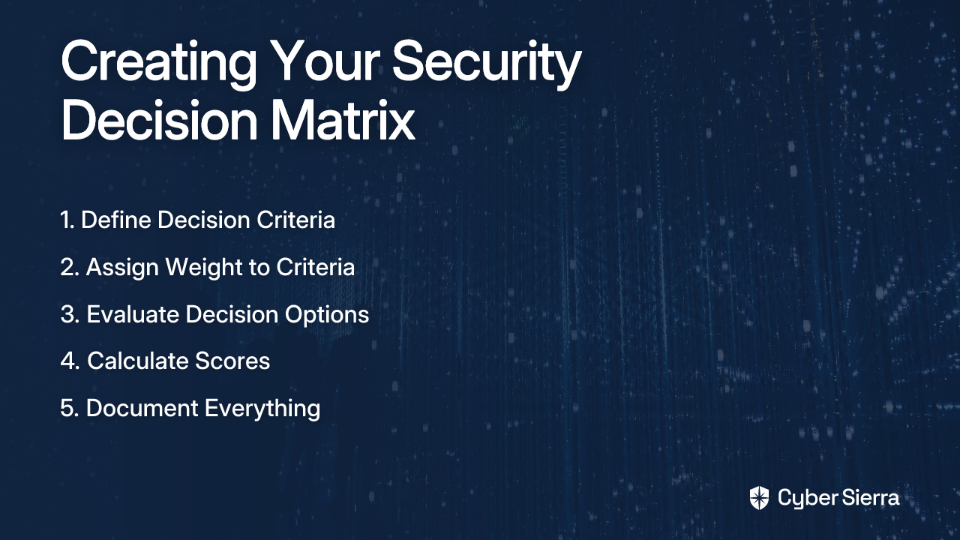
  1. Define Decision Criteria: Identify what matters for the decision. Common criteria include:
    • Business Impact (if the risk materializes)
    • Threat Likelihood
    • Implementation Cost
    • Resource Requirements (FTEs)
    • Compliance Alignment
    • Time to Implement
  2. Assign Weight to Criteria: Score the importance of each criterion on a scale of 1-5. For example:
    • Compliance might be a 5 (critical)
    • User convenience might be a 2 (important but not decisive)
  3. Evaluate Decision Options: Rate each security initiative against each criterion on a scale of 1-10.
  4. Calculate Scores: For each initiative, multiply its score for a criterion by that criterion's weight, then sum the results for a final priority score.
  5. Document Everything: The highest scores indicate your top priorities, but crucially, document the entire matrix and your rationale in your risk register.

Triage in Action: Applying the Decision Matrix to Common Initiatives

Let's look at how this framework applies to real-world security dilemmas:

Example 1: Prioritizing OWASP Top 10 Fixes

When facing multiple application vulnerabilities from the OWASP Top 10, use your decision matrix to determine which to address first:

Criteria (Weight)Fix A01-Broken Access Control on App XFix A03-Injection on App Y
Asset Criticality (5)Customer Data App (9) × 5 = 45Internal Tool (5) × 5 = 25
Exploitability (4)On CISA KEV (8) × 4 = 32Medium (6) × 4 = 24
Potential Impact (4)Data Breach (9) × 4 = 36Limited Access (5) × 4 = 20
Remediation Complexity (3)Complex (3) × 3 = 9Simple (8) × 3 = 24
TOTAL SCORE12293

In this scenario, fixing the Broken Access Control vulnerability should be prioritized despite being more complex to remediate.

Example 2: Scoping an MFA Implementation

When resources are limited, you may need to choose between comprehensive or targeted MFA deployment:

Criteria (Weight)MFA for All EmployeesMFA for Privileged Accounts Only
Risk Reduction (5)High (9) × 5 = 45Medium (7) × 5 = 35
Compliance Mandate (4)Exceeds Requirements (8) × 4 = 32Meets Requirements (6) × 4 = 24
Implementation Cost (3)High (3) × 3 = 9Low (8) × 3 = 24
Business Friction (3)High (2) × 3 = 6Low (8) × 3 = 24
TOTAL SCORE92107

The targeted approach scores higher because it balances risk reduction with practical resource constraints and minimizes business disruption—a critical consideration for any security initiative.

Example 3: SIEM vs. EDR Investment

When choosing between enhancing your SIEM or investing in a new EDR solution:

Criteria (Weight)Upgrade Existing SIEMDeploy New EDR Solution
Threat Detection (5)Medium (6) × 5 = 30High (9) × 5 = 45
Analyst Overhead (4)High (3) × 4 = 12Medium (6) × 4 = 24
Integration Complexity (3)Low (8) × 3 = 24Medium (5) × 3 = 15
Cost (4)Medium (6) × 4 = 24High (4) × 4 = 16
TOTAL SCORE90100

In this case, the EDR solution emerges as the priority despite higher costs, primarily due to its superior threat detection capabilities—highlighting how this framework helps you make nuanced trade-offs.

Communicating Your Decisions: From Technical Risks to Business Trade-Offs

Even the most rigorous prioritization process will fail if you can't effectively communicate your decisions to stakeholders. Security professionals must translate technical concerns into business language.

Speak the Language of Business with Outcome-Driven Metrics

Transform your technical requests into measurable business protections:

Instead of: "We need $200k for a new vulnerability scanner."

Try: "Our current patching cadence is 90 days. For $200k, we can implement tooling to achieve a 30-day patching cadence, reducing our window of exposure to critical threats by 66%."

This approach ties security investments directly to business KPIs that executives understand and value.

The Risk Register: Your Professional Shield

The risk register is your crucial "CYA" tool—a formal log of identified risks, their potential impact, the planned response (mitigate, accept, transfer, avoid), the risk owner, and current status.

For any security initiative you're forced to deprioritize, document the associated risk in the register and have it formally accepted by executive management. This fulfills the recommendation to "implement a risk acceptance form that executive management signs off on."

A well-maintained risk register serves multiple purposes:

  • Creates transparency about security trade-offs
  • Establishes accountability for accepted risks
  • Provides a historical record of decision-making
  • Protects you professionally when "things slip through the cracks"

The Inevitable Reality: Managing What Slips Through the Cracks

The hardest part of security triage isn't the technical assessment—it's accepting that you can't do everything. As one professional noted, "some things are naturally going to slip through the cracks, it's human nature."

The key difference: A documented, de-prioritized risk isn't a "crack" you missed; it's a calculated business decision. Your triage framework and signed risk register transform what might look like security negligence into structured risk management.

This approach also informs your incident response strategy. The risks you've chosen to accept are precisely the ones you need robust detection and response plans for. Your SIEM and EDR solutions should be configured to provide maximum visibility into these accepted risk areas.

From Firefighter to Strategist

In our resource-constrained reality, effective cybersecurity isn't about eliminating all risk—it's about managing it intelligently. By implementing a structured triage approach:

  1. Assess your critical assets, threats, and obligations using the three pillars framework
  2. Prioritize objectively using a decision matrix based on risk = likelihood × impact
  3. Communicate decisions using business-focused metrics and outcomes
  4. Document everything in your risk register with executive sign-off

This methodology transforms your role from a perpetually stressed firefighter to a strategic business partner. You'll protect your organization while also managing your professional risk and sanity in an environment where demand always exceeds supply.

Remember: Security triage isn't about being perfect—it's about being deliberate. In a world where we can't do everything, we must focus relentlessly on doing what matters most.

By leveraging frameworks like NIST and CIS, implementing DevSecOps principles, and adopting SRE approaches to security automation, you can create a resilient security posture even with limited resources. The goal isn't to implement every possible security control but to establish a defensible framework for deciding which controls provide the most protection for your investment.

Whether you're working with enterprise-grade tools like Microsoft E5 security suite or building with FOSS alternatives, the principles of security triage remain the same: understand your assets, assess your threats, document your decisions, and focus your limited resources where they'll have the greatest impact.

Frequently Asked Questions

What is security triage in cybersecurity?

Security triage in cybersecurity is the process of prioritizing security tasks, vulnerabilities, and initiatives based on their risk level, which is determined by factors like asset criticality, threat likelihood, and potential business impact. It's a strategic shift from trying to address every single alert to focusing limited resources on the threats that pose the greatest danger to the organization's most vital assets. This approach helps security teams manage alert fatigue and make defensible, data-driven decisions.

Why is a risk-based approach to security important?

A risk-based approach is important because it allows organizations to allocate their limited security resources—time, budget, and personnel—to the areas that pose the most significant threat to the business. Instead of treating all vulnerabilities equally, this approach uses the formula Risk = Likelihood × Impact to focus on what matters most. It transforms security from a technical cost center into a strategic function that protects business value.

How can I start building a security triage process?

You can start building a security triage process by focusing on three foundational pillars: identifying and classifying your critical assets, modeling the most relevant threats to your organization, and understanding your mandatory compliance requirements. Begin by creating an asset inventory to know what you're protecting. Then, use threat intelligence to understand your adversaries. Finally, map out your regulatory obligations. These three inputs provide the context to start making informed prioritization decisions.

What is a security decision matrix and what should it include?

A security decision matrix is a tool used to objectively score and prioritize security initiatives based on a set of weighted criteria. Key criteria often include the business impact if a risk materializes, the likelihood of a threat, implementation cost and complexity, and alignment with compliance mandates. By assigning a weight to each criterion and scoring each initiative against them, you can generate a numerical score that provides a clear, data-driven basis for prioritization.

How does a risk register protect security professionals?

A risk register protects security professionals by creating a formal, documented record of all identified risks and the executive-level decisions made about them. When an initiative is de-prioritized due to resource constraints, the associated risk is logged in the register with a rationale and an executive sign-off accepting that risk. This transforms a potential "oversight" into a documented, calculated business decision, providing professional accountability and a defensible record of your team's strategic choices.

Does security triage mean we stop trying to fix everything?

Yes, security triage intentionally moves away from the impossible goal of fixing everything and instead focuses on systematically addressing the most critical risks first. It's not about ignoring problems, but about making conscious, defensible decisions on what to prioritize when you can't do it all. The risks that are de-prioritized are formally accepted and often become key areas for enhanced monitoring and incident response planning.

blog-hero-background-image
Cyber Security

The Sysadmin's Guide to Fixing Admin Rights Requirements in Legacy Software

backdrop
Table of Contents

Join thousands of professionals and get the latest insight on Compliance & Cybersecurity.


You've been there before. A critical business application demands local administrator rights to run properly, your security policy explicitly forbids granting those rights, and somehow it's become your problem to solve. The vendor shrugs and says, "That's just how it works," while management insists this legacy software is essential for operations. You're caught in the middle, stuck between security requirements and business needs, with that UAC prompt mocking your existence.

This isn't just an annoyance—it's a serious security vulnerability waiting to be exploited. Every application running with admin privileges has the keys to your entire system, creating an unnecessarily large attack surface.

"But we've always given the accounting department admin rights for their tax software!" is not a valid security posture in today's threat landscape.

The good news? You don't have to choose between security and functionality. This guide will walk you through practical, technical solutions to diagnose exactly why that legacy application demands elevated privileges and how to fix the underlying issues without compromising your security stance.

Why Do Legacy Apps Demand the Keys to the Kingdom?

Most applications requiring admin rights weren't designed with modern security practices in mind. They were built in an era when User Account Control (UAC) didn't exist and everyone routinely logged in with full administrator access.

The most common reasons legacy applications demand elevated privileges include:

  1. Writing to protected locations: The application attempts to write configuration files, logs, or data directly to C:\Program Files or other system directories that standard users can't modify.
  2. Registry access issues: The application tries to write settings to HKEY_LOCAL_MACHINE (HKLM) instead of HKEY_CURRENT_USER (HKCU).
  3. System-level operations: The app needs to install drivers, modify system settings, or perform other high-privilege tasks.
  4. Poor manifest design: The application's manifest incorrectly specifies that it needs administrator privileges, even if its functionality doesn't actually require them.

As one frustrated sysadmin on Reddit put it: "Requiring unnecessary user privileges complicates installations" and creates ongoing management headaches.

Rather than throwing your hands up and granting admin rights, let's get to the root of the problem with some powerful diagnostic tools.

The Diagnostic Toolkit - Pinpointing the Problem with Procmon

Process Monitor (Procmon) is your best friend for diagnosing admin rights requirements. This free Microsoft Sysinternals tool shows real-time file system, Registry, and process activity, helping you identify exactly what's triggering those permission errors.

Here's how to use it effectively:

Step 1: Set Up Your Test Environment

  1. Install Procmon on a test machine (not production).
  2. Log in as a standard user (not an administrator).
  3. Launch Procmon with administrator rights (yes, the irony isn't lost on us).

Step 2: Configure Filters for Clarity

The raw output from Procmon is overwhelming and mostly irrelevant to our task. Apply these filters to see only the important stuff:

  1. Click Filter → Filter... (or press Ctrl+L).
  2. Add these filters:
    • Process Name is [YourLegacyApp.exe] → Include
    • Result is ACCESS DENIED → Include
    • Click "Add" after each filter, then "Apply"

This dramatically reduces the noise, showing only the operations where your application was denied access.

Step 3: Reproduce the Problem

  1. Start the Procmon capture (File → Capture Events, or press Ctrl+E).
  2. Launch your legacy application and perform the action that fails or triggers the UAC prompt.
  3. Once the error occurs, stop the capture (File → Capture Events again, or Ctrl+E).

Step 4: Analyze the Results

The filtered results will show exactly what resources the application tried to access and failed. Common patterns include:

  • Access denied when writing to C:\Program Files\YourApp\config.ini
  • Access denied when creating registry keys in HKLM\SOFTWARE\YourVendor
  • "FILE LOCKED WITH ONLY READERS" or "NAME NOT FOUND" errors

In a Spiceworks Community thread, sysadmins report that these permission issues often have simple patterns that can be addressed once identified.

Make detailed notes of these locations—they're the specific targets we need to fix, rather than granting blanket admin rights to the entire application.

The Scalpel Approach - Fixing Permissions with Group Policy

Now that we know exactly which resources the application needs access to, we can apply the principle of least privilege by granting permissions only to those specific locations.

Group Policy is the ideal tool for this in a domain environment because it allows for centralized management and consistent application across multiple machines.

Creating a Targeted Group Policy Object (GPO)

  1. Open Group Policy Management Console (GPMC).
  2. Create a new GPO named something descriptive like "APP - LegacyFinance Permissions".
  3. Link this GPO to the OU containing the computers that need to run the application.
  4. Right-click the new GPO and select "Edit".

Fixing File and Folder Permissions

To grant permissions to protected file system locations:

  1. Navigate to: Computer Configuration > Policies > Windows Settings > Security Settings > File System
  2. Right-click and choose "Add File..." or "Add Folder..."
  3. Browse to the file or folder identified by Procmon (e.g., C:\Program Files\LegacyApp)
  4. Click "Define this policy setting"
  5. Click "Add..." to add the user group that needs access (typically "Authenticated Users")
  6. Grant the minimum necessary permissions (usually "Modify" is sufficient)
  7. Click "OK" to save

As detailed in the DeployHappiness guide, this granular approach maintains security while enabling functionality.

Fixing Registry Permissions

Similarly, for registry access:

  1. Navigate to: Computer Configuration > Policies > Windows Settings > Security Settings > Registry
  2. Right-click and select "Add Key..."
  3. Select the registry key identified by Procmon (e.g., MACHINE\SOFTWARE\YourVendor)
  4. Click "Define this policy setting"
  5. Click "Add..." to add the appropriate user group
  6. Grant the minimum permissions needed (usually "Full Control")
  7. Click "OK" to save

Testing Your Fix

After applying the GPO, verify the fix by:

  1. Logging in as a standard user on a test machine
  2. Running gpupdate /force to apply the policy immediately
  3. Launching the application and testing the functionality that previously failed

If everything works correctly, you've successfully fixed the problem without compromising security. High five!

The Last Resort - Bypassing UAC with Application Shims

Sometimes, despite your best efforts with permissions, an application still demands admin rights due to how it's coded or its manifest requirements. When all else fails, application compatibility shims can be your salvation.

A shim is a small piece of code that intercepts API calls from an application to the operating system. For our purposes, we can use the RunAsInvoker shim, which tells Windows to run an application with the privilege level of the user who launched it, effectively bypassing the UAC prompt.

When to Use Shims

Shims should be your last resort because:

  • They don't fix the underlying issue
  • They might break if the application is updated
  • They need to be deployed and maintained on each client machine

That said, when dealing with a vendor who won't update their software and you're out of other options, shims can save the day.

Creating a Compatibility Shim

To create a shim using the Application Compatibility Toolkit (ACT):

  1. Install the ACT: Download and install the Microsoft Application Compatibility Toolkit, which is part of the Windows Assessment and Deployment Kit (ADK).
  2. Create a Shim Database:
    • Open the Compatibility Administrator tool (32-bit or 64-bit, depending on your app)
    • Right-click on "Custom Databases" and select "Create New → Application Fix..."
    • Enter the application name, vendor, and browse to the executable file
    • In the Compatibility Modes screen, check "RunAsInvoker"
    • Click Next through the remaining prompts
    • Click Finish to create the fix
  3. Save and Test the Shim:
    • Save the database with a descriptive name (e.g., LegacyAppFix.sdb)
    • Test the shim on a single machine by installing it with: sdbinst.exe -q YourShimFile.sdb
    • Verify the application works without admin privileges
  4. Deploy the Shim: Once tested, deploy the shim to all required machines using your preferred deployment method (SCCM, Group Policy, etc.).

As detailed by Alberto Morales, this technique has saved countless sysadmins from security compromises while maintaining application functionality.

Important Caveats with Shims

  • The shim must be installed after the application is installed
  • If the application is updated, you may need to recreate and redeploy the shim
  • Not all applications work with shims; thorough testing is essential
  • Unlike the permissions approach, shims don't actually fix the underlying security issues

Alternative Strategies and Long-Term Solutions

While Procmon and shims are powerful tools, there are other approaches worth considering:

LUA Buglight

LUA Buglight is a Microsoft tool specifically designed to identify and fix admin privilege issues. It can sometimes spot problems that Procmon misses, particularly with COM object instantiation and registration.

Application Virtualization

Tools like Microsoft App-V or VMware ThinApp can package applications in isolated virtual environments, allowing them to operate as if they had admin rights without actually granting those rights to the underlying OS. This approach works well for applications that need to write to protected locations.

Endpoint Privilege Management (EPM)

Commercial EPM products like BeyondTrust, CyberArk, or Thycotic provide more sophisticated solutions for managing application privileges. These tools can elevate privileges for specific applications without giving users admin rights, while also providing detailed auditing and control.

Engaging with Vendors

The most sustainable long-term solution is to push software vendors to fix their applications. Armed with your Procmon findings, you can provide vendors with specific issues to address rather than vague complaints.

As noted in user discussions, requiring unnecessary privileges should be considered a "red flag" for software products. Let vendors know that their poor security practices make their software less competitive and more difficult to deploy in modern, security-conscious environments.

Conclusion: Balancing Security and Functionality

The struggle between security requirements and legacy software needs is one of the most common headaches for sysadmins. By using the tools and techniques outlined in this guide, you can:

  1. Identify the specific permission issues causing admin rights requirements
  2. Apply targeted fixes using Group Policy or direct permission changes
  3. Use compatibility shims as a last resort when other methods fail
  4. Advocate for better software design with evidence-based vendor feedback

Remember that the principle of least privilege should guide all your decisions. Every permission granted should be the minimum necessary for functionality, no more. With careful analysis and targeted fixes, you can maintain a secure environment without sacrificing the legacy applications your organization depends on.

Your users get their applications, management gets their security compliance, and you get to sleep at night knowing you haven't compromised your network's integrity. That's a win-win-win scenario in the typically no-win world of IT security.

Frequently Asked Questions

Why do old applications often require administrator rights?

Old applications often require administrator rights because they were built before modern security standards, like User Account Control (UAC), were common. They frequently attempt to write files to protected system locations (like C:\Program Files) or modify system-wide registry keys (in HKEY_LOCAL_MACHINE), actions that are restricted for standard users.

How can I find out the specific reason an application needs admin rights?

The most effective way to find the specific reason is by using Microsoft's Process Monitor (Procmon) tool. By running the application as a standard user and filtering Procmon's output to show "ACCESS DENIED" results for that application's process, you can pinpoint the exact files, folders, or registry keys it is failing to access.

What is the best way to fix application permission issues without granting admin rights?

The best and most secure method is to use Group Policy (in a domain environment) to grant the application's user group the minimum necessary permissions to the specific files, folders, or registry keys it needs. This follows the principle of least privilege, resolving the issue without creating a broad security risk. For standalone machines, you can adjust permissions directly on the file system or registry.

When should I use an application compatibility shim?

You should only use an application compatibility shim, like RunAsInvoker, as a last resort. This option is for when an application still demands elevation even after you've fixed all underlying file and registry permission issues, often due to how the application's manifest is coded. Shims bypass the UAC prompt but don't fix the root cause.

Is it safe to bypass UAC with shims like RunAsInvoker?

Bypassing UAC with a shim is a calculated risk and is less secure than fixing the underlying permissions. While the RunAsInvoker shim makes the application run with the standard user's permissions, it doesn't solve the core problem and can have unintended side effects. It should only be used when you cannot modify permissions and the vendor will not provide a fix.

What should I do if my application still doesn't work after fixing permissions?

If fixing permissions doesn't work, the issue might be more complex, such as problems with COM object instantiation or incorrect application manifests. In this case, you can try alternative diagnostic tools like LUA Buglight or consider using an application compatibility shim. For a more robust, long-term solution, look into application virtualization or Endpoint Privilege Management (EPM) tools.

blog-hero-background-image
Cyber Security

AWS Config vs Security Hub vs Audit Manager: Which Compliance Tool Wins?

backdrop
Table of Contents

Join thousands of professionals and get the latest insight on Compliance & Cybersecurity.


You've set up your AWS environment and now you're facing the daunting task of ensuring everything stays compliant with security standards and regulations. You open the AWS console and find yourself staring at multiple options: AWS Config, Security Hub, and Audit Manager. Each promises to help with compliance, but which one should you use? Are they redundant, complementary, or completely different?

"I want to see alerts on my dashboard if any resource is non-compliant," you think to yourself. "How can I generate a report or parse all resources against a policy? And is there an option for creating a downloadable report?"

If these questions sound familiar, you're not alone. AWS users frequently express confusion about which compliance tool best suits their needs, especially when considering the additional costs these services might add to their AWS bill.

This guide will clear the confusion by breaking down each service's unique purpose, how they work together, and which one wins for your specific compliance needs.

Setting the Stage: The AWS Shared Responsibility Model

Before diving into the tools, let's establish an important foundation. AWS operates under a Shared Responsibility Model, which means AWS is responsible for the security of the cloud (physical infrastructure, host OS), while you're responsible for security in the cloud (guest OS, applications, data, and configurations).

With AWS supporting 143 security standards and compliance certifications like PCI-DSS, HIPAA, and GDPR, native tooling is essential to help you uphold your end of this shared model.

AWS Config: The Foundational Configuration Detective

What It Is

AWS Config provides a detailed inventory of your AWS resources, tracks their configurations, and records how they change over time. It answers the critical questions: "What does my AWS environment look like?" and "How has it changed?"

Core Features

  1. Configuration History & Snapshots: AWS Config maintains a detailed history of configuration changes, tracking who made what changes and when. This provides the historical context often needed during audits or troubleshooting.
  2. AWS Config Rules: Use managed or custom rules to evaluate whether your resource configurations comply with your policies. This directly addresses the need for alerts "if Encryption is not enabled on some RDS instance" that many users seek.
  3. Conformance Packs: Collections of AWS Config rules and remediation actions that can be deployed as a single entity across an organization. These packs help establish a compliance baseline.
  4. Automated Remediation: Can automatically fix non-compliant resources using AWS Systems Manager Automation documents.

Best For

AWS Config excels at:

  • Resource administration and gaining visibility into configurations
  • Auditing and compliance by providing historical configuration data
  • Security analysis by enabling review of IAM policies or security group configurations over time

Limitations

While powerful, AWS Config has some notable limitations:

  • It's primarily a resource configuration tracker, not a comprehensive security solution
  • It can add significant costs to your AWS bill as it's priced based on the number of configuration items recorded and rule evaluations
  • It doesn't provide a centralized threat-level view of your environment

AWS Security Hub: The Centralized Security Command Center

What It Is

Security Hub is a cloud security posture management (CSPM) service that centralizes and prioritizes security findings from various AWS services (like Amazon GuardDuty, AWS Inspector, and AWS Config) and third-party products. It's your security command center.

Core Features

  1. Aggregated Findings: Acts as a "single pane of glass" for security alerts, reducing alert fatigue by bringing all security findings into one place.
  2. Security Standards: Continuously checks your environment against security standards like the CIS AWS Foundations Benchmark and PCI DSS. This is crucial for users wanting to monitor against specific standards.
  3. Prioritization and Insights: Uses insights to help you prioritize which findings to address first, providing a clear dashboard view of your security posture.

How It Works with Config

This is a critical point that often causes confusion: Security Hub uses AWS Config rules to perform many of its security checks. You need Config enabled for Security Hub to function fully. Security Hub leverages Config for additional context on resource configurations, enhancing its security assessments, as described by users familiar with both services.

Best For

Security Hub is ideal for:

  • Answering the question: "What is my overall security posture across all my accounts right now?"
  • Creating the "compliance dashboard" many users desire
  • Prioritizing security issues at scale in a multi-account environment

Limitations

Despite its strengths, Security Hub has drawbacks:

  • Users report frustration with "[getting] everything including things you don't need in Security Hub" and false positives like "log metric filters are failing even though I see them" as mentioned in user discussions
  • It's primarily a dashboard, not a formal audit report generator, which is important for users asking: "Do you know if there is an option for creating a downloadable report with Config or Security Hub?"

AWS Audit Manager: The Automated Audit & Evidence Collector

What It Is

AWS Audit Manager helps you continuously audit your AWS usage to simplify how you assess risk and compliance with regulations and industry standards. Its primary job is to automate evidence collection for formal audits.

Core Features

  1. Automated Evidence Collection: Moves you from manual, time-consuming audit preparation to an automated process. It collects and organizes evidence from sources like CloudTrail logs, AWS Config, and Security Hub findings.
  2. Prebuilt Frameworks: This is perhaps its most valuable feature. Audit Manager offers frameworks that map your AWS resources to the requirements of standards like SOC 2, ISO 27001, PCI DSS, and HIPAA. This directly answers the user need: "I want to check if we are always compliant with ISO 27001 and SOC 2 standards."
  3. Audit-Ready Reports: Generates assessment reports that provide evidence tied to each control, ready to be shared with auditors. This is the definitive answer to users asking for "downloadable reports."

Best For

Audit Manager excels at:

  • Answering the question: "How can I prove to an auditor that I am compliant?"
  • Serving organizations that undergo regular, formal audits and need to reduce the manual effort of evidence collection
  • Providing the documentation needed to satisfy external auditors

Feature-by-Feature Comparison: At-a-Glance Decision Guide

FeatureAWS ConfigAWS Security HubAWS Audit Manager
Primary JobRecords resource configuration and changes.Aggregates and prioritizes security findings.Automates evidence collection for audits.
Core Question"What changed in my environment?""What is my current security posture?""Am I ready for my audit?"
Key OutputConfiguration history, compliance status of rules.A prioritized dashboard of security findings (a CSPM).Audit-ready reports with organized evidence.
ReportingView history in console, advanced queries.Centralized dashboard, basic CSV exports of findings.Generates detailed, downloadable assessment reports.
Ideal UserDevOps, Cloud Engineers, Security Analysts.CISO, Security Operations (SecOps), Compliance Teams.Compliance Managers, Internal/External Auditors, GRC Teams.
Works Best ForTroubleshooting, change management, basic compliance.Continuous monitoring, threat prioritization.Preparing for formal audits (SOC 2, ISO 27001, etc.).

Building a Winning Strategy: Using the Tools Together

The most important insight about these tools is that it's not "Config vs. Security Hub vs. Audit Manager" — it's about how they work together. The real power comes from using them as complementary layers in your compliance strategy.

A Layered Approach

Layer 1: The Foundation (AWS Config) Always start here. Enable AWS Config to record all resource configurations. This is the ground truth data that both Security Hub and Audit Manager rely on.

Layer 2: The Command Center (AWS Security Hub) Enable Security Hub and point it to Config. It will consume the Config data, run checks against standards like the CIS benchmark, and give you a real-time dashboard. This solves the need for daily monitoring and alerting.

Layer 3: The Auditor's Ally (AWS Audit Manager) When an audit is on the horizon, create an assessment in Audit Manager for the relevant framework (e.g., SOC 2). It will automatically pull evidence from Config, Security Hub, CloudTrail, and other services to build your audit report.

But Is It Worth the Cost?

A common question users ask is: "Does this truly offset the additional cost of using Audit Manager on top of the other services?"

The answer depends on your compliance burden. If your team spends weeks or months manually gathering screenshots, logs, and configuration details for an audit, then Audit Manager's automation will likely provide significant ROI through saved engineering hours and reduced audit fatigue.

For organizations with lighter compliance requirements, you might start with just Config and Security Hub, adding Audit Manager only when you face a formal audit.

Conclusion: The Right Tool for the Right Job

So which compliance tool wins? The answer depends on what you're trying to accomplish:

  • AWS Config wins for detailed configuration history and change tracking. It's your environment's indispensable flight recorder.
  • AWS Security Hub wins for real-time security posture management and creating a centralized dashboard for daily monitoring. It's your security command center.
  • AWS Audit Manager wins for automated evidence collection and generating audit-ready reports. It's your automated compliance officer.

The ultimate winner is a comprehensive strategy that layers these services. Start with Config as your foundation, add Security Hub for ongoing monitoring, and deploy Audit Manager when you need to prove compliance to a third party.

By understanding the unique strengths of each tool and how they work together, you can build a compliance strategy that not only meets regulatory requirements but actually enhances your overall security posture in AWS.

Frequently Asked Questions

What is the main difference between AWS Config, Security Hub, and Audit Manager?

The main difference lies in their primary job: AWS Config tracks resource configuration changes, AWS Security Hub provides a centralized view of your security posture, and AWS Audit Manager automates evidence collection for formal audits. Think of Config as the recorder, Security Hub as the dashboard, and Audit Manager as the report generator for auditors.

Do I need AWS Config if I am using AWS Security Hub?

Yes, you need AWS Config enabled for AWS Security Hub to function fully. Security Hub relies on AWS Config rules to perform many of its foundational security checks and gather configuration details about your resources. Without Config, Security Hub cannot provide a complete picture of your security and compliance posture.

Which AWS tool is best for creating compliance reports?

It depends on the audience for the report. AWS Audit Manager is best for generating formal, audit-ready reports for external auditors and compliance bodies (like for SOC 2 or ISO 27001). For internal, high-level dashboards on your current security posture to share with management or security teams, AWS Security Hub is the better choice.

How do these services help with automated remediation of non-compliant resources?

AWS Config is the primary service for automated remediation. You can configure it to trigger remediation actions, often using AWS Systems Manager Automation documents, to automatically fix non-compliant resources when a rule is triggered. While Security Hub can initiate automated responses to findings, the remediation logic itself is typically built on services like AWS Config and AWS Lambda. Audit Manager focuses on evidence collection, not direct remediation.

What is the best way to start with AWS compliance tools?

The best way to start is with a layered approach. First, enable AWS Config to create a foundational inventory and history of all your resources. This is the ground truth data. Second, enable AWS Security Hub to get a centralized dashboard and continuous monitoring of your security posture. Finally, use AWS Audit Manager when you need to prepare for a specific, formal audit.

Are AWS Config, Security Hub, and Audit Manager expensive?

The cost of these services depends entirely on your usage and the scale of your AWS environment. AWS Config is priced based on the number of configuration items recorded and rule evaluations. Security Hub pricing is based on the number of findings ingested and security checks performed. Audit Manager is priced based on the number of resource assessments. While they add to your bill, their value often comes from the significant reduction in manual effort, time saved during audits, and improved security, which can provide a strong return on investment.

blog-hero-background-image
Cyber Security

The GitOps Solution: Automating K8s Deployments with ArgoCD and Helm

backdrop
Table of Contents

Join thousands of professionals and get the latest insight on Compliance & Cybersecurity.


You've become your team's "Kubernetes person" almost by accident. What started as curiosity has turned into full responsibility for your organization's K8s infrastructure. Now you're drowning in YAML files, fielding urgent Slack messages about deployment issues, and nervously checking your phone during vacations because "if this goes down while I'm away, the team is completely screwed."

Sound familiar? You're not alone. Across Reddit and tech forums, the sentiment echoes: "I'm the only person on my team that seems to understand how it works. As a result, I'm expected to do everything."

This article introduces a better way forward: GitOps with ArgoCD and Helm. This approach doesn't just solve technical challenges—it addresses the human ones too, transforming you from an overwhelmed bottleneck into an empowered platform enabler.

What is GitOps? (And Why You Need It)

GitOps is a set of practices for managing infrastructure and application configurations using Git as the single source of truth. According to Red Hat, GitOps builds upon these core principles:

  1. Declarative Configuration: Your entire system is described as code, specifying the desired state rather than the steps to achieve it.
  2. Version Controlled: All configurations live in Git, providing complete history, rollback capabilities, and collaboration tools.
  3. Automated and Self-Healing: An operator (like ArgoCD) continuously monitors the actual state and reconciles it with the desired state defined in Git.

These principles translate into tangible benefits that directly address the "sole K8s expert" pain points:

  • Standardized Workflow & Reduced Toil: Developers can self-serve by submitting pull requests, freeing you from manual deployments.
  • Enhanced Security & Auditability: Every change is a logged Git commit, creating a comprehensive audit trail.
  • Improved Reliability & Easy Rollback: When something goes wrong, reverting to a previous known-good state is as simple as reverting a commit.
  • Consistency Across Environments: Your development, staging, and production environments stay in sync through the same configuration files.

In essence, GitOps transforms the "you need to deploy this now" emergency into a structured, reviewable pull request that empowers the entire team.

The Tools of the Trade: ArgoCD and Helm

To implement GitOps effectively in a Kubernetes environment, you'll need two key tools:

Helm: The Kubernetes Package Manager

Helm serves as the package manager for Kubernetes, simplifying the deployment of complex applications through:

  • Charts: Reusable packages containing all the resources needed to deploy an application
  • Values Files: YAML files that allow you to customize chart parameters without modifying the chart itself
  • Templates: Parameterized Kubernetes manifests that generate the final resources

Helm brings the familiarity of package managers like apt or npm to Kubernetes, making it easier to share and reuse configurations.

ArgoCD: The GitOps Continuous Delivery Tool

ArgoCD is the engine that powers the GitOps workflow by:

  • Continuously monitoring both your Git repositories and your Kubernetes clusters
  • Automatically detecting when they drift out of sync
  • Applying changes to bring the actual state in line with the desired state

ArgoCD's key features include:

  • Automated Synchronization: Changes pushed to Git automatically deploy to your cluster
  • Self-Healing Capabilities: Reverts unauthorized manual changes to maintain the desired state
  • Web UI for Visibility: Provides a dashboard showing sync status and deployment history
  • Support for Multiple Templating Tools: Works with Helm, Kustomize, and Jsonnet

How-To: Practical Patterns for Deploying Helm Charts with ArgoCD

Let's get practical and explore how to set up GitOps with ArgoCD and Helm. At the core of this setup is the ArgoCD Application manifest—a Kubernetes custom resource that defines what to deploy and where.

Here's a basic example:

apiVersion: argoproj.io/v1alpha1
kind: Application
metadata:
  name: sealed-secrets
  namespace: argocd
spec:
  project: default
  source:
    chart: sealed-secrets
    repoURL: https://bitnami-labs.github.io/sealed-secrets
    targetRevision: 1.16.1
    helm:
      releaseName: sealed-secrets
  destination:
    server: "https://kubernetes.default.svc"
    namespace: kubeseal

This simple YAML file tells ArgoCD to deploy the sealed-secrets Helm chart from the Bitnami repository to your cluster. Let's explore the three main patterns for deploying Helm charts with ArgoCD, as identified by Red Hat Developers.

Pattern 1: Pointing to a Helm Chart in a Helm Repository

This is the simplest approach, as shown in the example above. The ArgoCD Application points directly to a chart in a Helm repository.

Advantages:

  • Extremely simple to set up
  • Great for beginners
  • ArgoCD UI auto-populates default parameters

Disadvantages:

  • Difficult to troubleshoot locally with helm template
  • Customization is limited by the chart's design

Best For: Deploying well-maintained third-party charts with minimal configuration changes, like Prometheus or Nginx Ingress.

Pattern 2: Pointing to a Helm Chart in a Git Repository

In this pattern, you store the Helm chart in your Git repository, and ArgoCD points to it:

apiVersion: argoproj.io/v1alpha1
kind: Application
metadata:
  name: my-app
  namespace: argocd
spec:
  project: default
  source:
    repoURL: https://github.com/your-org/your-repo.git
    path: charts/my-app
    targetRevision: HEAD
    helm:
      releaseName: my-app
  destination:
    server: "https://kubernetes.default.svc"
    namespace: my-app

Advantages:

  • Full version control over the chart itself
  • Enables local testing with helm template and helm lint
  • Simplifies managing chart lifecycles

Disadvantages:

  • Can clutter the repository with Helm-specific files
  • Requires more Git operations for chart updates

Best For: Custom-developed applications or when you need to heavily customize a third-party chart.

Pattern 3: Using Kustomize to Render a Helm Chart

This advanced pattern combines Kustomize and Helm. The ArgoCD Application points to a directory with a kustomization.yaml file, which in turn specifies the Helm chart details:

apiVersion: argoproj.io/v1alpha1
kind: Application
metadata:
  name: my-app
  namespace: argocd
spec:
  project: default
  source:
    repoURL: https://github.com/your-org/your-repo.git
    path: kustomize/my-app
    targetRevision: HEAD
  destination:
    server: "https://kubernetes.default.svc"
    namespace: my-app

With a corresponding kustomization.yaml:

apiVersion: kustomize.config.k8s.io/v1beta1
kind: Kustomization
helmCharts:
- name: redis
  repo: https://charts.bitnami.com/bitnami
  version: 17.3.14
  releaseName: redis
  namespace: redis

Advantages:

  • Unlocks Kustomize's powerful patching capabilities
  • Maintains consistency in a Kustomize-centric environment
  • Allows for post-rendering modifications

Disadvantages:

  • Adds complexity for troubleshooting
  • Requires enabling the --enable-helm flag in ArgoCD

Best For: Teams already invested in Kustomize who need to patch objects generated by Helm charts.

Advanced Configuration and Best Practices

Mastering Helm Values in ArgoCD

ArgoCD offers several methods for passing configuration values to Helm charts, with a strict precedence order:

  1. parameters via argocd app set (highest priority)
  2. valuesObject key in the spec.source.helm block
  3. values key (a multi-line string) in the spec.source.helm block
  4. valueFiles list in the spec.source.helm block
  5. The chart's default values.yaml file (lowest priority)

For environment-specific configurations, the valueFiles approach works well:

spec:
  source:
    helm:
      valueFiles:
      - values.yaml
      - values-production.yaml

Scaling with the "App of Apps" Pattern

As your deployment grows, managing dozens of Application manifests becomes unwieldy. The "App of Apps" pattern solves this by creating a hierarchy:

  1. Create a root ArgoCD Application that points to a directory of other Application manifests
  2. These child Applications each manage actual applications or services

This pattern, exemplified in the argocd-example-apps repository, provides structure and organization for complex deployments across multiple clusters or environments.

From Kubernetes Hero to GitOps Enabler

GitOps with ArgoCD and Helm transforms your role from the overburdened Kubernetes expert to a platform enabler who builds the "paved road" for developers. Instead of being the bottleneck for every deployment, you create a system where:

  • Developers deploy through pull requests, not by asking you
  • Changes are automatically applied and verified
  • The system is self-healing, reducing late-night emergencies
  • Everything is auditable and reversible

As one Reddit user wisely suggested, "automate the deployment of manifests to K8s in a way that devs can get manifests into clusters easily on a git merge." This is exactly what the GitOps approach achieves.

Remember to "keep it simple to start." Begin with one application and one deployment pattern, then iterate as your comfort and needs grow. The goal is a manageable system that reduces your stress, not a perfect but overly complex one.

By implementing GitOps with ArgoCD and Helm, you're not just solving a technical problem—you're addressing the very real human challenge of being the lone Kubernetes expert. And perhaps most importantly, you might finally be able to take that vacation without checking your phone every hour.

Frequently Asked Questions

What is GitOps and why is it important for Kubernetes management?

GitOps is a methodology for managing Kubernetes infrastructure and applications where Git is the single source of truth for declarative configuration. It's important because it automates deployments, improves reliability, and enhances security by treating infrastructure as code. This approach transforms manual, error-prone deployment processes into a standardized, auditable workflow. By using pull requests to manage changes, it empowers developers to self-serve while maintaining control and visibility, directly addressing the "sole Kubernetes expert" bottleneck.

How do ArgoCD and Helm work together in a GitOps workflow?

Helm packages Kubernetes applications into reusable charts, while ArgoCD acts as the GitOps operator that automatically deploys and synchronizes these charts with the cluster. Helm simplifies the definition and configuration of your applications. ArgoCD then continuously monitors your Git repository for changes to these Helm charts and their values. When a change is detected, ArgoCD automatically applies it to the cluster, ensuring the live state always matches the desired state defined in Git.

What is the best pattern for deploying Helm charts with ArgoCD?

There is no single "best" pattern; the right choice depends on your specific use case. The article outlines three common patterns: pointing to a Helm repository, pointing to a chart in a Git repository, or using Kustomize to render a Helm chart. For simple, third-party applications, pointing directly to a Helm repository is easiest. For custom applications requiring heavy modification, storing the chart in your own Git repository provides more control. For teams already using Kustomize who need advanced patching, the Kustomize pattern is most effective.

How should I manage secrets like passwords and API keys in a GitOps repository?

You should never store plain-text secrets in a Git repository. A common and secure practice is to use a tool like Sealed Secrets, which encrypts your Kubernetes Secrets so they can be safely committed to Git. Sealed Secrets works by providing a public key that you use to encrypt your secrets before committing them. A controller running in your cluster holds the private key and is the only entity that can decrypt them, allowing you to manage secrets declaratively without compromising security.

What happens if a bad configuration is merged into the main branch?

One of the core benefits of GitOps is the ability to quickly and easily roll back to a previous known-good state. Since every change is a commit in Git, rolling back is as simple as reverting the problematic commit. Once you revert the commit, ArgoCD will detect the change and automatically synchronize the cluster back to the previous stable configuration. This provides a powerful safety net, making deployments less risky and reducing recovery time when issues occur.

Does GitOps replace my existing CI/CD pipeline?

GitOps is focused on continuous delivery (CD)—the deployment part of the process—and is designed to complement your existing continuous integration (CI) pipeline, not replace it entirely. Your CI pipeline (e.g., Jenkins, GitHub Actions) is still responsible for building, testing, and packaging your application (e.g., creating a Docker image). Once a new image is ready, the CI process can update a configuration file in your Git repository, which then triggers the GitOps CD workflow managed by ArgoCD to deploy the new version.

blog-hero-background-image
Cyber Security

PRTG + Twilio Integration: Complete SMS Alert Setup Guide

backdrop
Table of Contents

Join thousands of professionals and get the latest insight on Compliance & Cybersecurity.


It's 3 AM. A critical server just went down. Your email alert is sitting unread in your inbox because your office internet connection is unavailable. The next morning, your boss isn't happy, and you're left feeling the sting of those dreaded words: "Why didn't you respond to this sooner?"

If this scenario sounds painfully familiar, you're not alone. Many sysadmins face the frustration of missed alerts, especially during critical infrastructure failures when your primary notification channels are compromised.

The problem? As one frustrated admin put it: "I only receive one alert, and if it doesn't wake me, I'm SOL." This single-channel dependency creates a dangerous weak point in your incident response system.

The solution? Implementing a robust, out-of-band SMS alerting system that works even when your primary infrastructure doesn't.

In this guide, I'll show you how to integrate PRTG Network Monitor with Twilio to create a reliable SMS alerting system that persists even through network outages, power failures, and other critical events.

Why SMS Alerts Are a Sysadmin's Best Friend

Email alerts and push notifications are great—until they're not. Both typically rely on internet connectivity, which becomes their Achilles' heel during network outages.

SMS alerts shine in scenarios like:

  • Network backbone failures: When your primary connection is down, but cellular networks remain operational
  • ISP outages: When your entire office loses connectivity
  • Power outages: When, as one admin noted, "we only have enough charge to keep our servers, FW, and switches up for 2 hours"

SMS messages travel over cellular networks—a completely separate infrastructure from your primary internet connection. This separation creates the redundancy needed for truly reliable alerting.

Prerequisites: What You'll Need

Before we begin, make sure you have:

  • An active PRTG Network Monitor installation (the free 100-sensor version works perfectly for this integration)
  • Administrative access to your PRTG server
  • A Twilio account (a trial account is sufficient to start)
  • 15-20 minutes to configure and test the integration

As one PRTG user noted, "PRTG 100-sensor is a free download and worth the time" for this setup. If you're already using PRTG for monitoring, you've got a head start.

Part 1: Setting Up Your Twilio Account for SMS

PRTG doesn't natively support SMS notifications, but as users have pointed out, "scripts could be created to integrate with Twilio." Let's start by getting your Twilio account ready:

  1. Sign up for Twilio
    • Visit Twilio's website and create an account
    • Verify your email address and phone number
  2. Get a Twilio phone number
    • From your Twilio dashboard, navigate to "Phone Numbers" → "Manage" → "Buy a Number"
    • Ensure the number has SMS capabilities (most do by default)
    • Complete the purchase (trial accounts include credit for testing)
  3. Locate your credentials
    • On your Twilio dashboard, find your Account SID and Auth Token
    • These credentials will authenticate your requests to Twilio's API
    • Keep them secure—they function as your username and password

Part 2: Integrating Twilio with PRTG

There are two primary methods for integrating PRTG with Twilio. I'll walk you through both so you can choose the one that best fits your environment.

Method A: The Custom URL Method (Simple & Fast)

This method uses PRTG's built-in HTTP Request capability to call Twilio's API directly.

Step 1: Navigate to Notification Delivery in PRTG

  • In the PRTG web interface, go to Setup | System Administration | Notification Delivery
  • Scroll down to the SMS Delivery section

Step 2: Configure SMS Delivery

  • Select the option "Enter a custom URL for delivering SMS"
  • This will reveal a field where you'll enter your Twilio API URL

Step 3: Construct the Twilio API URL

  • Enter your custom URL in the following format: https://api.twilio.com/2010-04-01/Accounts/YOUR_ACCOUNT_SID/Messages.json?To=%SMSNUMBER&From=YOUR_TWILIO_NUMBER&Body=%SMSTEXT
  • Replace YOUR_ACCOUNT_SID with your actual Twilio Account SID
  • Replace YOUR_TWILIO_NUMBER with your Twilio phone number (in E.164 format, e.g., +15551234567)
  • The %SMSNUMBER and %SMSTEXT are PRTG placeholders that will be replaced with the recipient's number and alert message

Step 4: Set Authorization

  • For the HTTP method, select POST
  • Under Authentication, select Basic
  • Enter your Twilio Account SID as the username
  • Enter your Twilio Auth Token as the password
  • Click Save to apply your changes

Security Note: This method is simpler but less secure than Method B since it requires storing your Twilio credentials in PRTG. For production environments, the script method below is recommended.

Method B: The "Execute Program" Script Method (Powerful & Customizable)

This method uses a dedicated script for more advanced control and formatting.

Step 1: Prerequisites

  • Ensure .NET Framework 4.5 or higher is installed on your PRTG Core Server
  • Make sure your server can make outbound HTTPS connections to Twilio's API

Step 2: Download the Script

  • Download the PRTG-TwilioPager package from GitHub
  • This open-source solution was developed specifically for PRTG-Twilio integration

Step 3: Install the Script

  • Unzip the contents into the \Notifications\EXE\ subdirectory of your PRTG installation
  • The default path is typically C:\Program Files (x86)\PRTG Network Monitor\Notifications\EXE\

Step 4: Configure the Script

  • Open the Prtg.Pager.Twilio.exe.config file in a text editor like Notepad
  • Update the following settings in the appSettings section: <appSettings> <add key="accountSid" value="ACxxxxxxxxxxxxxxxxxxxxxxxxxxxxx" /> <add key="authToken" value="your_auth_token" /> <add key="sourcePhoneNumber" value="+15551234567" /> </appSettings>
  • Replace the placeholder values with your actual Twilio credentials
  • Save the file

Pro Tip: For enhanced security, consider using environment variables or a secure credential store instead of hardcoding credentials in the config file.

Part 3: Creating and Testing Your SMS Notification

Now that the integration is set up, it's time to create a notification template in PRTG and test it.

Step 1: Create a New Notification Template

  • Navigate to Setup | Account Settings | Notification Templates
  • Click Add new notification template
  • Give it a descriptive name like "Twilio SMS Alert"

Step 2: Configure the Template

For Method A (Custom URL):

  • Under Send SMS/Pager Message, check the box to enable it
  • Enter the recipient's phone number in E.164 format (e.g., +15551234567)
  • Customize the message text using PRTG's placeholders: %device %name is %status! (%message)
  • This will produce messages like "Web Server PING is DOWN! (Timeout)"

For Method B (Execute Program):

  • Select Execute Program as the delivery method
  • For the Program File, select Prtg.Pager.Twilio.exe from the dropdown
  • For Parameters, enter: "5551234567 %device %name: %status %down (%message)"
  • The first parameter is the recipient's phone number (without the + prefix)
  • The rest forms your message text with PRTG's placeholders

Step 3: Apply the Notification to a Sensor

  • Navigate to the device or sensor you want to monitor
  • Go to its Notifications tab
  • Click Add State Trigger
  • Configure when the notification should trigger (e.g., "When sensor state is Down for at least 60 seconds")
  • Select your newly created notification template from the dropdown
  • Click Save

Step 4: Test the Notification

  • On the sensor's Notifications tab, click the Test icon (looks like a running person)
  • This will send a test notification immediately
  • Check your phone to confirm you receive the SMS alert

Best Practices and Troubleshooting

Message Formatting

  • Keep messages concise but informative
  • Include the critical information first (device name, status)
  • Use PRTG's placeholders to customize messages:
    • %device: The name of the device
    • %name: The sensor name
    • %status: The current status (e.g., Down, Warning)
    • %message: The detailed status message
    • %down: Time since the status changed

Common Issues and Solutions

Problem: SMS not being received

  • Verify your Twilio account has sufficient credit
  • Check that phone numbers are in E.164 format (+1XXXXXXXXXX)
  • Ensure outbound HTTPS connections to Twilio's API are allowed through your firewall

Problem: Error messages in PRTG logs

  • Check your Twilio credentials for accuracy
  • Verify the script path and parameters are correct
  • Ensure the .NET Framework is properly installed

Problem: SMS messages are delayed

  • This is typically a carrier issue rather than a Twilio or PRTG problem
  • Consider using multiple notification methods for critical alerts

Conclusion

By integrating PRTG with Twilio, you've added a crucial layer of resilience to your monitoring system. As one sysadmin put it after setting up a similar system: "I haven't missed an important alert since."

This integration solves the pain point many admins face: "I did not wake up to address this. My Boss reamed me out today." With SMS alerts that work even when your primary infrastructure doesn't, you'll be the first to know when critical systems fail.

For those seeking even more advanced notification options, consider using this Twilio integration as a foundation and exploring additional tools like OpsGenie or PagerDuty for features like escalation paths. As one user noted about Zabbix (and which applies equally to an enhanced PRTG setup): "It can harass increasingly large sets of people as time goes on" - a feature that ensures critical issues never fall through the cracks.

Ready to take your alerting to the next level? Implement this guide today, and sleep better knowing you have a truly redundant notification system watching your infrastructure around the clock.

Frequently Asked Questions

Why are SMS alerts essential for system monitoring?

SMS alerts are essential because they provide a reliable, out-of-band notification channel that works even when your primary internet connection fails. While email and push notifications rely on internet connectivity, SMS messages use the cellular network—a completely separate infrastructure. This ensures you receive critical alerts during network outages, power failures, or ISP issues when other channels are down.

Can I set up PRTG and Twilio SMS alerts for free?

Yes, you can set up and test this integration for free. PRTG offers a free version that monitors up to 100 sensors, which is often enough for critical infrastructure. Twilio provides a trial account with free credits, allowing you to send a number of test alerts without any cost. For larger production environments, you would need to consider a paid PRTG license and Twilio's pay-as-you-go SMS pricing.

What is the difference between the Custom URL and Execute Program methods?

The Custom URL method is simpler and quicker to set up directly within the PRTG interface, making it ideal for testing. The Execute Program (script) method offers greater security and customization, making it the recommended choice for production environments. The script method allows you to manage credentials more securely (e.g., outside of the PRTG web interface) and can be modified for more complex logic or message formatting.

How can I customize the content of my SMS alerts?

You can customize SMS alert content in PRTG by using built-in variables called placeholders. Placeholders like %device, %name, %status, and %message are automatically replaced with real-time sensor data when an alert is triggered. This allows you to create dynamic and informative messages, such as "Web Server PING is Down! (Timeout)," giving you critical context directly in the alert.

What should I do if my SMS alerts are not being delivered?

If your SMS alerts are not being delivered, first check your Twilio account for API errors and ensure you have sufficient credit. Next, verify that all phone numbers are entered in the correct E.164 format (e.g., +15551234567). Finally, check the PRTG logs for errors and confirm that your server's firewall allows outbound HTTPS connections to api.twilio.com.


Resources:

blog-hero-background-image
Cyber Security

dbt vs Great Expectations vs Soda: Which Data Quality Tool to Choose

backdrop
Table of Contents

Join thousands of professionals and get the latest insight on Compliance & Cybersecurity.


Are you constantly battling data quality issues that lead to inaccurate KPIs? Do you find yourself struggling with manual, inefficient checks on large, complex datasets, and looking for a way to automate the cleanup process? If you're nodding in agreement, you're not alone.

The frustration is real. As one data engineer put it, "You probably shouldn't use Great Expectations if you want to get something done, it can be needlessly complex and time-consuming to setup." Yet somehow, you need to ensure your data is trustworthy without spending all your time on manual validations.

Data quality is a continuous, demanding process that cannot be handled manually at scale. This is where automated data quality tools come in, streamlining and automating critical activities like profiling, cleansing, and monitoring.

In this comprehensive comparison, we'll examine three leading open-source contenders:

  • dbt: The transformation powerhouse with built-in testing
  • Great Expectations (GX): The comprehensive validation framework
  • Soda: The modern, user-friendly monitoring and observability tool

By the end of this article, you'll have a clear framework to decide which tool aligns best with your team's needs, existing stack, and data quality challenges.

Foundations: What is Data Quality and Why Does It Matter?

Before diving into the tools, let's establish what we mean by "data quality" and why it's worth investing in dedicated solutions.

Key Metrics to Evaluate Data Quality

Data quality can be measured across several dimensions:

  • Timeliness: Data is ready when you need it
  • Completeness: The amount of usable data is sufficient
  • Accuracy: Data is reliable against a source of truth
  • Validity: Data conforms to business rule formats
  • Consistency: Data is comparable across different datasets

Benefits of High-Quality Data

  • Increased Trust & Enhanced Decision-Making: Reliable data enables data-driven decisions and better business outcomes
  • Internal Consistency: Standardizes data across departments to avoid discrepancies
  • Cost Efficiency: Reduces time and money spent on manual data cleansing

With these foundations established, let's dive into our three contenders.

Deep Dive: dbt for Data Quality

What It Is

dbt (data build tool) isn't primarily a data quality tool, but rather a transformation framework with powerful, integrated testing capabilities. It's best for ensuring data accuracy during transformations, making it a favorite for analytics engineers who live in the dbt ecosystem.

Key Features & Test Types

dbt offers several testing approaches:

  1. Generic Tests: Built-in tests that come with dbt Core:
    • unique: Ensures all values in a column are unique
    • not_null: Ensures a column contains no null values
    • accepted_values: Checks if column values are within a specified list
    • relationships: Validates referential integrity between two tables
  2. Singular Tests: Custom tests for a specific model, written as a SQL query that should return zero rows on success
  3. Custom Generic Tests: Extend dbt's capabilities by importing packages like dbt-expectations, which adds functionality inspired by Great Expectations

How It Works: Implementing dbt Data Quality Checks

Here's a step-by-step approach to implementing data quality checks in dbt:

  1. Define Metrics: Identify key metrics like completeness and accuracy
  2. Identify Data for Testing: Choose the tables/views to evaluate
  3. Define Testing Criteria: Use YAML and SQL to specify checks
  4. Set Up dbt Project: Configure your schema.yml file to include the tests
  5. Run Tests: Execute dbt test manually or on a schedule (e.g., in a CI/CD pipeline)

Pros & Cons

Pros:

  • Seamless integration with transformation workflows
  • SQL-based, which most data teams already know
  • Massive, highly active community
  • Tests defined alongside models for better maintainability

Cons:

  • Limited to dbt ecosystem
  • Basic reporting (mostly pass/fail logs)
  • Primary focus is transformation, not comprehensive data quality

Deep Dive: Great Expectations (GX) for Comprehensive Validation

What It Is

Great Expectations, released in 2017, is a dedicated, open-source data validation and profiling framework. It's designed for in-depth validation of data from multiple sources, not just within transformation workflows.

Key Features

  • Expectations: A declarative language for describing assertions about your data, the core of GX
  • Automated Data Profiling: Can scan data to automatically generate a suite of expectations
  • Data Docs: Automatically generated, human-readable documentation and data quality reports from test results
  • Validation: Can be integrated into pipelines (e.g., Airflow) to validate data at critical points
  • ExpectAI: A new feature that auto-generates tests to reduce manual effort

Pros & Cons

Pros:

  • Comprehensive validation capabilities
  • Rich, auto-generated documentation
  • Powerful profiling and schema validation
  • Strong Python integration

Cons:

  • Steep learning curve
  • As one user noted, it "can be needlessly complex and time-consuming to setup"
  • Over-engineered for simpler use cases
  • Requires strong Python skills

Deep Dive: Soda for Data Observability

What It Is

Soda Core (released 2022) is an open-source command-line tool that uses a user-friendly language to turn user-defined checks into SQL queries. It focuses on monitoring and observability, with an emphasis on ease of use.

Key Features

Soda Checks Language (SodaCL): This YAML-based, domain-specific language is designed for data quality and is remarkably readable:

# Example SodaCL validations
checks:
  - missing_count(YEAR) = 0
  - missing_percent(TOTALEMISSIONS) < 5
  - invalid_count(YEAR) = 0:
      valid length: 4

Other Core Features:

  • Metrics Observability: Claims to detect anomalies "70% faster and more accurately than Facebook Prophet-based systems"
  • Pipeline Testing: Test data early in CI/CD workflows to prevent bad data from being merged
  • Collaborative Contracts: Enable data producers and consumers to create shared agreements on data quality

Pros & Cons

Pros:

  • Simple, declarative language (SodaCL) with low barrier to entry
  • Strong focus on anomaly detection and monitoring
  • Collaborative features for data contracts
  • Modern architecture and design

Cons:

  • Smaller community than dbt and GX
  • As one user noted, there's a "lack of community discussion and support around Soda"
  • Fewer integrations with other tools
  • Relatively new compared to alternatives

Head-to-Head Comparison: A Feature-by-Feature Breakdown

FeaturedbtGreat Expectations (GX)Soda
Primary GoalTesting within data transformationDeep validation, profiling, and documentationMonitoring, anomaly detection, and observability
Ease of UseEasy for built-in tests; moderate with packagesSteep learning curve; can be complexEasy to moderate; user-friendly SodaCL
Test LanguageYAML + SQLPython, JSON, YAMLYAML (SodaCL)
Key StrengthSeamless integration with dbt transformation workflowsExtensive library of "Expectations" and auto-generated "Data Docs"Simple, declarative language and focus on anomaly detection
ReportingBasic pass/fail/warn logs; requires other tools for rich UIRich, auto-generated HTML reports (Data Docs)Cloud-based observability dashboard and alerts
CommunityMassive and highly activeLarge and established open-source communityGrowing, but smaller than dbt and GX

The Decision Framework: Which Tool is Right for You?

Choose dbt if...

  • You are an "analytics engineer" and live inside dbt Cloud or dbt Core
  • Your primary need is to validate assumptions and ensure data integrity during transformation
  • You want tests tightly coupled with your models and defined in the same repository
  • You prefer SQL-based testing and have a team already familiar with dbt

Choose Great Expectations if...

  • You need a comprehensive, standalone data quality framework to validate data from multiple sources
  • Detailed, shareable data quality reports (Data Docs) are a critical requirement for your stakeholders
  • Your team has strong Python skills and is willing to invest time in mastering a powerful tool
  • You need deep profiling capabilities and a high degree of customization

Choose Soda if...

  • Your top priority is ease of use and a declarative language that can be adopted by a wider range of roles
  • You need strong capabilities for continuous monitoring, alerting, and anomaly detection
  • You want to establish "data contracts" between producers and consumers
  • You prefer a modern tool with a clean, focused approach to data quality

Building a Culture of Data Trust

Remember that choosing a data quality tool is just one part of the equation. The best tool is one that fits your team's workflow, technical skills, and specific data quality challenges. The ultimate goal is not just to implement a tool, but to foster a culture where data quality is a shared responsibility.

dbt is ideal for integrated transformation testing, Great Expectations excels at deep, standalone validation, and Soda offers user-friendly monitoring and observability. Each has its place in the modern data stack, and many teams even use a combination of these tools to address different aspects of their data quality strategy.

By implementing the right tool(s) for your specific needs, you'll be well on your way to building trust in your data and enabling better business outcomes through reliable, high-quality information.

What's your experience with these tools? Have you found one that works particularly well for your use case? Share your thoughts and experiences in the comments below.

Frequently Asked Questions

What is the main difference between dbt, Great Expectations, and Soda?

The primary difference lies in their core focus. dbt excels at data quality checks integrated within data transformation workflows, Great Expectations provides a comprehensive framework for deep validation and documentation across various data sources, and Soda specializes in user-friendly data monitoring, observability, and anomaly detection.

When should I choose dbt for data quality?

You should choose dbt for data quality when your primary goal is to ensure data integrity during the transformation process. If your team already uses dbt for transformations, its built-in testing is the most seamless and efficient way to validate models, check for nulls, and maintain referential integrity directly within your existing workflows.

Is Great Expectations too complex for a small team?

Great Expectations can have a steep learning curve, which might be challenging for a small team with limited resources. Its comprehensive nature and reliance on Python can feel complex for simple use cases. For teams seeking a quicker setup, dbt (if already in use) or Soda's declarative language (SodaCL) might offer a more accessible starting point.

How do Soda and Great Expectations compare for data monitoring?

Both tools can be used for data monitoring, but they approach it differently. Great Expectations focuses on validating data against predefined "Expectations" at specific points in a pipeline, generating detailed reports. Soda is built more for continuous observability, using its simple SodaCL to run checks on a schedule and providing powerful anomaly detection features to automatically flag unexpected changes in your data over time.

Can dbt, Great Expectations, and Soda be used together?

Yes, many teams use these tools together to cover different aspects of data quality. A common pattern is to use dbt for tests during transformation, Great Expectations for rigorous validation of raw data at ingestion or critical data assets, and Soda for continuous monitoring and alerting on production data warehouses.

Which data quality tool is best for beginners?

For beginners already familiar with SQL and working within the dbt ecosystem, dbt's native testing is the easiest to start with. For a standalone tool, Soda is often considered more beginner-friendly due to its simple, declarative SodaCL language, which has a lower barrier to entry than the extensive Python-based configuration of Great Expectations.

blog-hero-background-image
Cyber Security

The CA System Is Broken: Here's What Security Teams Need to Know

backdrop
Table of Contents

Join thousands of professionals and get the latest insight on Compliance & Cybersecurity.


You're entrusting your organization's entire digital security to a system that was designed in the 1990s and has failed catastrophically multiple times since then. The Certificate Authority (CA) model—the foundation of HTTPS and internet trust—is fundamentally broken, yet security teams continue to operate as if this weren't the case.

As one security professional bluntly put it: "The CA system is structurally broken, and always has been... CAs only get paid when they issue certs, not when they don't issue certs." This perverse incentive structure is just the beginning of the problem.

This article will dissect why the CA model is structurally flawed, showcase its historical failures, and outline the strategic shift required for security teams to build resilience in a zero-trust world. The days of passively trusting CAs are over—it's time for active verification and management.

The Illusion of Trust: Deconstructing the Centralized CA Model

The Certificate Authority system serves as the trusted third party responsible for issuing digital certificates that authenticate the ownership of public keys—a critical function for secure HTTPS communications. On the surface, this seems reasonable: we need some authority to verify identity.

But the model's fatal flaw lies in its centralized nature. Any of the hundreds of CAs trusted by major browsers can issue a certificate for any domain. This creates an enormous attack surface with multiple points of failure that can compromise the entire system.

As another security professional observed, "The notion of paying other people to say you're you... is ridiculous." This sentiment highlights the absurdity of the current model, where your online identity depends on third parties with questionable incentives and security practices.

The inherent vulnerabilities of this system include:

The implications are severe: when a CA fails, the entire trust model collapses. And history shows that CAs fail with alarming regularity.

A Litany of Failures: A History of CA Compromises

These aren't theoretical risks. The history of the web is littered with high-profile CA failures that prove the system's untrustworthiness:

  • DigiNotar (2011): Suffered a complete compromise, leading to the issuance of over 500 rogue certificates, including fraudulent wildcard certificates for Google domains. This breach was so severe it led to the complete collapse of the company. The attackers, reportedly connected to the Iranian government, were able to conduct man-in-the-middle attacks against Gmail users in Iran.
  • Comodo (2011): An attacker compromised a reseller's account and issued multiple rogue certificates for high-value domains like login.yahoo.com, mail.google.com, and login.skype.com.
  • TurkTrust (2011): Accidentally issued two intermediate CA certificates instead of end-entity certificates, which could have been used to forge certificates for any site.
  • WoSign & StartCom (2015-2016): Engaged in numerous deceptive practices, including back-dating certificates to avoid new security requirements and using inadequate validation methods, leading to major browsers distrusting them entirely.
  • Symantec (2015-2017): Found to have improperly issued over 100 certificates for domains without authorization, including Google-owned domains. A lengthy investigation uncovered systemic issues, ultimately forcing Google and Mozilla to distrust all Symantec-issued certificates.

The root causes of these failures include poor security practices, misconfigurations, trusting third-party resellers without proper checks, and fundamental failures to comply with industry regulations. Yet the system persists, largely unchanged.

The Problem at Home: Stagnation in Enterprise CAs

The problem isn't limited to public CAs. Many organizations run their own internal PKI using tools that are outdated and architecturally flawed.

Microsoft Active Directory Certificate Services (AD CS) exemplifies this issue. Despite being a cornerstone of Windows enterprise environments since Windows NT 4.0, AD CS has seen virtually no significant updates for years—even in Windows Server 2022. It lacks support for modern cryptographic algorithms like EdDSA (crucial for IoT devices), has no clear roadmap for post-quantum cryptography, and suffers from several architectural limitations:

The Microsoft Teams global outage in 2020, caused by a single forgotten certificate renewal, demonstrates the real-world impact of poor certificate management. As digital certificate usage explodes with machine identities, IoT devices, and DevOps automation, these limitations become increasingly problematic.

Navigating the Broken System: Strategic Imperatives for Security Teams

Given that we're stuck with this flawed system for the foreseeable future, security teams need a strategic approach that acknowledges the inherent untrustworthiness of CAs while building in resilience. This requires a fundamental shift from passive trust to active verification and management.

Pillar 1: Proactive Monitoring & Validation

Many security professionals lament that "Certificate Transparency logs are voluntary on the part of the bad actors" and often just provide "confirmation of the breach after-the-fact." While this criticism has merit, CT logs remain a critical data source that security teams must leverage.

Implement Certificate Transparency (CT) Monitoring:

  • CT creates public, append-only logs of all issued certificates, providing a mechanism for monitoring and auditing CAs.
  • Security teams must actively monitor these logs for certificates issued for their domains that they did not request.
  • Tools like SSLmate's Cert Spotter can automate this critical function.

Strengthen Domain Control Validation:

  • Shift away from email-based validation, which can be compromised if an attacker controls MX records.
  • Use DNS validation (via TXT or CNAME records) which provides a stronger link to control over the domain itself.
  • Implement CAA (Certification Authority Authorization) Records to specify which CAs are permitted to issue certificates for your domains—a simple but powerful control to prevent misissuance.

Explore Alternatives:

  • Consider emerging technologies like DANE (DNS-based Authentication of Named Entities) which binds certificates to domain names using DNSSEC, reducing reliance on the CA system.

Pillar 2: Embrace Certificate Lifecycle Management (CLM)

As certificate numbers skyrocket, manual management becomes impossible, leading to operational failures and security gaps. Gartner estimates that dedicated CLM solutions can reduce certificate-related outages by 90% and manual processing time by 50%.

Core Functions of a CLM Solution:

  1. Discovery: A unified interface to visualize all certificates across your environment, identifying rogue certs and compliance issues.
  2. Automation: Automate the entire certificate lifecycle—requests, renewals, provisioning, and revocation.
  3. Governance: Enforce security policies and compliance rules through customizable workflows and role-based access.
  4. Alerting: Provide timely notifications for expiring certificates that cannot be automated.

Leading vendors in this space include DigiCert (CertCentral), Entrust (Certificate Hub), and Venafi (TLS Protect).

From Passive Trust to Active Resilience

The foundational trust model of the CA system is flawed and has proven unreliable time and again. Passively trusting CAs is an abdication of security responsibility.

Security teams must evolve from a mindset of passive trust to one of active resilience. This requires a strategic commitment to continuous verification through CT log monitoring and strong validation controls, coupled with automated management via robust Certificate Lifecycle Management.

In today's threat landscape, trust is not a given; it must be continuously verified and managed. By adopting these strategies, security teams can build a more resilient and defensible infrastructure, even on a foundation they cannot fully trust.

Frequently Asked Questions

What is the Certificate Authority (CA) model and why is it considered broken?

The Certificate Authority (CA) model is a system where trusted third-party organizations issue digital certificates to verify the identity of websites and secure online communication. However, the model is considered fundamentally broken because its centralized nature creates a massive attack surface; a compromise of any single CA can be used to issue fraudulent certificates for any website, undermining the entire system's trust.

How can a compromised Certificate Authority affect my organization?

A compromised CA can directly affect your organization by issuing fraudulent certificates for your domains to malicious actors. This enables sophisticated man-in-the-middle attacks, allowing attackers to impersonate your websites, intercept sensitive user data (like login credentials and financial information), and launch highly convincing phishing campaigns, leading to severe security breaches and reputational damage.

What is Certificate Transparency (CT) and how does it help?

Certificate Transparency (CT) is a system that creates public, append-only logs of all digital certificates issued by Certificate Authorities. It helps improve security by allowing domain owners and security teams to monitor these logs for any unauthorized or fraudulent certificates issued for their domains, providing a critical early warning system for potential attacks.

What is Certificate Lifecycle Management (CLM) and why is it important?

Certificate Lifecycle Management (CLM) is the practice of automating and managing the entire lifespan of digital certificates, from request and issuance to deployment, renewal, and revocation. It is critically important because as the number of certificates in an organization explodes (due to IoT, cloud, and DevOps), manual management becomes impractical, leading to outages from expired certificates and security gaps from unmanaged ones.

What are the first steps my security team should take to mitigate CA risks?

The first steps your security team should take are to implement Certificate Transparency (CT) monitoring to detect unauthorized certificates and to enforce Certification Authority Authorization (CAA) records in your DNS. A CAA record specifies which CAs are permitted to issue certificates for your domains, providing a simple yet powerful preventative control against misissuance.

Are internal CAs like Microsoft AD CS a safer alternative to public CAs?

No, internal CAs are not necessarily a safer alternative and often present their own significant risks. Many internal PKI solutions, such as Microsoft Active Directory Certificate Services (AD CS), are outdated, lack support for modern cryptography, have architectural limitations, and are often poorly managed. This can create a large internal attack surface and lead to critical failures, as seen in major service outages.

blog-hero-background-image
Cyber Security

How to Secure Cybersecurity Grants for Your Nonprofit

backdrop
Table of Contents

Join thousands of professionals and get the latest insight on Compliance & Cybersecurity.


You've set up your nonprofit to make a difference in your community. You're focused on your mission, your clients, and your impact. Then one day, you check your email to discover a ransomware threat demanding thousands of dollars, or worse—you learn that sensitive donor information has been compromised in a data breach.

For many nonprofits, this scenario isn't hypothetical—it's a growing threat. You're handling sensitive donor data and confidential client records on systems that, as one nonprofit professional put it, "tend to be pricey" to secure properly, especially when you're operating on a "reduced budget."

The challenge is clear: cybersecurity infrastructure is essential, but the costs can be prohibitive. As another nonprofit leader noted, "IT risks are only growing larger," yet many organizations lack the resources to address them adequately.

This is where cybersecurity grants come in. These specialized funding opportunities can provide the financial support your nonprofit needs to protect its digital assets, sensitive information, and ultimately, its mission. But finding and securing these grants requires knowledge, preparation, and strategy.

In this guide, we'll walk you through the landscape of cybersecurity grants available to nonprofits, provide a step-by-step process for crafting winning proposals, and share expert tips for avoiding common pitfalls. By the end, you'll have a clear roadmap for securing the funding you need to protect your organization's digital infrastructure.

The Landscape of Cybersecurity Grants for Nonprofits

Before you can apply for funding, you need to know where to look. Here's a comprehensive overview of the cybersecurity grant sources available to nonprofits:

1. Government Grants

The DHS Nonprofit Security Grant Program (NSGP)

The NSGP is one of the most significant sources of cybersecurity funding for nonprofits. Administered by FEMA, this program provides funds for "target hardening and physical security enhancements to nonprofit organizations at high risk of terrorist attacks," which includes cybersecurity measures.

The funding available through this program is substantial:

  • FY 2025 Total: $274.5 million ($137.25M for Urban Area, $137.25M for State)
  • FY 2024 Total: $454.5 million
  • FY 2023 Total: $305 million

To get started with the NSGP, explore these resources:

State-Specific Grants

Many states offer their own cybersecurity grant programs for nonprofits. Check with your state's emergency management or homeland security offices to learn about opportunities in your area. As one nonprofit professional recommended, "Nonprofit security grant program with FEMA and your state agency" can be an excellent place to start.

2. Foundation Grants

The TechSoup Cybersecurity Initiative

As one nonprofit professional noted, "TechSoup is definitely great and does have some stuff." TechSoup provides resources, discounted software, and occasional grants specifically for nonprofit cybersecurity needs. Their Digital Security Assessment tool can help identify your organization's vulnerabilities—a valuable first step before applying for funding.

Bill & Melinda Gates Foundation

The Gates Foundation offers grants that can support technology infrastructure improvements, including cybersecurity enhancements. Their focus is often on organizations whose work aligns with the foundation's core mission areas.

The Ford Foundation

For organizations working in human rights or activism, the Ford Foundation provides grants that can include cybersecurity components, especially when digital protection is integral to the safety of the communities you serve.

3. Corporate Grants

Google.org

Google.org offers grants to nonprofits focused on protecting at-risk communities, which can include digital protection measures. Their Impact Challenge grants have funded numerous technology initiatives for nonprofits.

Microsoft Tech for Social Impact

Microsoft offers grants and significant discounts for nonprofit access to cybersecurity tools through their Tech for Social Impact program. This includes access to secure cloud solutions and protection against cyber threats.

Cisco Foundation

The Cisco Foundation provides grants to enhance technology infrastructure, including cybersecurity measures, for organizations whose work aligns with their focus areas.

4. Cybersecurity-Specific Grants

Center for Internet Security (CIS) Grants

The CIS offers specific programs to help nonprofits implement critical cybersecurity practices and tools to protect against common threats.

CyberPeace Institute's Nonprofit Support Program

This program assists nonprofits at high risk of cyberattacks, providing both expertise and resources to enhance security posture.

A Step-by-Step Guide to Crafting a Winning Grant Proposal

Now that you know where to look for funding, let's break down the process of creating a grant proposal that stands out:

Step 1: Preparation is Everything

Conduct a Cybersecurity/Vulnerability Assessment

Before writing your proposal, you need to understand your specific needs. A vulnerability assessment identifies your organization's security gaps and justifies your funding request with concrete data. This is essential—as one nonprofit professional advised, you should "provide some data on any tech breaches in your area to help bolster the case."

Create a Diversified Funding Strategy

While grants are crucial, they shouldn't be your only source of cybersecurity funding. According to expert advice from Donorbox.org, aim for grants to cover no more than 20% of your total funding needs. This diversification makes your organization more resilient and appealing to funders.

Develop a Grant Calendar

Create a calendar to track application deadlines and requirements for different grants. This simple organizational tool can prevent missed opportunities and ensure you have adequate time to prepare each application.

Step 2: The Core Components of Your Proposal

A successful cybersecurity grant proposal typically includes these essential elements:

Cover Letter

Keep it to one page and include the project name, amount requested, why the project is important, and a list of the proposal's contents. This is your first impression—make it count.

Executive Summary

Provide a concise overview of your entire proposal. Many reviewers make initial decisions based solely on this section, so make it compelling and clear.

Organizational Background

Showcase your nonprofit's track record and credibility. Highlight your mission impact and why cybersecurity is crucial to continuing this work.

Need/Problem Statement

This is where you make your case, using data to tell a powerful story. One nonprofit professional shared that they had "all my research done, including data I have from working with one of our partners orgs after a DDoS and breach." This kind of specific information demonstrates the real-world impact of cybersecurity threats on your organization.

Objectives and Outcomes

Define specific, measurable, achievable, relevant, and time-bound (SMART) goals for your cybersecurity project. What will success look like, and how will you measure it?

Program Plan & Evaluation

Detail exactly what you will do with the funding (e.g., implement multi-factor authentication, conduct phishing awareness training, purchase endpoint detection software) and how you will evaluate the effectiveness of these measures.

Budget

Provide a detailed, line-item budget that justifies every cost. Be specific about how each expenditure contributes to your cybersecurity goals.

Sustained Impact

Explain how these security improvements will benefit your organization long after the grant funding is spent. Funders want to know their investment will have lasting value.

Step 3: Tailor, Review, and Submit

Customize Each Application

Avoid generic, "cookie-cutter" proposals. Research each funder and tailor your application to their specific interests and priorities. This personalization significantly increases your chances of success.

Review Before Submission

Have someone with fresh eyes review your proposal for clarity, typos, and adherence to all guidelines. Small mistakes can disqualify an otherwise excellent proposal.

Gather Letters of Support

Include letters from community partners, technology experts, or clients who can reinforce the need and community impact of your cybersecurity project.

Pro-Tips and Pitfalls to Avoid

Pro-Tips for Success

Seek Partnerships

Collaborate with other nonprofits to strengthen your application. Joint proposals can demonstrate broader community impact and resource efficiency.

Align with Grant Objectives

Ensure your project directly addresses the grantmaker's stated goals. Make these connections explicit in your proposal.

Follow Up

After submitting, consider a polite follow-up to express continued interest and answer any questions the funder might have.

Network with Successful Applicants

Connect with peers who have successfully secured funding. As one nonprofit professional offered, "I do, happy to talk if you want to message. Just completed our second round with a major donor." These connections can provide invaluable insights.

Common Pitfalls to Avoid

Vague Descriptions

Be crystal clear about how funds will be used. Avoid generalities that make reviewers question your planning.

Ignoring Grant Guidelines

Failure to follow instructions is a common reason for immediate disqualification. Read the guidelines multiple times and create a checklist to ensure compliance.

Generic Applications

Funders can spot a non-customized proposal immediately. Take the time to tailor each application to the specific funder.

Viewing Grants as a Quick Fix

Grant writing is a long-term strategy that requires significant effort. Don't expect immediate results; build relationships with funders over time.

Secure Your Funding, Secure Your Mission

Cybersecurity is not optional for nonprofits today—it's essential to protecting your mission, your data, and the trust of those you serve. While securing funding for these needs can be challenging, it's entirely achievable with the right approach.

By conducting thorough research, crafting data-driven proposals tailored to each funder, and avoiding common pitfalls, you can successfully secure the cybersecurity grants your organization needs.

Take the first step today by conducting a vulnerability assessment. This will not only prepare you for grant applications but also help you understand your organization's specific security needs. Remember, securing your data is fundamental to securing your mission in today's digital world.

Frequently Asked Questions

What are cybersecurity grants for nonprofits?

Cybersecurity grants for nonprofits are specific funding opportunities designed to help charitable organizations protect their digital assets, data, and infrastructure from online threats. These grants provide financial support to cover costs that many nonprofits find prohibitive, such as purchasing security software, conducting vulnerability assessments, training staff, and updating hardware. They are offered by government agencies, private foundations, and corporations to ensure that mission-driven organizations can operate safely in a digital world.

Where can my nonprofit find cybersecurity grants?

Nonprofits can find cybersecurity grants from several sources, including federal government programs like the DHS Nonprofit Security Grant Program (NSGP), state-specific agencies, private foundations like the Bill & Melinda Gates Foundation, and corporate philanthropies such as Google.org and Microsoft Tech for Social Impact. It's best to create a diversified funding strategy. Start by checking federal databases and your state's homeland security or emergency management office. Also, explore technology-focused foundations and corporate grant programs that align with your nonprofit's mission.

How do I write a successful grant proposal for cybersecurity funding?

To write a successful grant proposal, you must clearly demonstrate your organization's specific security needs with data, outline a detailed plan for using the funds, and tailor your application to each funder's priorities. The process starts with a thorough cybersecurity or vulnerability assessment to identify your risks. Key components of a strong proposal include a clear problem statement backed by data, SMART objectives, a detailed budget, and a plan for sustaining the security improvements.

Why is a vulnerability assessment necessary before applying for a grant?

A vulnerability assessment is necessary because it provides the concrete data and evidence needed to justify your funding request and build a powerful, data-driven case. Instead of simply stating that you need better security, an assessment identifies specific weaknesses (e.g., outdated software, lack of multi-factor authentication). This allows you to show funders exactly what the problem is and how their investment will directly solve it, moving your request from a general appeal to a targeted, strategic plan.

What are the most common mistakes to avoid when applying for cybersecurity grants?

The most common mistakes to avoid are submitting generic, "cookie-cutter" applications, ignoring the funder's specific guidelines, and providing vague descriptions of how the funds will be used. Funders can easily spot a proposal that hasn't been tailored to their mission. Failing to follow instructions is often a reason for immediate disqualification, and your budget must be specific, clearly linking every requested dollar to a specific cybersecurity outcome.

What can cybersecurity grant funding typically be used for?

Cybersecurity grant funding can typically be used for a wide range of security enhancements, including purchasing hardware and software, conducting staff training, hiring cybersecurity consultants, and implementing new security protocols. Examples include acquiring firewalls, implementing multi-factor authentication (MFA), running phishing awareness campaigns for your team, and developing an incident response plan. Always check the specific grant's guidelines for allowable expenses.

blog-hero-background-image
Cyber Security

Vendor Security Assessment Framework for IT Professionals

backdrop
Table of Contents

Join thousands of professionals and get the latest insight on Compliance & Cybersecurity.


You receive an urgent Slack message at 11 PM: "SolarWinds compromise confirmed. Emergency patches needed ASAP." Your stomach drops as you realize dozens of critical systems are at risk. Another sleepless night ahead.

Sound familiar? If you've ever felt that wave of anxiety when a trusted vendor becomes your biggest security liability, you're not alone. According to recent discussions among IT professionals, the "frustration with last-minute emergency patches due to vendor negligence" and "anxiety over potential security breaches affecting important systems" are all too common.

The stakes couldn't be higher. Consider these sobering statistics:

  • Over 60% of data breaches involve third-party vendors
  • 61% of organizations reported a third-party data breach or security incident in the last year
  • 60% of organizations work with over 1,000 third-party vendors

The good news? You can shift from reactive firefighting to proactive control with a structured vendor security assessment framework. This article provides a practical, actionable approach to safeguarding your organization from the weakest links in your vendor ecosystem.

The Modern Threat Landscape: Why a Formal Framework is Non-Negotiable

A Vendor Risk Assessment is the systematic process of identifying and evaluating the cybersecurity, financial, compliance, and operational risks associated with your third-party vendors. But why is a formal framework so critical?

Today's threat landscape extends far beyond your organizational boundaries. Your security is only as strong as your weakest vendor—a reality dramatically illustrated by incidents like the MGM Casinos' $100 million loss from a cyber attack that exploited third-party vulnerabilities.

The spectrum of vendor risks is broader than most realize:

Cybersecurity Risks: Poor access controls, vulnerable code, and inadequate security practices can create backdoors into your network. The SolarWinds breach demonstrated how sophisticated attackers can compromise trusted software update mechanisms, affecting thousands of organizations simultaneously.

Compliance and Regulatory Risks: Under regulations like GDPR, HIPAA, and the DORA Act, your organization remains liable even when a vendor mishandles data. The financial penalties can be devastating.

Operational Risks: When critical vendors experience downtime or security incidents, your services may grind to a halt. The widespread service disruption caused by the recent CrowdStrike outage affecting Microsoft systems is a prime example.

Financial Risks: Third-party risk now accounts for a staggering 31% of all cyber insurance claims in 2024, according to Resilience.

Fourth-Party Risks: This often-overlooked dimension involves the vendors of your vendors. Your meticulously vetted partner might have relationships with high-risk providers that indirectly expose your data.

Without a structured framework to assess these multifaceted risks, IT professionals are left vulnerable, scrambling to respond to incidents rather than preventing them.

Building Your Framework: Core Components and Principles

A robust vendor security assessment framework rests on three fundamental principles:

Principle 1: Establish Governance and Define Risk Tolerance

Begin by assembling a cross-functional team including IT security, legal, procurement, and business stakeholders. This team will define security policies, roles, and responsibilities for vendor management.

Next, establish your organization's risk tolerance by distinguishing between:

  • Inherent Risk: The baseline risk a vendor poses before any controls are applied
  • Residual Risk: The risk that remains after implementing mitigation strategies

Many IT professionals struggle with "creating effective vendor assessment criteria from scratch," as noted in online discussions. Having clear governance and risk tolerance standards provides the foundation for consistent decision-making.

Principle 2: Implement a "Right-Sized," Risk-Based Approach

Not all vendors pose equal risk. A one-size-fits-all assessment process wastes resources and creates unnecessary friction. Instead, implement a tiered approach:

Tier 1 (High Risk): Vendors with access to sensitive data (PII, PHI) or critical systems

  • Require comprehensive assessments, on-site audits, and continuous monitoring
  • Examples: Cloud providers, managed service providers, financial system vendors

Tier 2 (Medium Risk): Vendors with limited access to non-critical systems

  • Require standardized questionnaires and annual reviews
  • Examples: Marketing tools, HR platforms, non-critical SaaS applications

Tier 3 (Low Risk): Vendors with minimal exposure and no access to sensitive data

  • A lightweight, automated assessment may suffice
  • Examples: Office supplies, cleaning services

This tiered approach allows you to focus your most rigorous assessment efforts where they matter most.

Principle 3: Develop a Comprehensive Assessment Toolkit

Your framework requires practical tools to function effectively:

Standardized Questionnaires: Leverage industry-standard frameworks like the SIG Questionnaire or develop custom questionnaires based on NIST CSF or ISO 27001.

Technical Validation & Documentation: Address the common challenge of "difficulties in verifying the vendor's email and data security measures" by requiring concrete evidence:

  • SOC 2 reports
  • ISO 27001 certifications
  • Vulnerability Assessment and Penetration Test (VAPT) results
  • Proof of backup and restore testing

Contract Management: Embed security requirements directly into vendor agreements, including:

  • Clear security expectations and standards
  • Compliance requirements
  • Incident response SLAs
  • Data handling procedures for offboarding

The Vendor Assessment Lifecycle: A Step-by-Step Process

A vendor relationship is a lifecycle, not a one-time event. Your framework should address each phase:

Phase 1: Onboarding & Due Diligence

  1. Identify & Inventory: Create a comprehensive inventory of all vendors and map them to the critical assets and data they can access. This addresses the pain point of "confusion over whether to assess the vendor or the solution itself" by documenting both the vendor entity and their specific solutions.
  2. Define Risk & Scope: Assign each vendor to a risk tier (1, 2, or 3) based on:
    • Type and sensitivity of data accessed
    • Criticality of systems or services provided
    • Regulatory requirements
    • Integration depth with your infrastructure
  3. Collect & Analyze Information: Distribute tailored questionnaires and request security documentation, including SOC 2 reports and penetration test results. Use automated tools to assess their external security posture.
  4. Identify & Remediate Gaps: Review findings, document risks, and work with the vendor to address critical vulnerabilities before finalizing contracts. This directly addresses the "need for assurance that the vendor has a robust incident response plan" expressed by IT professionals.

Phase 2: Ongoing Monitoring

One of the most common pitfalls is treating vendor assessments as a one-time event. In reality, vendor security postures change constantly.

  1. Establish Continuous Monitoring: Use Third-Party Risk Management (TPRM) platforms to provide steady monitoring, risk scoring, and alerts for changes in the vendor's security posture or data leaks.
  2. Schedule Periodic Reviews: Conduct comprehensive reassessments at key moments:
    • Every six months for high-risk vendors
    • During contract renewals
    • After significant changes in the vendor's service or infrastructure
    • Immediately following a known security breach involving the vendor

Phase 3: Secure Offboarding

When a vendor relationship ends, security concerns don't. Proper offboarding includes:

  • Revoking all access to your systems and data
  • Verifying that your data has been securely returned or destroyed per contractual agreements
  • Conducting a final security assessment to ensure no lingering vulnerabilities

Best Practices and Common Pitfalls to Avoid

Best Practices to Adopt:

  • Leverage Automation: Use TPRM platforms to automate questionnaire delivery, continuous monitoring, and report generation.
  • Integrate with Procurement and Legal: Make security a core part of the vendor selection process from the beginning, not an afterthought.
  • Foster a Partnership: Treat vendor management as a collaboration rather than an adversarial process.
  • Train Your Team: Ensure internal teams understand assessment criteria and escalation procedures.

Common Pitfalls to Avoid:

  1. Skipping Assessments for "Low-Tier" Vendors: Even vendors with seemingly low-risk profiles can become entry points for attackers.
  2. Ignoring Fourth-Party Risks: Always ask vendors about their own suppliers' security practices.
  3. Neglecting SLAs and Contracts: Security requirements must be legally binding, not just verbal agreements.
  4. Lacking Executive Oversight: Regularly report risk findings to leadership to ensure proper strategic decisions and resource allocation.

Conclusion: From Reactive to Proactive

A structured Vendor Security Assessment Framework isn't bureaucratic overhead—it's your organization's first line of defense in a world built on interconnected services. By implementing this framework, you can transform your approach from reactive firefighting to proactive risk management.

The next time you receive a vendor security alert, instead of that familiar wave of anxiety, you'll have the confidence that comes from having systematically evaluated, monitored, and mitigated the risks in advance.

As regulations continue to tighten and AI-driven risk assessments become more sophisticated, your framework will need to evolve. But the core principles—governance, risk-based assessment, and lifecycle management—will remain the foundation of effective vendor security.

By embedding risk intelligence throughout your vendor relationships, you can finally escape the "stressful environment caused by security vulnerabilities" and focus on strategic initiatives that drive your organization forward.

Frequently Asked Questions

What is a vendor security assessment framework?

A vendor security assessment framework is a systematic process for identifying, evaluating, and mitigating the cybersecurity, compliance, and operational risks associated with third-party vendors. It provides a structured approach to ensure your vendors meet your organization's security standards throughout your entire relationship—from onboarding and continuous monitoring to secure offboarding. This framework helps shift your security posture from reactive to proactive.

Why is managing third-party vendor risk so critical?

Managing third-party vendor risk is critical because your organization's security is only as strong as your weakest vendor. A breach through a third party can lead to significant financial loss, data breaches, regulatory penalties, and operational downtime. With over 60% of data breaches involving third parties, failing to manage this risk exposes your organization to major incidents, and regulations like GDPR and HIPAA hold you accountable for data mishandled by your vendors.

How can I start building a vendor risk assessment program?

You can start building a vendor risk assessment program by first establishing governance. This involves assembling a cross-functional team (including IT, legal, and procurement) and defining your organization's risk tolerance. Once governance is in place, create an inventory of all vendors and classify them into risk tiers (e.g., high, medium, low). This risk-based approach allows you to focus your most intensive assessment efforts on the vendors that pose the greatest threat.

How often should vendors be reassessed?

The frequency of vendor reassessment should be based on their risk level. High-risk vendors should be reviewed more frequently, such as every six months, while lower-risk vendors may only need an annual review. Beyond scheduled reviews, assessments should also be triggered by key events like contract renewals, significant changes in the vendor's services, or immediately after the vendor experiences a known security breach.

What are some essential tools for a vendor security assessment?

Essential tools for a vendor security assessment include standardized security questionnaires, technical validation documents, and legally binding contracts. Questionnaires can be based on industry standards like SIG or NIST. For validation, always request evidence like SOC 2 reports, ISO 27001 certifications, and recent penetration test results. Finally, your contracts should explicitly detail security requirements, incident response SLAs, and data handling procedures.

What is the difference between inherent and residual risk?

Inherent risk is the level of risk a vendor presents before any security controls or mitigation strategies are applied. Residual risk is the risk that remains after those controls have been implemented. The goal of a vendor security assessment is to identify the inherent risk and then apply controls to reduce it to an acceptable level of residual risk that aligns with your organization's risk tolerance.

blog-hero-background-image
Cyber Security

How to Set Up Persistent Network Alerts That Actually Wake You Up

backdrop
Table of Contents

Join thousands of professionals and get the latest insight on Compliance & Cybersecurity.


It's 3 AM. A single, generic notification buzzes on your nightstand. You roll over and ignore it. The next morning, you walk into a crisis. The main server has been down for hours, and as one sysadmin on Reddit lamented, "I did not wake up to address this. My Boss reamed me out today."

If this scenario sounds familiar, you're not alone. Many IT professionals find themselves in a precarious position where they "only receive one alert and if it does not wake me I'm SOL." This vulnerability becomes especially critical when physical limitations like having "enough charge to keep our servers, FW and Switches up for 2 hours" are in play.

The solution isn't just another tool—it's a comprehensive strategy for creating alerts that are impossible to sleep through.

The Philosophy of Unmissable Alerts

Before diving into specific tools, we need to understand what makes an alert system truly effective.

Fighting Alert Fatigue

The primary enemy of effective alerting is what experts call "Alert Fatigue." As highlighted by research from Obkio, this occurs when an overwhelming notification volume causes admins to overlook critical alerts. Your brain learns to tune out the constant stream of notifications, making even urgent alerts easy to miss.

Defining Alert Tiers That Make Sense

Not all alerts are created equal. Using the methodology outlined in LinuxJournal's Sysadmin 101, establish a clear hierarchy:

  1. Critical Alerts: These are the only alerts that should wake you up at 3 AM. Every critical alert must be actionable, meaning it has a specific, documented action plan for resolution.
  2. Warning Alerts: These notify you of potential issues that are not yet critical (e.g., disk usage at 85%). To avoid spam, configure these with periodic repeats, such as once every hour, rather than continuously.
  3. Non-Alert Monitoring: The vast majority of metrics should be tracked for context and historical analysis without triggering a notification unless a critical threshold is breached.

The Psychology of Waking Up

For alerts that absolutely must wake you up:

  • Use a loud, obnoxious ringtone that is reserved only for these critical alerts
  • Enable strong vibration patterns
  • Ensure persistence - the notification must repeat until acknowledged

This is the core principle behind tools like OnPage, which uses an "'Alert-Until-Read' tone that is loud and intrusive."

Setting Smart Thresholds to Eliminate Noise

Improperly set thresholds are a primary cause of alert fatigue. They either "flood admins with alerts or miss real issues." This can also lead to "Alert Storms," where a single core device failure triggers dozens of alerts from dependent devices.

4-Step Process for Effective Thresholds

Follow this practical approach from Obkio to set thresholds that strike the right balance:

  1. Extended Observation Period: Before setting any alerts, monitor your network's key metrics for 2-4 weeks to gather a comprehensive dataset.
  2. Thorough Traffic Analysis: Analyze this data to identify normal operating patterns, daily peaks, and trends. This forms your performance baseline.
  3. Clear Metric Definitions: Based on your analysis and business requirements (e.g., SLAs), set clear upper and lower thresholds for key metrics like latency, jitter, packet loss, and CPU utilization.
  4. Baseline Data Management & Integration: Store this baseline data and configure your monitoring tool to trigger alerts based on deviations from these established norms, not arbitrary numbers.

Building Your Escalation Fortress: The No-Fail Response Plan

An escalation policy is your safety net when the primary responder is unavailable or unable to resolve the issue. It specifies who gets notified, when they get notified, and how the handoff occurs.

Types of Incident Escalation

According to Atlassian's best practices, effective escalation comes in three forms:

  • Hierarchical Escalation: The incident is passed up the chain of command to a more senior team member.
  • Functional Escalation: The incident is passed to a different team or individual with specific skills or system knowledge (e.g., from the network team to the database team).
  • Automatic Escalation: Modern on-call platforms like PagerDuty or OpsGenie use rules to automatically escalate an alert if it is not acknowledged or resolved within a predefined time.

A Practical Escalation Timeline Example

This model ensures an alert is never dropped:

  • Time 0: A critical alert is triggered and sent to the primary on-call sysadmin via multiple channels (push notification, SMS).
  • Time +5 minutes: If the alert is not acknowledged, the system re-sends the notification, perhaps using a more aggressive method like a phone call.
  • Time +10 minutes: The alert is sent again.
  • Time +15 minutes: If still unacknowledged, the alert is automatically escalated to the secondary on-call person and/or the entire team distribution list.

As one Redditor noted about Zabbix, a good system should be able to "harass increasingly large sets of people as time goes on."

The Modern Sysadmin's Toolkit for Persistent Alerting

Here's a curated selection of tools specifically mentioned by IT professionals for creating reliable alert systems:

All-in-One On-Call Management Platforms

Monitoring Systems with Advanced Alerting

Specialized Persistent Alerting Apps

Simple, Dedicated Solutions

Your Implementation Checklist: From Theory to Practice

Ready to build a system that will actually wake you up? Follow this step-by-step guide:

  1. Define Alert Tiers: Classify events as Critical, Warning, or Informational. Only Critical alerts should trigger your wake-up sequence.
  2. Establish Baselines: Use your monitoring tool to collect 2-4 weeks of performance data before setting any thresholds. This prevents alert storms caused by normal system behaviors.
  3. Choose Your Tooling: Select a primary on-call management platform (PagerDuty, OpsGenie) to handle notifications and escalations.
  4. Integrate Your Systems: Connect your monitoring tools (Zabbix, Checkmk, PRTG) to your on-call platform.
  5. Configure Multi-Channel Notifications: For critical alerts, set up a sequence:
    • High-priority mobile app push notification with a unique, loud sound
    • SMS message
    • Automated phone call
  6. Build Your Escalation Policy: Implement the 15-minute escalation timeline. Define primary, secondary, and tertiary contacts for every service.
  7. Set Up On-Call Schedules: Use your platform to create fair rotations. Ideal rotations are one to four weeks to prevent burnout. Plan for holiday coverage.
  8. Test, Review, and Refine: Run drills to ensure the system works as expected. Regularly review alert effectiveness with your team and dedicate time to tuning thresholds and reducing false positives.

Sleep Soundly, Respond Powerfully

Building an effective alerting system is not about a single tool. It's a strategy that combines smart thresholds, persistent multi-channel notifications, and ironclad escalation policies.

By implementing this framework, you can move from the fear of missing a critical alert to the confidence that you and your team are prepared for any incident, at any time. This isn't just about protecting your servers; it's about protecting your time, your sanity, and your sleep.

No more getting reamed out by the boss for missing that 3 AM alert. No more waking up to a crisis that could have been prevented. With a properly configured persistent alerting system, you can rest easy knowing that when something truly critical happens, you'll be awake, alert, and ready to respond.

Frequently Asked Questions

What is the most important first step to creating an effective IT alert system?

The most important first step is to define your alert tiers. By classifying all potential events into categories like "Critical," "Warning," and "Informational," you can ensure that only truly urgent, actionable issues trigger aggressive, wake-you-up notifications. This strategy is the foundation for fighting alert fatigue and making your entire system more effective.

How can I avoid alert fatigue while still being notified of critical issues?

You can avoid alert fatigue by combining smart thresholds with a tiered alert strategy. Instead of using arbitrary numbers, set your alert thresholds based on 2-4 weeks of historical performance data to understand your system's normal behavior. Then, configure your system so that only critical-tier alerts trigger persistent, multi-channel notifications, while warning-tier alerts are less intrusive (e.g., a single email or a once-per-hour reminder).

Why is an escalation policy necessary for on-call teams?

An escalation policy is a crucial safety net that ensures a critical alert is never missed. It defines a clear chain of command for what happens if the primary on-call person does not acknowledge an alert within a set timeframe (e.g., 15 minutes). The policy automatically routes the alert to a secondary person, a manager, or an entire team, providing the redundancy needed to guarantee a response to any incident.

What's the difference between a monitoring tool and an on-call management platform?

A monitoring tool (like Zabbix, Checkmk, or PRTG) actively watches your systems and applications for problems and generates an alert when a threshold is breached. An on-call management platform (like PagerDuty or OpsGenie) takes those alerts and handles the human side of the response—managing on-call schedules, sending persistent notifications via multiple channels (SMS, phone call, push), and executing escalation policies. The two types of tools work together to create a complete solution.

How do you make an alert loud enough to wake you up?

The most reliable method is to use a dedicated on-call management app (like PagerDuty, OpsGenie, or OnPage) that is designed for this purpose. These apps allow you to override your phone's silent settings with a loud, obnoxious ringtone used exclusively for critical alerts. Key features to look for are "Alert-Until-Read" persistence, where the sound repeats until acknowledged, and strong vibration patterns.

What should I do if my entire network goes down, including internet access?

For a total outage scenario, you need an independent, out-of-band monitoring solution. This involves a device that operates independently of your local network and internet connection, typically using a cellular (4G/5G) connection. Tools like MarCELL Pro are designed for this; they monitor for power and internet outages and will send you an SMS or automated phone call via their cellular link when your infrastructure goes dark.

toaster icon

Thank you for reaching out to us!

We will get back to you soon.