blog-hero-background-image
Cyber Security

How to Build AWS Continuous Compliance Monitoring for ISO 27001 and SOC 2

backdrop
Table of Contents

Join thousands of professionals and get the latest insight on Compliance & Cybersecurity.


You've just finished another exhausting compliance audit cycle. Mountains of screenshots, countless meetings with auditors, and that sinking feeling that you're always one configuration drift away from non-compliance. The monthly manual checks that seemed manageable at first have become a dreaded task that pulls you away from more strategic work.

"If only there was a way to get real-time alerts when resources become non-compliant," you think, remembering that unencrypted RDS instance that nearly derailed your last audit.

The good news? You can transform compliance from a periodic nightmare into a continuous, automated process using AWS's native toolset. This guide will show you how to build a comprehensive monitoring system for ISO 27001 and SOC 2 that provides real-time alerts, automates remediation, and generates audit-ready reports—all without the "hefty fees" of third-party solutions.

The Foundation: Why Continuous Compliance on AWS?

Before diving into implementation, it's important to understand AWS's Shared Responsibility Model. While AWS is responsible for security of the cloud (infrastructure, hardware, software), you remain responsible for security in the cloud (data, configuration, access management).

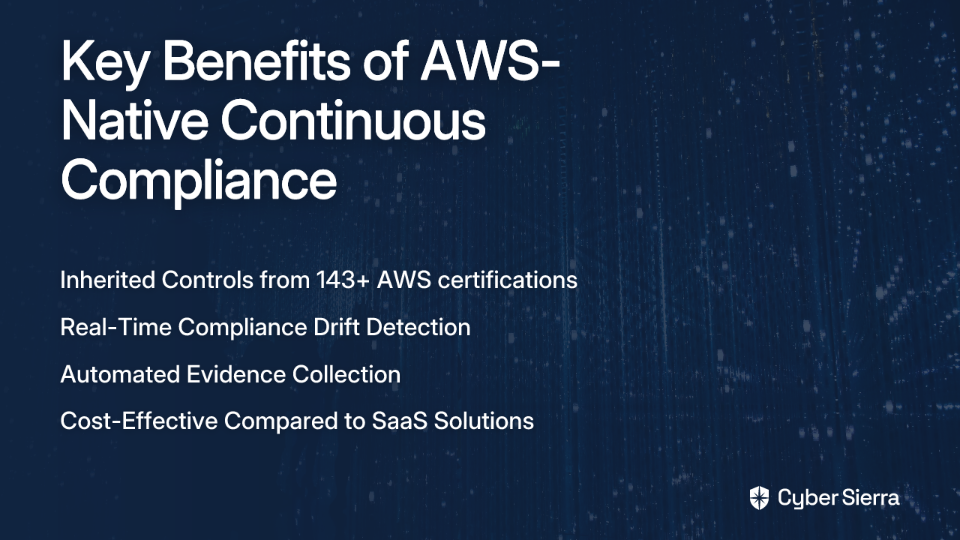
The benefits of building continuous compliance monitoring directly on AWS include:

  1. Inherited Controls: AWS maintains 143 security standards and compliance certifications, allowing you to inherit many infrastructure security controls.
  2. Real-Time Detection: Continuous monitoring of configuration changes against compliance requirements, addressing the pain point many users express about wanting immediate alerts for non-compliant resources.
  3. Automated Evidence Collection: Simplify audit preparation by automating evidence gathering with tools like AWS Audit Manager, solving the common problem of generating downloadable reports.
  4. Cost Efficiency: Native AWS tools offer a more cost-effective approach compared to SaaS alternatives like Vanta or Secureframe that "charge a hefty fee," as noted by users in online discussions.

Mapping ISO 27001 & SOC 2 to AWS Services

Understanding how compliance frameworks map to AWS services is crucial for effective monitoring.

ISO 27001

ISO 27001 is an international standard for Information Security Management Systems (ISMS) based on Confidentiality, Integrity, and Availability. Key requirements include:

  • Risk Assessment → AWS Config/Security Hub
  • Access Control → AWS IAM
  • Cryptography → AWS KMS
  • Operations Security → AWS CloudTrail/GuardDuty
  • Communications Security → AWS VPC/Security Groups

SOC 2

SOC 2 evaluates security based on five Trust Services Categories: Security, Availability, Processing Integrity, Confidentiality, and Privacy. Key mappings include:

  • Data Protection → AWS KMS/S3 Encryption
  • Network Security → Amazon VPC/AWS WAF
  • Monitoring → Amazon CloudWatch/GuardDuty
  • Access Control → AWS IAM/Organizations
  • Change Management → AWS Config/CloudTrail

The Core AWS Toolset for Continuous Compliance

While there are various approaches to compliance monitoring, including open-source tools like ScoutSuite and SaaS solutions, we'll focus on AWS's native services that provide a powerful, integrated foundation:
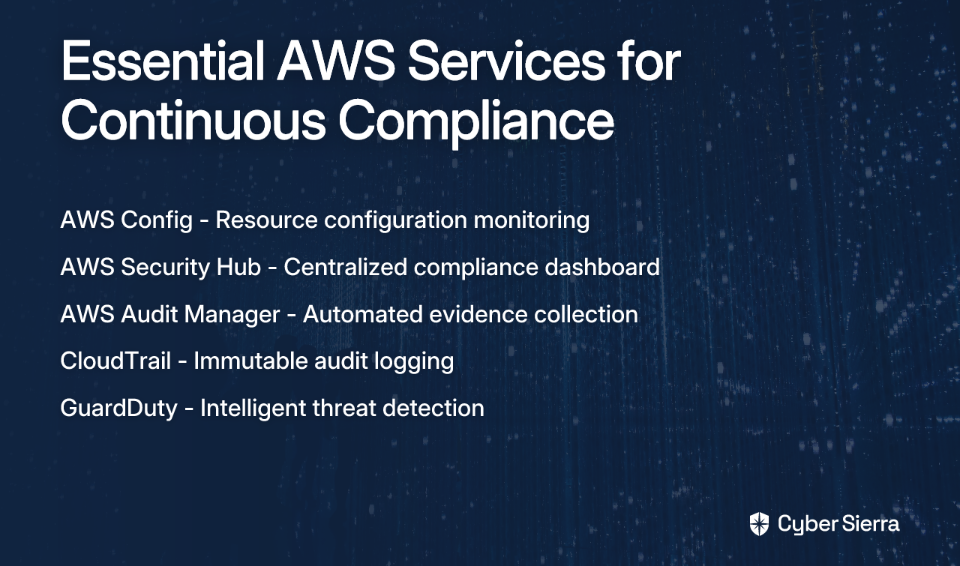
AWS Config

AWS Config is the cornerstone of your compliance monitoring system. It continuously records configuration changes to your resources and evaluates them against desired settings.

Key features:

  • Config Rules: Pre-built and custom rules that check if your resources comply with specific requirements
  • Conformance Packs: Collections of Config Rules that can be deployed as a single entity
  • Remediation Actions: Automated fixes for non-compliant resources

AWS Security Hub

Security Hub serves as your compliance dashboard, directly addressing the need many users express for centralized visibility. It aggregates findings from multiple AWS services and presents a unified view of your security and compliance posture.

Key features:

  • Compliance Standards: Built-in support for standards including CIS AWS Foundations Benchmark, PCI DSS, and AWS Foundational Security Best Practices
  • Security Score: At-a-glance view of your overall compliance status
  • Integrated Insights: Correlation of findings across different services

AWS Audit Manager

AWS Audit Manager bridges the gap between continuous monitoring and periodic audits by automatically collecting and organizing evidence.

Key features:

  • Pre-built Frameworks: Ready-to-use frameworks for standards like ISO 27001 and SOC 2
  • Automated Evidence Collection: Continuous gathering of relevant evidence from AWS services
  • Assessment Reports: Generation of audit-ready reports, solving the pain point of "creating a downloadable report"

Supporting Services

  • AWS CloudTrail: Provides an immutable audit log of all API activity
  • Amazon GuardDuty: Offers intelligent threat detection
  • AWS IAM: Manages access permissions and identity policies
  • AWS Organizations: Enables centralized management across multiple accounts

Step-by-Step Guide to Building Your Monitoring System

Now let's implement a practical, actionable solution for continuous compliance monitoring:

Step 1: Foundational Setup in a Multi-Account Environment

  1. Organize your AWS environment using AWS Organizations. Create dedicated accounts for:
    • Security/Audit (for centralized monitoring)
    • Workloads (dev/test/prod)
  2. Enable AWS Config across all accounts and regions using CloudFormation StackSets or Systems Manager Quick Setup. This addresses the pain of manually running compliance checks that many users face.
  3. Register a delegated administrator for AWS Config in your Security account and set up a central S3 bucket for logs and artifacts.

Step 2: Deploying Compliance Rules with AWS Config Conformance Packs

  1. Create or select appropriate Conformance Packs that align with ISO 27001 and SOC 2 requirements:
Resources:
  ConformancePackForISO27001:
    Type: AWS::Config::ConformancePack
    Properties:
      ConformancePackName: ISO27001-Controls
      DeliveryS3Bucket: {YOUR-S3-BUCKET}
      TemplateS3Uri: s3://{PATH-TO-YOUR-TEMPLATE}/iso27001-template.yaml
  1. Deploy key rules relevant to ISO 27001/SOC 2, such as:
    • cloudtrail-log-file-validation-enabled
    • ec2-security-group-unrestricted-access-check
    • s3-bucket-server-side-encryption-enabled
    • rds-instance-encryption-enabled (directly addressing the concern about unencrypted RDS instances)

Step 3: Centralizing Visibility with AWS Security Hub

  1. Enable Security Hub in your delegated administrator account and turn on standard security best practices.
  2. Configure Security Hub to ingest findings from AWS Config, providing a comprehensive compliance dashboard—exactly what users are looking for when they say "I want to see alerts on my dashboard if any resource is non-compliant."
  3. Set up automated notifications using Amazon SNS to alert your team when critical compliance issues are detected.

Step 4: Automating Evidence Collection with AWS Audit Manager

  1. Create assessments in Audit Manager using pre-built frameworks for ISO 27001 and SOC 2.
  2. Configure automated evidence collection that maps to specific controls in your compliance frameworks.
  3. Generate assessment reports that can be shared with auditors, solving the common pain point of "how can I generate a report or parse all resources against a policy?"

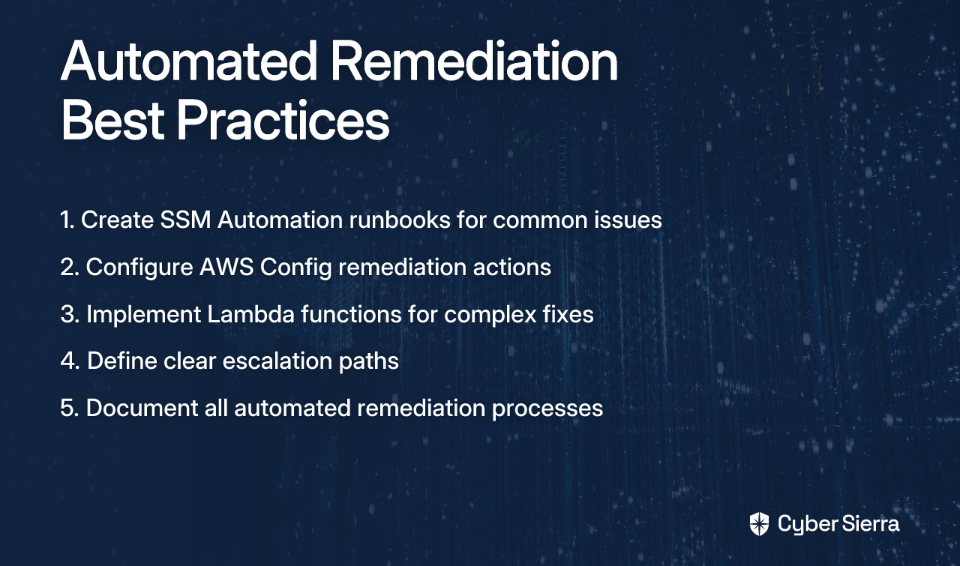
Step 5: Implementing Automated Remediation

  1. Create AWS Systems Manager Automation runbooks or Lambda functions to automatically fix common compliance issues:
Resources:
  RemediationForS3Encryption:
    Type: AWS::Config::RemediationConfiguration
    Properties:
      ConfigRuleName: s3-bucket-server-side-encryption-enabled
      TargetId: AWS-EnableS3BucketEncryption
      TargetType: SSM_DOCUMENT
      Automatic: true
      Parameters:
        BucketName:
          ResourceValue:
            Value: RESOURCE_ID
        SSEAlgorithm:
          StaticValue:
            Values:
              - AES256
  1. Define escalation paths for issues that can't be automatically remediated.

Advanced Strategy: Shifting Left with Compliance as Code

To truly master continuous compliance, integrate compliance checks into your development process:

  1. Pre-deployment checks using tools like AWS CloudFormation Guard to prevent non-compliant infrastructure from being deployed.
  2. Post-deployment continuous monitoring using AWS Config to catch any drift or changes after resources are deployed.

Here's a simple example of a compliance rule written for CloudFormation Guard:

let s3_buckets = Resources.*[ Type == 'AWS::S3::Bucket' ]
rule s3_buckets_must_be_encrypted when %s3_buckets !empty {
  %s3_buckets.Properties.BucketEncryption.ServerSideEncryptionConfiguration[*].ServerSideEncryptionByDefault.SSEAlgorithm exists
}

Addressing Common Questions and Concerns

Cost Considerations

While AWS Config and Security Hub do add costs based on the number of configuration items and rules evaluated, they're generally more cost-effective than SaaS solutions that "charge a hefty fee." Budget $500-1000/month for a medium-sized environment, compared to potentially 5-10x that amount for comprehensive SaaS compliance platforms.

Native AWS Tools vs. Alternatives

  • Native AWS Tools: Deep integration, pay-as-you-go pricing model, but require more setup and AWS expertise
  • SaaS (Vanta, Secureframe): More polished UI and broader policy management but with higher subscription costs
  • Open Source (ScoutSuite): Free and customizable but requires self-hosting and lacks official support

Conclusion

By leveraging AWS's native toolset—Config for monitoring, Security Hub for visibility, and Audit Manager for evidence collection—you can build a robust continuous compliance monitoring system for ISO 27001 and SOC 2 that transforms compliance from a periodic audit nightmare into an ongoing, automated process.

This approach addresses the key pain points expressed by AWS users: real-time compliance alerts, automated checks instead of monthly manual runs, comprehensive reporting capabilities, and cost-effective implementation without the "hefty fees" of third-party solutions.

Most importantly, this system shifts your team from reactive firefighting during audit season to proactive compliance management, letting you focus on innovation rather than documentation hunts and last-minute fixes.

Frequently Asked Questions (FAQ)

What are the essential AWS services for building a continuous compliance system?

The core services are AWS Config, AWS Security Hub, and AWS Audit Manager. AWS Config is used to monitor and record resource configurations, Security Hub aggregates findings into a central dashboard, and Audit Manager automates evidence collection for audits. Together, they form a powerful foundation for continuous compliance monitoring.

How does AWS Config help with compliance automation?

AWS Config automates compliance by continuously evaluating your AWS resource configurations against predefined or custom rules. It acts as the engine of your compliance system. By using Conformance Packs, you can deploy a collection of rules mapped to standards like ISO 27001. When a resource drifts from a compliant state, Config detects it and can even trigger automated remediation actions to fix the issue.

Why use native AWS tools over third-party SaaS solutions?

The primary advantages of using native AWS tools are deeper integration, a pay-as-you-go pricing model, and greater customization, which often results in lower costs. While SaaS solutions like Vanta or Secureframe offer user-friendly interfaces, they come with higher subscription fees. Native tools leverage the AWS ecosystem directly, providing real-time data without API latency and allowing you to build a system tailored to your specific needs.

How can I get real-time alerts for non-compliant resources on AWS?

You can get real-time alerts by integrating AWS Security Hub with Amazon Simple Notification Service (SNS). AWS Config detects a non-compliant resource and sends its finding to Security Hub. You can then configure Security Hub to send these findings to an SNS topic, which can trigger notifications via email, Slack, or other messaging services, ensuring your team is immediately aware of compliance issues.

What is the first step to setting up continuous compliance in a multi-account AWS environment?

The first and most critical step is to establish a proper multi-account structure using AWS Organizations and designate a central Security/Audit account. This centralized account is used to manage your compliance tools. From there, you should enable AWS Config across all member accounts, aggregate logs and findings into the central account, and register it as a delegated administrator for services like Security Hub and Config.

Can this AWS setup be used for other compliance frameworks besides ISO 27001 and SOC 2?

Yes, this setup is highly adaptable and can be used for many other compliance frameworks, such as PCI DSS, HIPAA, and CIS Benchmarks. AWS provides pre-built Conformance Packs and Audit Manager frameworks for various standards. You can select the ones relevant to your needs or create custom rules and frameworks to monitor controls specific to your industry or regulatory requirements.

blog-hero-background-image
Cyber Security

Certificate Transparency Logs: Your Early Warning System for SSL Attacks

backdrop
Table of Contents

Join thousands of professionals and get the latest insight on Compliance & Cybersecurity.


You've invested in SSL certificates, hardened your web servers, and set up regular security scans. But there's a critical blind spot in your security strategy that almost no one is monitoring—one that could give you advance warning of sophisticated SSL-based attacks before they even begin.

"Unless you're monitoring Certificate Transparency logs proactively (virtually noone is) this wouldn't be detected." - Security professional on r/netsec

This blind spot exists because most security professionals don't realize they're sitting on a gold mine of early threat intelligence: Certificate Transparency (CT) logs—a public, permanent record of every trusted SSL certificate issued for your domains.

In this article, you'll discover how to transform these overlooked logs into your own early warning system against phishing campaigns, man-in-the-middle attacks, and other SSL-based threats. We'll cover what CT logs are, how to leverage them defensively, how attackers use them against you, and how to manage the information leakage risks they create.

What is Certificate Transparency? The Public Ledger for the Web

Certificate Transparency is an open framework designed to protect against certificate mis-issuance by logging all certificates to public, append-only logs. These logs create an auditable record that subjects Certificate Authorities (CAs) to public scrutiny.

The system was created in response to several high-profile security incidents, including the 2011 DigiNotar breach where attackers issued fraudulent certificates for major domains like Google and Yahoo. This breach highlighted a fundamental weakness in the web's trust model: we had no reliable way to know when unauthorized certificates were issued for our domains.

Technical Foundations

Certificate Transparency logs are built on a Merkle tree data structure, which enables efficient cryptographic verification of the log's integrity. When a CA issues a certificate, it submits the certificate to multiple CT logs and receives a Signed Certificate Timestamp (SCT) in return—essentially a receipt proving the certificate has been logged.

These SCTs can be delivered to browsers in three ways:

  1. Embedded in the X.509v3 certificate itself
  2. As a TLS extension during the handshake
  3. Via OCSP stapling

What gives CT its teeth is browser enforcement. Google Chrome requires CT log inclusion for all certificates issued after April 30, 2018. Apple maintains its own set of CT requirements for Safari. This means that if a certificate isn't in a public CT log, modern browsers simply won't trust it—making CT a non-negotiable part of the modern web.

The Defensive Playbook: Monitoring Your Digital Footprint

The primary defensive value of CT logs is the ability to get timely alerts for any certificate issued for your domains—authorized or not. This can serve as an early warning system for:

  • Phishing campaigns using lookalike domains
  • BGP hijacking attempts
  • DNS tampering
  • Subdomain takeovers
  • Compromised internal systems requesting certificates

Manual Monitoring (The Quick Check)

For a quick assessment of your current exposure, several free web-based tools provide on-the-spot searches:

Step-by-Step with crt.sh:

  1. Navigate to https://crt.sh
  2. Enter your domain using wildcard notation to capture all subdomains (e.g., %.yourdomain.com)
  3. Review the results, focusing on:
    • Common Names you don't recognize
    • Certificates from unexpected issuers
    • Recently issued certificates that weren't authorized

Other useful interfaces include Google's Transparency Report and Entrust's CT Search.

Automated Monitoring (The Proactive System)

While manual checks are useful, the real power comes from automated, continuous monitoring—the missing piece for most organizations.

Managed Services:

  • Cloudflare Certificate Transparency Monitoring: If you use Cloudflare, enable their free CT monitoring in the Crypto Tab. It automatically emails you whenever a certificate is logged for your domains using their internal "Crawler" tool.
  • SSLMate Cert Spotter: This dedicated commercial tool offers more advanced features like notifications via email, webhooks, or Slack, and helps reduce false positives.

Open-Source Options: For teams that prefer building their own monitoring, several open-source projects tap directly into the CT "firehose":

Incident Response: When You Get a Suspicious Alert

  1. Don't Panic: Most alerts are for legitimate renewals or new services
  2. Investigate: Check internally if any team member or automated process requested the certificate
  3. Contact the CA: If confirmed unauthorized, contact the issuing CA immediately—they have a responsibility to investigate and potentially revoke the certificate

The Offensive Playbook: CT for Reconnaissance

Understanding how attackers use CT logs is crucial for strengthening your defenses. Let's examine their tactics:

Asset Discovery - Building a Target List

Security researchers, penetration testers, and attackers use CT logs as a definitive source for discovering an organization's subdomains, including development, staging, and internal services that may not be publicly linked.

The process is simple:

  1. Query a tool like crt.sh for a target domain (%.target.com)
  2. Harvest all Common Names (CNs) and Subject Alternative Names (SANs)
  3. Build a comprehensive map of the target's infrastructure

Pivoting Through Data

Advanced reconnaissance involves pivoting from one piece of information to another. An analyst might take the Organization (O) field from a discovered certificate and re-query CT logs for that organization's name to find other domains and assets that may not share the same top-level domain.

Identifying Weak Points

Attackers specifically look for:

  • Certificates issued for internal-sounding hostnames (vpn.internal, dev-db.yourdomain.com)
  • Expired certificates, as these often point to forgotten or unmaintained servers that are more likely to be vulnerable
  • Naming patterns that reveal technology stacks or business functions

The Double-Edged Sword: Managing Information Leakage Risks

While CT logs provide significant security benefits, they can also create information leakage risks:

"They were unaware that Certificate Transparency logs existed and they were surprised and worried when I showed them that it's trivial to pull up a publicly-accessible list of sensitive information (unreleased product keywords, customer names, etc) that has been leaked through domain names." - DevOps engineer on r/devops

Because CT logs are public and immutable, any hostname you issue a certificate for is permanently disclosed. This can inadvertently reveal:

  • Internal Infrastructure: jira.internal.corp, git.dev.corp
  • Project Codenames: project-apollo.yourdomain.com
  • Customer Information: acme-corp.yourdomain.com
  • Device FQDNs: printer-4th-floor.office.yourdomain.com

Mitigation Strategies

  1. Use Wildcard Certificates: This is your primary defense. A certificate for *.yourdomain.com logs only that wildcard name, not the specific hostnames it will be used on, obscuring your internal infrastructure from public view.
  2. Implement Strict Naming Conventions: Establish and enforce internal policies for subdomain naming to prevent sensitive information from being used in hostnames that require public certificates.
  3. Regularly Audit Your Public Footprint: Use the monitoring techniques from the "Defensive Playbook" section not just to find malicious certificates, but to audit for accidental information leaks from your own teams.
  4. Implement Certificate Authority Authorization (CAA): Use CAA DNS records to specify which CAs are authorized to issue certificates for your domain. This won't stop leakage but dramatically reduces the risk of unauthorized certificates. SSLMate's CAA Record Helper can simplify this process.

From Passive Hope to Proactive Defense

Certificate Transparency is a mandatory and powerful part of today's web ecosystem. Don't let your organization's security posture remain passive—transform CT logs from a potential information leakage risk into a high-fidelity early warning system.

Take Action Now:

  1. Right Now: Take five minutes to search for your domains on https://crt.sh. See what's already out there.
  2. This Week: Enable an automated monitoring solution. If you use Cloudflare, turn on their free CT monitoring. If not, start a trial of a service like SSLmate's Cert Spotter.
  3. Going Forward: Integrate CT monitoring into your security operations. Make reviewing your public certificate footprint a regular part of your security hygiene.

Frequently Asked Questions

What is Certificate Transparency and why is it important?

Certificate Transparency (CT) is a public framework that logs every trusted SSL/TLS certificate issued, creating a verifiable record to prevent mis-issuance and enhance web security. It's important because it allows domain owners to monitor for unauthorized certificates, providing an early warning against phishing, man-in-the-middle attacks, and other SSL-based threats. Modern browsers like Chrome and Safari require CT logging for a certificate to be trusted.

How can I check for certificates issued for my domain?

You can check for certificates issued for your domain by using free online tools like crt.sh. Simply visit the site and enter your domain name with a wildcard (e.g., %.yourdomain.com) to see a complete list of all publicly logged certificates. This allows you to quickly identify any certificates you don't recognize.

Why should I monitor Certificate Transparency logs?

You should monitor CT logs to get immediate alerts about any new certificates issued for your domains, whether they are authorized or malicious. This proactive monitoring serves as an early warning system. It can help you detect phishing campaigns using lookalike domains, potential DNS or BGP hijacking, and internal security compromises before they escalate into major incidents.

What is the main security risk of Certificate Transparency logs?

The main security risk is information leakage, as CT logs publicly and permanently reveal the hostnames for which certificates are issued. This can expose internal infrastructure details, project codenames, or customer information if they are included in subdomain names (e.g., dev-database.internal.yourcompany.com). Attackers use this information for reconnaissance to map out your digital footprint and identify potential targets.

How can I prevent sensitive information from being leaked via CT logs?

The most effective way to prevent information leakage is by using wildcard certificates (e.g., *.yourdomain.com). A wildcard certificate is logged just once under its wildcard name, obscuring the specific internal hostnames it protects. Additionally, you should implement strict internal naming policies for subdomains and use Certificate Authority Authorization (CAA) records to limit which CAs can issue certificates for your domain.

Can a certificate be removed from a Certificate Transparency log?

No, certificates cannot be removed from CT logs. The logs are designed to be append-only and immutable, which is a core feature of their security model. This permanence ensures a complete and tamper-proof historical record. If an unauthorized certificate is discovered, the correct procedure is to have the issuing Certificate Authority (CA) revoke it, but the record of its issuance will remain in the log.

By taking these steps, you move from the majority who are unaware to the prepared minority, turning a public requirement into a private security advantage. In the cat-and-mouse game of cybersecurity, Certificate Transparency logs give you a rare opportunity to see your attacker's moves before they happen—but only if you're watching.

blog-hero-background-image
Cyber Security

How to Implement CISA Emergency Directives Without Burning Out Your Security Team

backdrop
Table of Contents

Join thousands of professionals and get the latest insight on Compliance & Cybersecurity.


You've just received another CISA Emergency Directive. Your inbox pings with the notification, and that familiar knot forms in your stomach. The directive demands immediate action on critical Cisco ASA vulnerabilities, with a tight compliance deadline that seems impossible to meet. Your already-stretched security team looks up from their screens with resignation in their eyes. "When will it end?" someone mutters, voicing what everyone is thinking.

Sound familiar? You're not alone.

The relentless cycle of emergency directives, vulnerability assessments, and patch management has created an unspoken crisis in cybersecurity teams across organizations. A staggering 63% of Security Operations Center (SOC) professionals report experiencing burnout due to increasing workloads, according to Tines' "Voice of the SOC 2023" report. Even more alarming, cybersecurity professionals now face burnout levels that exceed those of frontline healthcare workers, as revealed in recent Kyndryl research.

As a CISO, you're caught in the middle—responsible for maintaining your organization's security posture while also protecting the wellbeing of your team. This guide will provide you with actionable strategies for implementing CISA Emergency Directives effectively while preventing your security team from burning out in the process.

The High Stakes of a Stressed Security Team

Burnout isn't just a human resources issue—it's a critical vulnerability in your security posture. Consider these alarming statistics:

  • SOC teams can receive between 10,000 to 20,000 alerts per week, with 59% reporting they feel overwhelmed by the sheer volume, according to Cisco's Global State of Security Report.
  • The average Mean Time To Respond (MTTR) to security incidents is 2.3 days using traditional methods, a delay that can be catastrophic when dealing with zero-day vulnerabilities, per ReliaQuest's Annual Threat Report.

When your team operates under constant pressure, several critical risks emerge:

  1. Alert Fatigue: Team members begin to tune out alerts, increasing the chance that genuine threats slip through.
  2. Increased Human Error: Exhausted security professionals make mistakes in configuration, analysis, or remediation.
  3. Knowledge Silos: Under pressure, documentation and knowledge sharing suffer, creating single points of failure.
  4. Delayed Response Times: Overwhelmed teams take longer to respond to incidents, expanding the attack window.
  5. Talent Attrition: Burnout leads to turnover, and replacing skilled security professionals can take 6-9 months.

The solution isn't working harder—it's working smarter. Let's look at how to deconstruct an emergency directive and implement it without breaking your team in the process.

Deconstructing the Directive: A Tactical Approach to ED-25-03

To demonstrate a sustainable approach, let's use CISA's ED-25-03 (addressing Cisco ASA and Firepower vulnerabilities) as our case study.

This directive targeted zero-day vulnerabilities (including CVE-2025-20333 and CVE-2025-20362) that allow attackers to gain persistence below the operating system level, making simple reboots ineffective as a remediation strategy. Many organizations struggled with the complexity and urgency of this directive, as noted in discussions among security professionals.

Instead of viewing the directive as one massive, overwhelming task, break it down into manageable components:

  1. Step 1: Inventory all in-scope devices
    Create a detailed inventory of all Cisco ASA and Firepower devices, including those in less obvious places like labs or testing environments.
  2. Step 2: Perform core dump & forensic analysis
    For all public-facing devices, follow CISA's specific procedures to collect and analyze core dumps by the deadline.
  3. Step 3: Respond to detected compromises
    If a compromise is found, immediately disconnect the device from the network but keep it powered on for forensic analysis.
  4. Step 4: Handle non-compromised devices
    Disconnect end-of-support devices or apply necessary patches to supported devices promptly.
  5. Step 5: Report to CISA
    Submit a complete inventory and a report of actions taken by the stipulated deadline.
  6. Step 6: Engage for ongoing support
    Maintain communication with CISA for further guidance.

With this roadmap in mind, let's explore how to implement these steps while protecting your team's wellbeing.

The CISO's Playbook: Strategies for Sustainable Implementation

Process: Proactive Planning & Intelligent Workload Distribution

1. Develop a Phased Action Plan

Instead of scrambling when a directive hits, build a structured approach that your team can follow for any emergency directive:

  • Preparation & Planning: Maintain an updated inventory of critical assets and assign clear roles before a directive is issued.
  • Detection & Triage: Establish procedures for running integrity checks and classifying devices as suspect, clean, or unknown.
  • Containment: Create a playbook for quickly isolating suspected devices.
  • Remediation & Recovery: Define procedures for replacing or reimaging compromised devices.
  • Post-Incident Review: Schedule time to analyze what worked and what didn't to refine your approach.

2. Create Buffer Timelines

One of the most effective strategies mentioned by security leaders is building slack into project plans. While CISA directives have firm deadlines, your internal timeline should include:

  • A buffer period before the official deadline (typically 20-25% of the total time allocated)
  • Designated "focus time" where the team can work without interruption
  • Explicit handoff points between team members

"Creating a timeline buffer can alleviate some of the pressure on teams," noted one security leader in a Reddit discussion on CISA directives.

3. Distribute the Workload

Analyze your team's capacity before assigning tasks. For ED-25-03 implementation, you might:

  • Assign inventory tasks to junior team members
  • Have mid-level engineers handle patch application
  • Reserve forensic analysis for your most experienced staff

Implement a rotation system for after-hours monitoring to ensure no single person bears the entire burden of around-the-clock vigilance.

4. Prioritize Ruthlessly

With so many vulnerabilities reported, it's essential to establish a clear ranking system:

  • Use CVSS scores as a starting point
  • Factor in the exposure of affected systems (public-facing vs. internal)
  • Consider business criticality of impacted services
  • Evaluate the existence of active exploits in the wild

Technology: Automation and Tool Consolidation

1. Reduce Tooling Complexity

Security teams using 11-24 different tools experience significant inefficiencies. When implementing emergency directives like ED-25-03, tool sprawl becomes an even bigger liability. Consider:

  • Consolidating vulnerability management, patch management, and compliance reporting tools into a unified platform
  • Implementing single-pane-of-glass solutions that provide holistic visibility across your environment
  • Retiring redundant tools that create additional alert noise

2. Implement Smarter Security Automation

Automation is crucial for managing the high volume of alerts associated with emergency directives:

  • Set up automated inventory scanning to quickly identify affected Cisco ASA and Firepower devices
  • Create automated triage workflows that separate critical alerts from noise
  • Use automated patch verification to confirm successful remediation
  • Deploy tools that can correlate alerts to reduce duplicate work

3. Use Behavior-Based Analysis

Shift from signature-based detection to monitoring user patterns and flagging anomalies. This approach reduces false positives and allows the team to focus on genuine threats, particularly important when dealing with zero-day vulnerabilities like those addressed in ED-25-03.

People: Prioritizing Mental Health and Resilience

1. Normalize the Conversation

Foster a culture where it's acceptable to discuss stress and burnout. Cybersecurity professionals are often on call 24/7, which significantly impacts mental health:

  • Hold regular check-ins specifically focused on team wellbeing, not just project status
  • Share resources like Cybermindz.org, which offers tools for recognizing burnout signs in cybersecurity professionals
  • Lead by example by discussing your own stress management strategies

2. Build Strong Resilience

Implement training and workshops on stress management specific to high-pressure security situations:

  • Offer mindfulness and stress reduction techniques tailored for security professionals
  • Provide clear escalation paths for when team members feel overwhelmed
  • Create "no meeting" blocks during intensive directive implementation periods

3. Provide Tangible Support

  • Ensure access to mental health professionals and counseling services
  • Consider temporary staff augmentation during directive implementation
  • Implement mandatory time off after intensive response periods
  • Recognize and reward extraordinary efforts during emergency response

Real-World Success: Learning from the Field

The Proactive Planner

A financial services organization maintained a continuously updated asset inventory using automated discovery tools. When ED-25-03 was issued, they immediately identified all in-scope Cisco devices, bypassing the most time-consuming first step. This gave their team a 48-hour head start on the forensic analysis phase and significantly reduced stress levels.

The Automation Adopter

A healthcare provider leveraged an integrated security platform with strong automation capabilities to handle the initial triage of alerts related to the Cisco vulnerabilities. Their system automatically categorized devices based on exposure level and potential impact, allowing senior analysts to focus on complex forensic tasks instead of metadata gathering. This reduced their MTTR by 60% compared to previous emergency directives.

The People-First Leader

One CISO at a government contractor immediately held a team meeting upon the directive's release to set expectations, acknowledge the pressure, and remind the team of available mental health resources. They implemented a rotating "on-call" schedule for the directive response, ensuring no team member worked more than 10 hours per day. Despite the high-pressure situation, they reported no attrition during or after the incident.

Conclusion: Building a Resilient Security Program

Effective CISA directive implementation requires a balanced approach:

  • Process: Create structured, repeatable response processes with built-in buffer time
  • Technology: Leverage automation and consolidate tools to reduce alert fatigue
  • People: Prioritize team wellbeing as a critical component of security posture

Remember: A burned-out security team is the biggest vulnerability your organization can have. By implementing these strategies, you can maintain compliance with critical security directives like ED-25-03 while fostering a sustainable environment for your team.

As one security leader put it: "The goal isn't just to survive this directive—it's to build a resilient program that can handle whatever comes next without breaking our people in the process."

By shifting from a culture of constant reaction to one of sustainable readiness, you'll not only better implement emergency directives but strengthen your overall security posture through a healthier, more effective team.

Frequently Asked Questions (FAQ)

What is a CISA Emergency Directive and why is it so stressful for security teams?

A CISA Emergency Directive is a mandatory order for U.S. federal agencies to address a critical cybersecurity vulnerability. It is highly stressful for security teams due to its tight, non-negotiable deadlines, the complexity of the required actions, and the high stakes of protecting critical infrastructure from active threats.

How can CISOs prevent team burnout when responding to an emergency directive?

CISOs can prevent team burnout by adopting a balanced strategy that focuses on improving processes, leveraging technology, and prioritizing people. This includes creating a phased action plan with buffer timelines, automating repetitive tasks like inventory and triage, consolidating security tools, and actively promoting a culture that supports mental health and resilience.

What is the first step my team should take when a new CISA directive is released?

The first and most critical step is to deconstruct the directive into a manageable, tactical plan instead of treating it as a single, overwhelming task. This process should begin with immediately identifying all in-scope assets and devices (a task made much faster with a pre-existing inventory) before moving on to triage, containment, and remediation.

What are the biggest security risks of having a burned-out SOC team?

The biggest security risks from a burned-out security team are increased human error, delayed incident response times, and a higher likelihood of missing critical threats. Burnout leads directly to alert fatigue, where genuine threats are overlooked, and exhausted professionals are more prone to making mistakes, ultimately expanding the attack window for adversaries.

Why is tool consolidation and automation so important for managing directives?

Tool consolidation and automation are crucial because they directly combat the alert fatigue and human error that drive burnout. Automating tasks like asset discovery, alert triage, and patch verification allows security experts to focus on high-value activities like forensic analysis. Consolidating tools into a unified platform reduces complexity and provides a clearer view of the security environment, enabling faster, more accurate responses.

How can I support my security team's mental health during a high-pressure incident?

You can support your team’s mental health by normalizing conversations about stress, providing tangible support, and leading by example. This includes holding regular check-ins focused on wellbeing, ensuring access to mental health resources, and implementing practical measures like rotating on-call duties and enforcing mandatory time off after the incident is resolved.

blog-hero-background-image
Cyber Security

What Small Organizations Get Wrong About CISA Emergency Directives

backdrop
Table of Contents

Join thousands of professionals and get the latest insight on Compliance & Cybersecurity.


When the Cybersecurity and Infrastructure Security Agency (CISA) issues an Emergency Directive, the reaction in many small IT shops is a familiar mix of stress and confusion. If you've ever found yourself staring at the technical details of a critical Cisco ASA vulnerability wondering "how am I supposed to handle this with my limited resources?" — you're not alone.

The flood of security alerts, patch requirements, and compliance deadlines can feel overwhelming when you're already stretched thin. As one IT manager recently shared, "CISA's emergency directive feels overwhelming and confusing to implement, especially for smaller teams without dedicated resources."

While Emergency Directives are technically binding only for federal civilian Executive Branch agencies, they serve as critical warning signals for organizations of all sizes. For resource-constrained environments, these directives aren't just government mandates—they're expert-vetted threat intelligence and prioritized action plans available at no cost.

This article will demystify CISA Emergency Directives for smaller organizations, highlighting common mistakes, practical compliance strategies, and funding opportunities that won't break your already-strained budget.

Mistake #1: The "Not for Us" Mindset

The most dangerous misconception small organizations have about CISA Emergency Directives is dismissing them with a simple "that doesn't apply to us." This thinking typically stems from two flawed assumptions:

  1. "These directives are only for federal agencies."
  2. "We're too small to be a target."

While it's true that Emergency Directives are only binding for federal agencies, the vulnerabilities they address affect organizations of all sizes. Cyber actors don't discriminate based on your organization chart or budget—they exploit the same technical vulnerabilities regardless of who owns the system.

The reality is sobering: 88% of small business owners feel their businesses are vulnerable to cyberattacks, according to recent SBA findings. This widespread recognition of the threat exists even when action is delayed or deemed too expensive.

When CISA issues an Emergency Directive about critical vulnerabilities in Cisco Firepower or ASA devices, the underlying security risk applies to any organization using that technology. The directive simply serves as an early warning system and a prioritized action plan developed by some of the nation's top cybersecurity experts.

Even more damaging than ignoring directives entirely is misinterpreting their scope or requirements. This leads to either:

  • Taking insufficient action that leaves you vulnerable, or
  • Wasting precious resources on unnecessary measures

For small organizations, every security dollar and staff hour counts. Misinterpreting directive requirements means either wasted resources or persistent vulnerabilities—neither of which you can afford.

Mistake #2: Neglecting the Basics in a Rush to Comply

When an Emergency Directive highlights a complex vulnerability in a specific application or system, there's a tendency to hyper-focus on that particular issue while neglecting fundamental security controls. This reactive approach leaves your organization vulnerable despite your compliance efforts.

"It's frustrating to constantly patch systems and still face new vulnerabilities," shared one IT administrator. This sentiment reveals a common pattern: organizations scramble to address the specific vulnerability in the directive but fail to strengthen their overall security posture.

According to CISA's own findings, cyber actors most frequently exploit poor security configurations, weak controls, and neglected cyber hygiene to gain initial access. The most common attack vectors include:

  1. Exploiting public-facing applications
  2. Leveraging external remote services (VPNs, RDP)
  3. Conducting phishing attacks
  4. Abusing trusted relationships
  5. Utilizing valid accounts

A stark example comes from a Shadowserver scan that discovered 84% of over 450,000 Kubernetes API instances allowed some form of access—indicating widespread and serious misconfigurations that attackers could easily exploit.

Before diving into directive-specific remediation, ensure you've implemented these critical basics:

  • Multi-Factor Authentication (MFA): The single most effective control to prevent unauthorized access
  • Strong, Unique Passwords: Move away from password reuse
  • Regular Software Updates: Don't let known vulnerabilities linger
  • Phishing Awareness Training: Empower employees to recognize threat management techniques

Mistake #3: Believing Compliance Requires a Blank Check

Perhaps the most pervasive misconception is that proper compliance with security directives requires substantial financial investment. Many small organizations assume they need enterprise-grade security tools to properly address vulnerabilities identified in Emergency Directives.

"Smaller organizations can't allocate funds for additional tools or personnel, making it harder to comply," noted one IT leader in a recent discussion about CISA directives.

This perception often leads to one of two equally problematic outcomes:

  • Giving up on compliance entirely
  • Overspending on unnecessary tools while neglecting more effective, low-cost measures

The truth is that CISA and other federal agencies provide a wealth of free tools, services, and assessments specifically designed to help resource-constrained organizations improve their security posture.

CISA maintains an extensive library of free cybersecurity services and tools that can help organizations of all sizes implement robust security controls without breaking the bank. These include vulnerability scanning services, incident response planning tools, and security assessment frameworks.

A Practical Roadmap: Cost-Effective Compliance & Funding

Instead of viewing CISA Emergency Directives as overwhelming mandates, approach them as opportunities to systematically improve your security posture within your resource constraints. Here's a practical roadmap:

1. Prioritize with a Zero-Trust Mindset

Adopt the Zero-Trust principle—"never trust, always verify"—as your guiding framework. For small organizations, this starts with network segmentation to limit an attacker's movement if they breach your perimeter.

When addressing Emergency Directives, prioritize actions according to CISA's recommended mitigations:

  1. Strengthen authentication (implement MFA wherever possible)
  2. Restrict remote capabilities for administrative accounts
  3. Use vulnerability scanning tools (many are free through CISA)
  4. Change all default credentials
  5. Establish centralized log management

2. Leverage Free Tools and Services

Take advantage of the numerous free resources CISA provides:

These tools can significantly improve your security posture without requiring additional budget allocation.

3. Find the Funding

Despite budget constraints, there are substantial funding opportunities specifically designed for small organizations:

State and Local Cybersecurity Grant Program (SLCGP):

  • Total funding: $1 billion over four years
  • FY 2025 funding: $91.7 million announced by DHS
  • Key detail: States must allocate at least 80% of funds to local governments, with 25% of that 80% specifically earmarked for rural areas

For local government entities, this means substantial funds are available and specifically allocated for smaller, resource-constrained organizations. Visit CISA's SLCGP page for application details.

Small Business Administration (SBA) Grants: The SBA recently awarded $3 million for cybersecurity pilot programs through universities to help small businesses enhance their security posture. These programs demonstrate the federal commitment to funding security improvements at the small business level.

Stay informed about these opportunities through the SBA's cybersecurity resources and upcoming events like the SBA's annual Cybersecurity Summit.

Strength in Numbers: Leveraging Community and Shared Services

Small organizations don't have to face cybersecurity challenges alone. One of the most overlooked strategies for effective compliance is collaboration.

Shared Services

Consider forming cooperative agreements with other local organizations to share the cost of cybersecurity tools, expertise, and personnel. Many vulnerability assessment tools, patch management systems, and information security monitoring solutions become more affordable when the cost is distributed across multiple entities.

Community Training and Information Sharing

Take advantage of free or low-cost training opportunities that build critical skills:

  • Attend CISA's State, Local, Tribal, and Territorial Stakeholder Cybersecurity Fundamentals Workshops
  • Utilize CISA's Tabletop Exercise Packages to improve incident response preparedness
  • Participate in information sharing communities to stay ahead of emerging threats

Active participation in these communities not only improves your technical capabilities but also creates valuable relationships with peers facing similar challenges.

From Reactive Compliance to Proactive Resilience

When the next CISA Emergency Directive arrives in your inbox, remember that it's more than just another security burden—it's expert-vetted threat intelligence delivered directly to you at no cost.

The key to effective compliance isn't unlimited resources; it's strategic implementation:

  1. Shift your mindset: View directives as roadmaps, not just mandates
  2. Master the basics: Solid cyber hygiene is your best defense
  3. Use free resources: CISA offers numerous no-cost tools and services
  4. Apply for funding: Explore SLCGP and SBA grant opportunities
  5. Collaborate: Share costs and expertise with peer organizations

By implementing these strategies, even the smallest organizations can build sustainable, resilient security programs that effectively manage risk without breaking the bank. The cycle of vulnerabilities may continue, but your ability to respond efficiently and effectively will dramatically improve.

Remember that cybersecurity isn't about achieving perfection—it's about continuous improvement and risk management within your constraints. With the right approach, even resource-constrained organizations can effectively respond to CISA Emergency Directives and meaningfully enhance their security posture.

Frequently Asked Questions

What is a CISA Emergency Directive and does my organization have to comply?

CISA Emergency Directives are technically only mandatory for federal civilian agencies, but they serve as critical, expert-vetted security warnings for all organizations. While you are not legally required to comply if you are not a federal agency, ignoring them is a significant risk. The vulnerabilities they highlight affect organizations of all sizes, and the directives provide a prioritized action plan from top cybersecurity experts, available at no cost. Treating them as urgent security intelligence is a best practice for protecting your organization.

How can a small organization afford to comply with CISA directives?

Small organizations can afford compliance by leveraging a wealth of free tools and services from CISA and pursuing specific federal grants designed for state, local, and small business cybersecurity. Compliance doesn't require a blank check. CISA offers free resources like vulnerability scanning and incident response planning tools. Furthermore, programs like the State and Local Cybersecurity Grant Program (SLCGP) and SBA grants provide billions of dollars in funding specifically to help resource-constrained organizations improve their security posture.

Where is the best place to start when a new CISA directive is issued?

The best place to start is by ensuring your fundamental security controls are in place before focusing on the specific vulnerability mentioned in the directive. Cyber attackers most often exploit basics like weak passwords or missing multi-factor authentication (MFA). Before tackling the directive's specific technical details, confirm that you have implemented essential cyber hygiene practices like MFA, strong password policies, regular software updates, and phishing awareness training. Once the basics are covered, use the directive's guidance to prioritize actions for the specific threat.

What are the most common security mistakes small organizations make with CISA directives?

The most common mistakes are incorrectly believing CISA directives don't apply to them, neglecting basic security hygiene in a rush to patch a specific vulnerability, and assuming effective security is too expensive. These mistakes create a false sense of security. Ignoring directives leaves you exposed to known threats. Focusing only on a specific patch while neglecting MFA or strong passwords leaves you vulnerable to simpler attacks. Finally, assuming you can't afford security causes inaction, when many of the most effective controls and tools are free.

What is the single most effective security measure a small business can implement?

The single most effective security measure to prevent unauthorized access is implementing multi-factor authentication (MFA) wherever possible. MFA adds a critical layer of defense that can block attackers even if they have stolen valid credentials, such as a username and password. CISA and other cybersecurity experts consistently recommend MFA as a top priority for all organizations because it effectively mitigates a wide range of common cyberattacks.

blog-hero-background-image
Cyber Security

Beyond Basics: Advanced Reading for Seasoned CISOs

backdrop
Table of Contents

Join thousands of professionals and get the latest insight on Compliance & Cybersecurity.


You've mastered the technical fundamentals. You understand enterprise security architecture inside and out. Now, as an experienced CISO, you're looking for something more—literature that challenges your thinking, expands your perspective, and helps you evolve from a technical expert into a true security leader.

As one seasoned CISO noted, "I did mean specifically big-picture, self-help, philosophy of security leadership type things." This sentiment echoes across the infosec community as security leaders increasingly seek resources that address the strategic and philosophical dimensions of their role.

The Post-Technical CISO Journey

Today's CISO role has evolved dramatically. No longer just the technical guardian, you're now a business executive who must align security with organizational objectives, communicate effectively with boards, and navigate complex political landscapes.

"I don't find myself reading many technical books anymore," confessed one security leader. "Most of my reading has to do with the specific industry I'm in, leadership, or more recently, public speaking/storytelling." This shift reflects the maturation of the CISO position—and demands a different kind of reading list.

The challenge is compounded by the rapid evolution of our field. "We work in cybersecurity, and it evolves EVERY SINGLE DAY. Books published in 2018 don't seem to be as relevant anymore." This reality requires a reading framework focused on timeless principles and contemporary insights that remain valuable despite changing technologies.

The New Imperative: Strategic Thinking in a Hyper-Threat Landscape

According to the World Economic Forum's Global Cybersecurity Outlook 2025, 72% of businesses report that their cybersecurity risks are increasing. Nearly half of leaders cite the malicious use of generative AI as a significant concern, while 60% indicate that geopolitical tensions directly influence their cybersecurity strategies.

This complex landscape demands a strategic mindset. As noted in a recent analysis of cybersecurity strategic thinking, post-pandemic shifts and ongoing geopolitical tensions require CISOs to move beyond tactical responses to long-term strategic planning.

The modern CISO must not only prevent breaches but build sustainable cyber resilience that enables business growth. This requires deep understanding of risk, strategy, and human behavior—topics that extend far beyond traditional technical reading.

A Curated Reading Framework for the Modern CISO

To address these challenges, I've developed a reading framework organized into four essential categories that speak to the multifaceted responsibilities of today's security leader.

Category 1: Mastering Strategic Leadership & Business Acumen

For the CISO looking to "transform into a business executive" and effectively influence boards:

Category 2: Building Resilient and Future-Proof Programs

For creating adaptive, resilient security postures that withstand evolving threats:

Category 3: The Philosophy of Security & Human Dynamics

For those seeking deeper insights into the "why" behind security challenges:

  • Why CISOs Fail, 2nd Edition by Barak Engel
    Goes beyond technical failures to examine human behavior in cybersecurity. It introduces thought-provoking concepts like "digital shrinkage" and the evolution from a CISO (Chief Information Security Officer) to a CI/SO (Chief Information and Security Officer).
  • How to Measure Anything in Cybersecurity Risk by Douglas W. Hubbard & Richard Seiersen
    Challenges traditional risk management methods, offering a philosophical shift toward quantitative, data-driven decision-making that provides a new lens for articulating risk to business stakeholders.

Category 4: Expanding Influence Through Communication and Soft Skills

For the CISO navigating what can be "a highly stressful, political, and lonely gig":

  • Premier CISO – Board & C-suite: Raising the Bar for Cybersecurity by Michael S. Oberlaender
    Focuses specifically on communication strategies for engaging boards and executive leadership—a critical skill set for modern CISOs who must translate complex technical concepts into business language.
  • Never Split the Difference by Chris Voss
    While not a cybersecurity book, its lessons on negotiation are invaluable for CISOs who must secure budget, influence policy, and manage stakeholders during crises—skills repeatedly mentioned as essential by practicing security leaders.
  • Deep Work by Cal Newport
    Addresses the challenge of maintaining focus in a demanding role, helping CISOs carve out time for the strategic thinking that distinguishes exceptional leadership from mere management.

Beyond the Bookshelf: Essential Resources for Continuous Learning

In a field that "evolves EVERY SINGLE DAY," books are only part of the solution. The modern CISO needs dynamic resources that provide up-to-date insights:

  • The Cyber Security Canon: This curated, peer-reviewed list from Palo Alto Networks identifies seminal works that have shaped the cybersecurity field—a valuable filter for identifying truly impactful reading.
  • Cyber Leadership Institute's CISO Playbooks: These concise, actionable guides address specific challenges like Protecting Crown Jewels and Cyber Resilience Governance—perfect for the busy CISO who needs practical frameworks.
  • World Economic Forum Reports: Publications like the Global Cybersecurity Outlook provide essential macro-level insights that inform strategic planning in an increasingly complex threat landscape.
  • Peer Communities: The Cyber Leadership Hub offers a platform for accessing playbooks, discussions with fellow CISOs, and industry news—addressing the expressed need for collaborative knowledge sharing among security leaders.

Cultivating the Mind of a Security Leader

The journey for a seasoned CISO is one of intellectual expansion. Your evolution from technical expert to strategic business leader requires understanding risk, resilience, and human dynamics at a profound level.

The most effective security leaders are continuous learners who draw wisdom from diverse fields. Their reading habits reflect a commitment not just to protecting the organization but to leading it through a complex digital world.

As one CISO noted, reading time becomes "very much 'my time'"—a precious opportunity for personal and professional growth. The framework presented here aims to maximize that time by focusing on literature that challenges conventional thinking and expands your leadership perspective.

This list is just a starting point. The cybersecurity community thrives on shared knowledge and collaborative learning. What books or resources have fundamentally changed your perspective as a security leader? The conversation continues, and your insights enrich us all.

Frequently Asked Questions

Why should experienced CISOs read non-technical books?

Experienced CISOs should read non-technical books to develop the strategic, business, and leadership skills required to evolve from a technical expert into an effective business executive. The modern CISO role extends beyond technical oversight to include aligning security with business objectives, communicating complex risks to the board, and navigating organizational politics. Books on leadership, strategy, and communication provide the frameworks needed to master these critical aspects of the job.

What are the most critical skills for a CISO in today's threat landscape?

The most critical skills for a modern CISO are business acumen, strategic thinking, and effective communication, particularly with executive leadership and the board. While technical expertise is the foundation, today's hyper-threat landscape demands that CISOs operate as strategic business partners. The ability to articulate cyber risk in terms of business impact and build a resilient organization is paramount.

How can I stay current if cybersecurity books become outdated so quickly?

You can stay current by focusing on books that teach timeless principles of strategy and leadership while supplementing them with dynamic, up-to-date resources. While specific technologies change, the fundamentals of risk management, communication, and strategic thinking do not. Complement your reading with continuous learning from resources like the World Economic Forum's reports, the Cyber Security Canon, and peer communities that provide contemporary insights.

Which book category is best for improving communication with the board?

The category "Expanding Influence Through Communication and Soft Skills" is specifically curated to help CISOs improve their communication with boards and C-suite executives. Books like Premier CISO – Board & C-suite focus directly on engagement strategies for executive leadership, helping you translate technical concepts into the language of business risk and opportunity that resonates with the board.

What is the main benefit of adopting a "Zero Trust" strategy?

The main benefit of adopting a "Zero Trust" strategy is that it aligns security directly with business operations by shifting from a perimeter-based defense to a more granular, identity-centric model. As detailed in books like Project Zero Trust, this approach is not just a technical architecture but a strategic philosophy that enables secure digital transformation by focusing on protecting critical data and workflows.

Where can CISOs find practical, actionable guides for specific challenges?

CISOs can find practical, actionable guides in resources like the Cyber Leadership Institute's CISO Playbooks, which offer concise frameworks for specific challenges. These playbooks are designed for busy executives and cover critical topics like protecting "crown jewel" assets and implementing cyber resilience governance, providing ready-to-use tools for immediate application.


This article incorporates insights from practicing CISOs and security leaders who generously shared their experiences and recommendations in online forums. Their collective wisdom informs this reading framework for the next generation of cybersecurity leadership.

blog-hero-background-image
Cyber Security

Server Room Security 101: Protecting Your Database Infrastructure

backdrop
Table of Contents

Join thousands of professionals and get the latest insight on Compliance & Cybersecurity.


You've encrypted your data, configured firewalls, and restricted user permissions. But what happens when someone can just walk into your server room? As one concerned admin on Reddit put it, "they can still sneak into the room that our server is in and manipulate the db... is there a way to prevent that?"

This anxiety is well-founded. Gaining physical access to your database servers means it's essentially game over for your security measures. Your most advanced digital database security protocols are rendered meaningless without robust physical security protecting the hardware they run on.

In this guide, we'll cover the fundamentals of server room protection, addressing the physical security measures that form the foundation of comprehensive database security, and provide cost-effective solutions that work for organizations of all sizes.

Why Physical Access is "Game Over" for Database Security

When someone asked, "Manipulate the database in what way?" on a Reddit thread, they were missing a crucial point: physical access to servers doesn't merely allow database manipulation—it enables total system compromise.

Here's what an intruder with physical access can do:

  1. Direct Hardware Access: They can connect a keyboard and monitor, reboot the server into maintenance or single-user mode, and reset administrator passwords.
  2. Data Exfiltration: Hard drives can be physically removed from servers and copied, bypassing all encryption that's only active when the system is running.
  3. Malicious Hardware Installation: Devices like keyloggers or network taps can be surreptitiously installed to capture credentials or data.
  4. Bypassing Network Security: Direct console access bypasses all network firewalls and intrusion detection systems.

As one security expert bluntly stated: "This has nothing to do with database security, and everything to do with physical security of your assets." In reality, they're two sides of the same coin—your database security can only be as strong as the physical security protecting it.

The Three Pillars of Server Room Defense

Pillar 1: Fortifying the Gates - Access Control

The most basic question from our user research is also the most critical: "Why is anyone able to 'sneak into the room'? Why is this room not secured properly?"

Implementing strict access controls should be your first priority:

  • Locks and Keys: At minimum, use high-quality commercial locks and maintain strict key control policies. Know who has keys and change locks when keys are lost or employees depart.
  • Modern Access Control Systems: Cloud-based systems offer enhanced security through features like:
    • Remote access management
    • Digital visitor logging
    • Integration with alarms and surveillance
    • Audit trails that log every entry and exit
  • Visitor and Staff Policy: Create and enforce a clear policy that no unauthorized personnel may enter the server room. All visitors must be logged and escorted at all times.
  • Surveillance and Monitoring: Install cameras at all entry points to deter unauthorized access and record any security violations. Door alarms can provide immediate alerts when doors are opened or propped open.

Pillar 2: Taming the Environment - Climate and Condition Monitoring

Insider threats aren't your only concern. Environmental factors can be just as dangerous to your database infrastructure:

  • Heat Management: Servers generate extreme heat. A single server can consume 1,200 watts per hour—comparable to eight refrigerators. Overheating leads to performance degradation, hardware failure, and potential data corruption.
  • Best Practice: Maintain a stable temperature between 65°F and 71°F using a dedicated HVAC system.
  • Proactive Environmental Monitoring: Use IoT-enabled sensors for real-time data on:
    • Temperature and relative humidity
    • Air quality index (AQI)
    • Particulate matter 2.5 (PM 2.5)
    • Total volatile organic compounds (TVOCs)
    • Noise levels and motion

Modern sensors can send instant email/SMS alerts when custom thresholds are breached, preventing damage before it happens.

Pillar 3: Strategic Design - Building a Secure Foundation

The physical design of your server room is crucial for both security and operational efficiency:

  • Location: The server room should be a dedicated space, not a converted closet. It should be centrally located, away from exterior walls, and shielded from potential fire and flood hazards.
  • Physical Room Specifications:
    • Windowless: Prevents solar heat gain and physical breaches
    • Ceiling Height: Minimum of 9 feet for proper heat dissipation
    • Door Dimensions: At least 42 inches wide and 8 feet tall for equipment access
    • Flooring: Antistatic materials to prevent electrostatic discharge
  • Equipment and Electrical Requirements:
    • Server Racks: Use professionally installed, grounded racks
    • Aisle Space: Maintain at least 4 feet of clearance between server aisles
    • Power: Implement backup power systems (UPS and/or generator)
    • Cable Management: Regularly inspect cables for wear and tear

Practical & Cost-Effective Security for SMBs

Small and medium-sized businesses face the same threats but often with tighter budgets. Here's how to prioritize your security investments:

  • Start with the Basics: A high-quality deadbolt lock and a strict key-access list is the most cost-effective security measure you can implement.
  • Develop Clear Security Protocols: Create written procedures for who can access the room and when, and ensure all staff understand them.
  • Scalable Technology:
    • Cloud-based access control systems can be surprisingly affordable, with options to pay per door, allowing you to start small and scale up.
    • Basic environmental sensors and IP cameras have become increasingly budget-friendly while providing crucial protection.
  • Smart Planning: Many design principles (like choosing a windowless room) cost nothing to implement during initial setup but provide significant security benefits.

Beyond the Hardware: Cultivating a Security Culture

Technology is only as effective as the people using it. Addressing the human element is essential for comprehensive database security:

  • Develop Clear Policies:
    • Define what constitutes a security violation (e.g., propping open a server room door, sharing access credentials)
    • Establish clear consequences. As one Reddit user put it: "If people just circumvent protection, that's a firing offense."
  • Connect Physical Access to Digital Permissions:
    • Tie physical access rights to digital permissions. Not everyone with physical access needs root access to the database.
    • Implement the principle of least privilege, as recommended in user research: "The only permissions your developers should have is ability to execute the stored procedures necessary for their work. That's it."
    • Utilize user roles and restricted views in the database itself to further limit potential data manipulation.
  • Training and Accountability:
    • Conduct regular security training for all staff, not just IT
    • Build a strong security culture where every employee understands their role in protecting critical database infrastructure

Lock the Door, Protect the Data

Server room security is the bedrock of database protection. A single physical breach can undo every digital safeguard you've implemented. By focusing on the three pillars—strong access controls, proactive environmental monitoring, and strategic physical design—you can create a comprehensive defense for your most critical digital assets.

Start with a simple audit of your own server room. Is the door secure? Who has access? How is the environment monitored? From there, use this guide to build layers of protection that address both physical and digital security concerns.

Remember, as one security professional succinctly put it: "Gaining physical access means it's game over for security in general." Don't let your server room be the unlocked door to your digital kingdom.

By implementing these physical security measures, you create the essential foundation upon which all your database security efforts can effectively stand. Without them, even the most sophisticated digital protections are built on sand.

Frequently Asked Questions

What is the most critical first step in securing a server room?

The most critical first step is implementing robust physical access control. This means, at a minimum, using high-quality commercial locks and maintaining a strict policy for key distribution. For enhanced security, consider modern access control systems that provide audit trails, remote management, and integration with surveillance cameras to ensure only authorized personnel can enter.

Why is physical access to a server a major security risk?

Physical access to a server is considered a "game over" security risk because it allows an intruder to bypass all digital defenses. With direct hardware access, a person can reboot the server to reset administrator passwords, physically remove hard drives to steal data, install malicious hardware like keyloggers, and circumvent all network firewalls and intrusion detection systems.

How can I protect servers from environmental damage like overheating?

You can protect servers from environmental damage by maintaining a stable climate and actively monitoring conditions. The best practice is to keep the server room temperature between 65°F and 71°F using a dedicated HVAC system. Additionally, deploying environmental sensors to monitor temperature, humidity, and air quality in real-time can provide instant alerts if conditions fall outside safe thresholds, preventing hardware failure and data corruption.

What are cost-effective server security solutions for small businesses?

Small businesses can implement effective server security on a budget by starting with the fundamentals. A high-quality deadbolt lock and a written access policy are inexpensive first steps. Affordable, scalable technologies like cloud-based access control (paying per door) and budget-friendly IP cameras and environmental sensors offer significant protection without a large upfront investment.

How does server room security relate to database security?

Server room security is the physical foundation of database security. Your database security measures, such as encryption and access permissions, are only effective if the underlying hardware is physically secure. If an unauthorized person can gain physical access to the server, they can bypass these digital protections entirely, making robust physical security an essential and inseparable component of any comprehensive database protection strategy.

What security policies should be implemented for server room access?

Clear, written security policies are crucial for managing server room access. These policies should define who is authorized to enter, require that all visitors are logged and escorted, and establish clear consequences for violations like propping a door open or sharing access credentials. Furthermore, physical access rights should be aligned with digital permissions, following the principle of least privilege to limit what an individual can do even if they are inside the room.

blog-hero-background-image
Cyber Security

How to Set Up Row-Level Permissions in Notion Databases

backdrop
Table of Contents

Join thousands of professionals and get the latest insight on Compliance & Cybersecurity.


After years of eager anticipation, Notion has finally delivered one of its most requested features: row-level database permissions. This powerful capability allows you to control who can access specific pages within your databases, solving a pain point that had some users almost quitting the platform entirely.

"Finally. I don't need to duplicate my product list to delete the 'cost' property for customer's preview," as one user eloquently put it. If you've been waiting for a more sophisticated way to segment database access among team members or external stakeholders, your patience has paid off.

Understanding Notion's Database Permission Levels

Before diving into row-level permissions (officially called "page-level access" in Notion), it's important to understand the core permission levels available in Notion databases:

  • Full access: Users can edit everything, including database structure, properties, views, filters, sorts, and permissions
  • Can edit: Users can create and edit pages within the database
  • Can edit content: This is the game-changer permission level that allows users to edit page content without modifying the database structure
  • Can comment: Users can only view and comment on pages
  • Can view: Read-only access

The "Can edit content" permission is particularly valuable as it keeps your database structure intact while allowing collaborators to work with the content. This prevents team members or clients from accidentally breaking views or deleting critical properties.

Setting Up Page-Level Access: Step-by-Step Guide

Important Note: Native row-level permissions require a Notion Business or Enterprise plan. If you've been eagerly waiting for this feature, it might be time to upgrade.

Here's how to implement page-level access in your Notion databases:

  1. Navigate to the full-screen page of your database (not a linked view)
  2. Click the Share button in the top-right corner
  3. First, invite the relevant people or groups and set their base permission level (typically "Can edit content")
  4. Inside the Share menu, locate the Page-level access section
  5. Click Create a rule
  6. Configure your rule with:
    • A condition based on a property (currently only Person and Created by properties are supported)
    • An access level defining what matching users can do with the pages
Setting up page-level access in Notion

If multiple rules apply to a single page for the same user, the highest access level will apply.

Real-World Use Case: Team Task Management

Let's implement database segmentation for a team task tracker:

  1. Ensure your task database has a Person property named "Assignee"
  2. Share the database with your team, giving them "Can view" access at the database level
  3. Create a page-level access rule:
    • If "Assignee" contains "Person viewing the page"
    • Then "Person viewing the page" can "Edit"

This configuration allows team members to see all tasks in the database but only edit the ones assigned to them. For a personalized experience, create a linked database view on each team member's personal page with a filter where "Assignee is @me".

Real-World Use Case: Client Project Portal

For agencies and consultants who've been eagerly waiting for better client collaboration tools, this feature is a game-changer:

  1. Create a database with all your client projects
  2. Include a Person property for "Client Contact"
  3. Invite clients as guests with "Can view" base access
  4. Create a page-level access rule:
    • If "Client Contact" contains "[Client's name]"
    • Then "[Client's name]" can "Comment" or "Edit" (depending on your workflow)

This setup ensures clients only see their own projects, not those of other clients. You no longer need to duplicate your entire product list just to hide sensitive information from clients.

Key Limitations of Row-Level Database Permissions

While this feature drop is significant, it's important to understand its limitations:

  1. No Direct Page Creation: Users with only rule-based access (without "Can edit content" at the database level) cannot create new pages/rows in the database.
  2. No Deletion Rights: Even with "Full access" to a specific page via a rule, users cannot delete that page without broader permissions at the database level.
  3. Limited Property Support: Rules only work with Person and Created by properties. You cannot create rules based on Select, Status, or Relation properties.
  4. No Column-Level Security: This is crucial to understand—page-level access lets you hide entire rows, but not specific columns within a visible row. If a user can see a page, they see all its properties. This explains why some users previously had to "duplicate my product list to delete the 'cost' property for customer's preview."

Many users who have been waiting for this feature might be disappointed by these limitations, especially the inability to hide specific columns from certain users.

Advanced Workarounds for True Granular Control

When native features don't provide enough flexibility, consider these workarounds:

Using Forms to Bypass Creation Limits

For team members or clients who need to add entries but shouldn't see the entire database:

  1. Create a Notion Form connected to your database
  2. Share just the form link with limited-access users
  3. They can submit new entries without accessing the database directly

For external stakeholders, third-party tools like Tally or NoteForms can connect to your Notion database while providing even more customization options.

Using the Notion API and Automation for Column-Level Security

For true property-level security (hiding specific columns like "cost"):

  1. Maintain a "private" master database with all data
  2. Use automation tools (Make, Zapier) to sync only non-sensitive properties to a "public" database
  3. Share only the "public" database with clients or team members needing limited access

This approach provides genuine column-level security but requires technical setup and may involve costs for automation tools.

Client Portals with Third-Party Front-End Builders

For the most sophisticated solution:

  1. Use Notion as a backend database
  2. Build a custom client portal using tools like NotionApps or Softr
  3. Configure granular permissions in the front-end builder:
    • Row-level filtering based on user email or other identifiers
    • Column visibility controls to hide sensitive information
    • Custom forms for data entry

This approach offers the most control but comes with additional costs and a learning curve.

Troubleshooting Common Access Issues

Here are solutions to common problems you might encounter when implementing row-level permissions:

"A user can't see a page they are assigned to"

Double-check the page-level access rules in the original database (not a linked view). Ensure the Person property on that specific page correctly contains their user profile. Remember that rules don't work in offline mode, so connectivity issues might affect access.

"A guest can't add new entries to our shared projects list"

This is expected behavior. Guests with limited access cannot create pages without "Can edit content" permission at the database level. Consider using forms as described above or granting slightly higher permissions with careful page-level restrictions.

"I gave a user 'Full access' in a rule, but they still can't change a database view"

Rule-based permissions apply only to the content of specific pages. Structural changes (views, properties, filters) are governed by database-level permissions. The user needs "Full access" at the database level to make those changes.

Getting Started with Row-Level Permissions

If you're eager to join the beta or access this feature:

  1. Ensure you're on a Business or Enterprise plan
  2. Contact Notion support to inquire about betas for ambassadors if the feature isn't already available to you
  3. Start with a simple use case like a personal task manager to get comfortable with the feature

Conclusion

Notion's row-level database permissions represent a significant step forward for collaboration and data security within the platform. While not perfect (especially for those wanting true column-level security), this feature enables much more sophisticated database segmentation than was previously possible.

For teams managing multiple projects, departments sharing resources, or consultants working with various clients, these new permission controls allow for cleaner, more secure collaboration without the need for duplicate databases.

If you've been eager to implement more granular access controls in your Notion workspace, now's the time to start experimenting with these powerful new capabilities. And if you need even more control, consider the advanced workarounds outlined above to create truly customized experiences for your team and clients.

The Notion community has been waiting years for this feature, and while it may not solve every permission challenge, it's a welcome addition that addresses many common use cases for database segmentation and access control.

Frequently Asked Questions

What are row-level permissions in Notion?

Row-level permissions, officially called "page-level access" in Notion, allow you to control which users can view, comment on, or edit specific pages (rows) within a single database based on rules you set. This feature is a significant enhancement for collaboration, as it enables you to share one database with multiple people while segmenting access to its content. For example, you can ensure team members can only edit tasks assigned to them, or that clients can only see project pages relevant to their account.

Why can't I use page-level access in my Notion database?

Page-level access (row-level permissions) is exclusively available on Notion's Business and Enterprise plans. If you are on a Free or Plus plan, you will not have access to this feature. This is a premium feature designed for teams and organizations that require more granular control over data access. If this capability is crucial for your workflow, you may need to consider upgrading your Notion subscription.

How can I hide specific columns (properties) from users in a Notion database?

Notion's native page-level access does not support hiding specific columns (properties); it only controls access to entire rows (pages). If a user can see a page, they can see all of its properties. To achieve true column-level security, you need to use advanced workarounds, such as maintaining a private master database and using automation tools like Make or Zapier to sync only non-sensitive properties to a separate "public" database that you share with users.

What are the main limitations of Notion's page-level access feature?

The primary limitations are the inability to hide specific columns (no column-level security), the restriction of rules to only 'Person' and 'Created by' properties, and the fact that users with only rule-based access cannot create or delete pages. Understanding these constraints is key to implementing the feature effectively and knowing when to use a workaround.

How can users add new pages if they don't have full edit access to the database?

Users without "Can edit content" permission at the database level cannot create new pages directly. The recommended workaround is to use a form tool, such as Notion Forms or a third-party service like Tally, that is connected to the database. By sharing a form link, you allow users to submit new entries, which then appear as new pages in your database, bypassing the need for direct creation permissions.

Can I set permissions based on a 'Status' or 'Select' property?

No, you cannot set page-level access rules based on 'Status', 'Select', 'Relation', or other similar properties. Currently, the rules for page-level access can only be configured using the Person and Created by properties. This means permissions must be tied directly to the users who are assigned to or who created the page.

blog-hero-background-image
Cyber Security

React Security Checklist: Essential Practices Every Developer Must Follow

backdrop
Table of Contents

Join thousands of professionals and get the latest insight on Compliance & Cybersecurity.


You've built a sleek React application with impressive features and an intuitive UI. But when you browse forums like Reddit, you see developers lamenting that "frontend is never safe" or admitting "I don't know LMAO" when asked about securing React applications. This uncertainty is understandable – frontend security often takes a backseat to functionality and design.

The truth is, while React provides some built-in protections against common vulnerabilities, it's not immune to attacks. With React powering applications for major brands and holding a 34% market share among JavaScript libraries, it's a prime target for malicious actors.

This comprehensive security checklist will transform your approach to React security, focusing on practical, implementable solutions to the most critical vulnerabilities. Let's turn that "I don't know" into "I've got this covered."

✅ 1. Tame dangerouslySetInnerHTML

You're building a comment section that needs to support formatted text. The easiest solution seems to be using React's dangerouslySetInnerHTML to render the HTML. But there's a reason for that ominous name.

Why It Matters:

dangerouslySetInnerHTML bypasses React's automatic escaping of content, creating a direct gateway for Cross-Site Scripting (XSS) attacks. As one developer bluntly put it, "React security boils down to not thinking dangerouslySetInnerHTML is safe."

Attack Scenario: A user posts a seemingly innocent comment that contains hidden malicious JavaScript. When rendered directly with dangerouslySetInnerHTML, the script executes in other users' browsers, potentially stealing session tokens or redirecting to phishing sites.

How to Protect Your App:

  1. Never render unsanitized content:
// DANGEROUS: This code invites XSS attacks
<div dangerouslySetInnerHTML={{ __html: userComment }} />
  1. Always sanitize with a dedicated library:
import DOMPurify from 'dompurify';

function SafeComment({ userInput }) {
  const sanitizedHTML = DOMPurify.sanitize(userInput);
  return <div dangerouslySetInnerHTML={{ __html: sanitizedHTML }} />;
}
  1. Restrict allowed HTML elements and attributes:
const sanitizedContent = DOMPurify.sanitize(content, { 
  allowedTags: ['p', 'b', 'i', 'a', 'ul', 'li'],
  allowedAttributes: { 'a': ['href'] } 
});
  1. Create a reusable hook for consistency:
import { useMemo } from 'react';
import DOMPurify from 'dompurify';

export function useSecureHTML(unsafeHTML) {
  return useMemo(() => DOMPurify.sanitize(unsafeHTML), [unsafeHTML]);
}

// Usage
function Comment({ html }) {
  const safeHTML = useSecureHTML(html);
  return <div dangerouslySetInnerHTML={{ __html: safeHTML }} />;
}

This approach is especially important when implementing WYSIWYG editors that generate HTML content, as highlighted by developers on Reddit.

✅ 2. Defend Against XSS in All Forms

Cross-Site Scripting (XSS) attacks are among the most common web vulnerabilities and feature prominently in the OWASP Top Ten. While React's JSX automatically escapes values to prevent many XSS attacks, several attack vectors remain open.

Why It Matters:

XSS vulnerabilities can lead to session hijacking, credential theft, and unauthorized data access. As one developer warned, "Don't allow user to control href in links. User could put :javascript there to run malicious code."

Attack Scenario: An attacker creates a profile with a malicious URL using the javascript: protocol in their website link. When users click this link, instead of navigating to a new page, the browser executes the JavaScript code with the same permissions as your application.

How to Protect Your App:

  1. Validate URLs before rendering:
function validateURL(url) {
  try {
    const parsed = new URL(url);
    return ['https:', 'http:'].includes(parsed.protocol);
  } catch (e) {
    return false;
  }
}

function SafeLink({ href, children }) {
  const isSafe = validateURL(href);
  return isSafe ? (
    <a href={href}>{children}</a>
  ) : (
    <span>{children}</span>
  );
}
  1. Sanitize URL parameters and route data:
import { useParams } from 'react-router-dom';
import DOMPurify from 'dompurify';

function UserProfile() {
  const { username } = useParams();
  // Sanitize parameter to prevent DOM-based XSS
  const safeUsername = DOMPurify.sanitize(username);
  return <div>Profile: {safeUsername}</div>;
}
  1. Avoid direct DOM manipulation:
// INSTEAD OF: 
divRef.current.innerHTML = data; // Vulnerable to XSS

// USE:
divRef.current.innerText = data; // Safe alternative
  1. Handle user input carefully:
// For controlled form inputs, sanitize on submission
const [input, setInput] = useState('');

const handleSubmit = (e) => {
  e.preventDefault();
  const sanitizedInput = DOMPurify.sanitize(input);
  submitToServer(sanitizedInput);
};

Implementing these defenses creates multiple layers of protection against XSS attacks, significantly reducing your application's attack surface. For more comprehensive strategies, check out StackHawk's React XSS Guide.

✅ 3. Implement Bulletproof Authentication

Authentication vulnerabilities can compromise your entire application, regardless of how secure the rest of your code is. While authentication logic primarily resides on the backend, the frontend plays a crucial role in managing sessions and protecting user credentials.

Why It Matters:

Broken authentication mechanisms can allow attackers to impersonate legitimate users, accessing sensitive data and functionality. This vulnerability frequently appears in the OWASP Top Ten.

Attack Scenario: An attacker exploits an XSS vulnerability to steal authentication tokens stored in localStorage, gaining unauthorized access to a user account without needing their password.

How to Protect Your App:

  1. Use a trusted authentication provider:
// Install Auth0 SDK
// npm install @auth0/auth0-react

// Wrap your app with Auth0Provider
import { Auth0Provider } from '@auth0/auth0-react';

ReactDOM.render(
  <Auth0Provider
    domain="your-domain.auth0.com"
    clientId="your-client-id"
    redirectUri={window.location.origin}
  >
    <App />
  </Auth0Provider>,
  document.getElementById('root')
);
  1. Implement secure login/logout:
import { useAuth0 } from '@auth0/auth0-react';

function AuthButtons() {
  const { isAuthenticated, loginWithRedirect, logout } = useAuth0();
  
  return isAuthenticated ? (
    <button onClick={() => logout()}>Log Out</button>
  ) : (
    <button onClick={() => loginWithRedirect()}>Log In</button>
  );
}
  1. Protect sensitive routes:
import { withAuthenticationRequired } from '@auth0/auth0-react';

// This component will only render for authenticated users
const ProtectedRoute = withAuthenticationRequired(SecretComponent);
  1. Secure API calls with access tokens:
import { useAuth0 } from '@auth0/auth0-react';

function ApiComponent() {
  const { getAccessTokenSilently } = useAuth0();
  
  const callApi = async () => {
    try {
      // Get token securely (not stored in localStorage)
      const token = await getAccessTokenSilently();
      
      // Use token in API request
      const response = await fetch('https://api.example.com/data', {
        headers: {
          Authorization: `Bearer ${token}`
        }
      });
      
      const data = await response.json();
      // Process data...
    } catch (error) {
      console.error(error);
    }
  };
  
  return <button onClick={callApi}>Fetch Protected Data</button>;
}

The Auth0 guide for React provides comprehensive instructions for implementing secure authentication. The key security advantage is that it handles tokens in memory rather than localStorage, protecting against XSS token theft.

✅ 4. Deploy a Content Security Policy (CSP)

A Content Security Policy acts as your application's security perimeter, defining which resources can be loaded and executed. It's an HTTP header that instructs browsers which domains are permitted to load scripts, styles, fonts, and other assets.

Why It Matters:

Even with perfect code practices, vulnerabilities can slip through. CSP provides a powerful second line of defense against XSS and data injection attacks by blocking unauthorized script execution.

Attack Scenario: Despite your best efforts, an XSS vulnerability allows an attacker to inject a script that attempts to send user data to a malicious server. With a proper CSP in place, the browser would block this script from executing or connecting to unauthorized domains.

How to Protect Your App:

  1. Implement a basic CSP header:
Content-Security-Policy: default-src 'self'; script-src 'self';

This simple policy only allows resources to be loaded from your application's own origin, blocking inline scripts and connections to external domains.

  1. For React applications using inline styles and scripts:
Content-Security-Policy: default-src 'self'; script-src 'self' 'unsafe-inline'; style-src 'self' 'unsafe-inline';
  1. Add configuration for external resources:
Content-Security-Policy: default-src 'self'; script-src 'self' https://apis.google.com; style-src 'self' https://fonts.googleapis.com; font-src 'self' https://fonts.gstatic.com;

Learn more about CSP options in the MDN documentation.

✅ 5. Harden Your Dependencies and Build Process

Modern React applications rely on dozens or hundreds of npm packages. Each dependency introduced into your project is a potential security risk.

Why It Matters:

Supply chain attacks targeting npm packages have become increasingly common. A vulnerability in even a minor dependency can compromise your entire application.

Attack Scenario: You install a popular npm package that was recently compromised. The malicious code silently collects authentication tokens and sends them to an attacker-controlled server.

How to Protect Your App:

  1. Keep dependencies updated:
# Check for vulnerabilities
npm audit

# Update packages
npm update

# Fix vulnerabilities
npm audit fix
  1. Use a security linter:
# Install ESLint React Security Config
npm install eslint-plugin-react-security --save-dev

Add to your .eslintrc:

{
  "plugins": ["react-security"],
  "extends": ["plugin:react-security/recommended"]
}
  1. Implement Subresource Integrity (SRI) for CDN scripts:
<script 
  src="https://cdn.example.com/react.production.min.js"
  integrity="sha384-hash_value_here"
  crossorigin="anonymous">
</script>
  1. Set up automated security scanning:

Tools like StackHawk can identify vulnerabilities in your application by scanning it as part of your CI/CD pipeline:

# Example CI configuration
stages:
  - build
  - test
  - security-scan

security:
  stage: security-scan
  script:
    - hawk scan

Conclusion: Security as an Ongoing Process

Security isn't a feature to implement once and forget—it's an ongoing process of vigilance and improvement. By following this checklist, you've taken significant steps toward building more secure React applications:

  1. Sanitize HTML with DOMPurify before using dangerouslySetInnerHTML
  2. Validate all user inputs and URLs to prevent XSS attacks
  3. Implement robust authentication with secure token handling
  4. Deploy a Content Security Policy as a second line of defense
  5. Keep dependencies updated and scan for vulnerabilities

Remember that even the most secure code can be compromised by a single oversight. Use tools like Web Application Firewalls (WAFs), implement proper encryption at rest and in transit, and consider multi-factor authentication for sensitive operations.

Modern security threats are constantly evolving, and staying informed about new vulnerabilities and attack vectors is crucial. Connect with the React security community through forums, conferences, and security-focused blogs to keep your knowledge current.

By incorporating these practices into your development process, you're not just writing code—you're building trust with your users by protecting their data and privacy.

Frequently Asked Questions

What is the most common security risk in a React application?

The most common and critical security risk in React applications is Cross-Site Scripting (XSS). This vulnerability occurs when an attacker injects malicious code into your application, which then executes in the browsers of other users. While React's JSX syntax automatically escapes many values to prevent XSS, risks remain through improper use of dangerouslySetInnerHTML, rendering user-provided URLs, or direct manipulation of the DOM.

Is it ever safe to use dangerouslySetInnerHTML in React?

Yes, dangerouslySetInnerHTML can be used safely, but only if you rigorously sanitize the HTML content with a trusted library like DOMPurify before rendering it. The prop is named "dangerously" to warn developers that it bypasses React's built-in protections. Sanitization strips out potentially harmful elements like <script> tags and JavaScript event handlers (onclick), ensuring that only safe, clean HTML is rendered to the DOM.

How should I securely store authentication tokens in a React app?

The most secure method is to store authentication tokens in memory, managed by a dedicated authentication library (e.g., Auth0 SDK, MSAL). Storing tokens in localStorage is not recommended because it is easily accessible to any malicious scripts injected via an XSS attack. In-memory storage, combined with secure mechanisms like refresh tokens and HttpOnly cookies for session management, provides a much stronger defense against token theft.

What is a Content Security Policy (CSP) and why do I need one for my React app?

A Content Security Policy (CSP) is an HTTP header that gives you fine-grained control over which resources a browser is allowed to load for your application. For a React app, it acts as a powerful second line of defense against XSS attacks. By defining a whitelist of trusted domains for scripts, styles, and other assets, you can prevent the browser from executing unauthorized code injected by an attacker, even if they find a vulnerability in your code.

How can I automatically check my React project for security issues?

You can automate security checks in your React project in two primary ways: by scanning your dependencies and by analyzing your source code. Use npm audit or yarn audit regularly to find and fix known vulnerabilities in your third-party packages. Additionally, integrate a security-focused linter like eslint-plugin-react-security into your editor and CI/CD pipeline to catch potential security anti-patterns in your code as you write it.


This article is part of our ongoing series on web application security. For more detailed guidance on specific security topics, check out our other resources on authentication, API security, and secure coding practices.

blog-hero-background-image
Cyber Security

CSRF Tokens in React: When You Actually Need Them

backdrop
Table of Contents

Join thousands of professionals and get the latest insight on Compliance & Cybersecurity.


You've built an awesome React SPA and are getting ready to deploy. But wait—should you implement CSRF protection? You search online and find conflicting advice. Some tutorials from "pro React developers" don't even mention CSRF tokens, while others claim they're absolutely essential. What's the truth?

The confusion around CSRF protection in React applications is widespread and understandable. In this article, we'll clear up when you actually need CSRF tokens and when you don't—because the answer isn't always "yes."

What is Cross-Site Request Forgery (CSRF)? A 60-Second Refresher

Cross-Site Request Forgery (CSRF) is an attack that tricks an authenticated user's browser into performing unwanted actions on a website where they're currently logged in. The key vulnerability is that browsers automatically include cookies (including authentication cookies) with requests to a domain.

For example, imagine you're logged into your banking website in one tab. In another tab, you visit a malicious site that contains code to submit a form to your bank's transfer endpoint. When this form submits, your browser will automatically include your banking session cookies with the request. Without CSRF protection, the bank's server has no way to tell that this request came from the malicious site instead of the legitimate banking interface.

The impact can be severe: unauthorized fund transfers, password changes, data theft, or account takeovers—all exploiting the user's authenticated session.

The Deciding Factor: How You Handle Authentication

The necessity of CSRF protection in your React application depends almost entirely on how you implement authentication. Let's break down the two primary scenarios:

Scenario 1: You DEFINITELY Need CSRF Tokens (Cookie-Based Authentication)

If your React application uses cookies for authentication (session cookies or even JWTs stored in cookies), you are vulnerable to CSRF attacks and need protection.

The "Why": When using cookie-based authentication, browsers automatically send cookies with every request to the domain that set them. This automatic cookie inclusion happens regardless of where the request originated from (your app or a malicious site), making it impossible for your server to distinguish legitimate requests from forged ones based on cookies alone.

This vulnerability exists because of how web browsers handle cookies and the same-origin policy—they attach relevant cookies to requests even when those requests are initiated by third-party sites.

The Solution: CSRF Tokens

CSRF tokens provide a layer of verification that the request came from your frontend, not a third party. Here's how they typically work:

  1. The server generates a unique, unpredictable token when a user logs in or starts a session
  2. This token is made available to the client-side JavaScript (but not to third-party sites)
  3. For each state-changing request (POST, PUT, DELETE), your frontend code must include this token
  4. The server validates the token before processing the request

Common implementation patterns include:

Synchronizer Token Pattern: The server generates a token per session and provides it via an API endpoint. The client includes this token in a custom header with each state-changing request.

Double Submit Cookie Pattern: The server sets a CSRF token in a cookie that is not HttpOnly (so JavaScript can read it). Your React code reads this token from the cookie and sends it back in a custom HTTP header (e.g., X-CSRF-Token). The server verifies that the token in the header matches the token in the cookie.

Scenario 2: You Likely DON'T Need CSRF Tokens (Token-Based Authentication)

If your React application uses token-based authentication with JWTs or similar tokens sent in the Authorization header (not in cookies), you generally don't need CSRF protection.

The "Why": With token-based authentication, your frontend code must explicitly retrieve the token (from memory or storage) and include it in the Authorization header of each request. Browsers do NOT automatically attach this header to cross-site requests, which means a malicious site cannot forge a properly authenticated request.

In this model, your client-side code is responsible for:

  1. Obtaining the token (usually during login)
  2. Storing it securely (in memory or potentially localStorage/sessionStorage)
  3. Explicitly including it in the Authorization header of API requests

A third-party site cannot access your token due to the same-origin policy that prevents JavaScript on one domain from accessing data on another domain.

The Critical Caveat: JWTs in Cookies

Here's where many developers get confused: If you decide to store your JWT in a cookie (even an HttpOnly cookie for XSS protection), you've reintroduced the CSRF vulnerability. This is because the browser will automatically send that cookie with requests to your domain, just like a session cookie.

In this specific case, you must implement CSRF protection, typically using the Double Submit Cookie pattern described above.

Practical Implementation: The Double Submit Cookie Pattern in React

Let's look at how to implement CSRF protection in a React app that needs it (using cookie-based authentication):

Step 1: Server-Side Setup (Node.js/Express Example)

First, let's set up the server to generate and validate CSRF tokens:

const express = require('express');
const crypto = require('crypto');
const cookieParser = require('cookie-parser');
const app = express();

app.use(cookieParser());
app.use(express.json());

// Generate and set CSRF token on authentication or initial page load
app.post('/api/login', (req, res) => {
  // Authenticate user (omitted for brevity)
  // ...

  // Generate CSRF token
  const csrfToken = crypto.randomBytes(16).toString('hex');
  
  // Set authentication cookie (could be a session ID or JWT)
  res.cookie('AUTH_COOKIE', 'user-auth-data', { 
    httpOnly: true,
    secure: process.env.NODE_ENV === 'production',
    sameSite: 'lax' // Adds some CSRF protection for modern browsers
  });
  
  // Set CSRF token in a readable cookie (not HttpOnly)
  res.cookie('XSRF-TOKEN', csrfToken, { 
    httpOnly: false,
    secure: process.env.NODE_ENV === 'production',
    sameSite: 'lax'
  });
  
  res.json({ success: true, user: { /* user data */ } });
});

// CSRF protection middleware for state-changing methods
function validateCsrfToken(req, res, next) {
  const methodsToProtect = ['POST', 'PUT', 'DELETE', 'PATCH'];
  
  if (methodsToProtect.includes(req.method)) {
    const tokenFromHeader = req.headers['x-xsrf-token'];
    const tokenFromCookie = req.cookies['XSRF-TOKEN'];
    
    if (!tokenFromHeader || !tokenFromCookie || tokenFromHeader !== tokenFromCookie) {
      return res.status(403).json({ error: 'Invalid CSRF token' });
    }
  }
  
  next();
}

// Apply CSRF protection to API routes
app.use('/api', validateCsrfToken);

// Protected endpoint example
app.post('/api/update-profile', (req, res) => {
  // This route is now protected from CSRF
  // Process the update...
  res.json({ success: true });
});

Step 2: Client-Side Setup (React with Axios)

Now, let's configure our React application to include the CSRF token with each request:

import axios from 'axios';
import Cookies from 'js-cookie';

// Create an Axios instance with default config
const apiClient = axios.create({
  baseURL: 'https://api.example.com',
  withCredentials: true // Important! Allows cookies to be sent with requests
});

// Add request interceptor to include CSRF token
apiClient.interceptors.request.use(
  config => {
    // Read the CSRF token from the cookie
    const csrfToken = Cookies.get('XSRF-TOKEN');
    
    if (csrfToken) {
      // Add it as a header to each request
      config.headers['X-XSRF-TOKEN'] = csrfToken;
    }
    
    return config;
  },
  error => Promise.reject(error)
);

// Example React component making a protected request
function ProfileEditor() {
  const updateProfile = async (profileData) => {
    try {
      // The CSRF token will be automatically included
      const response = await apiClient.post('/api/update-profile', profileData);
      console.log('Profile updated!', response.data);
    } catch (error) {
      console.error('Error updating profile:', error);
    }
  };
  
  // Component JSX...
}

The withCredentials: true setting is crucial for cross-domain requests, as it instructs the browser to include cookies when making requests to a different origin. This is necessary for CORS scenarios where your API might be on a different domain than your React app.

Addressing Nuances and Modern Defenses

What about SameSite Cookies?

Modern browsers support the SameSite cookie attribute, which provides significant CSRF protection when properly configured:

  • SameSite=Strict: Cookies are only sent in same-site requests
  • SameSite=Lax (default in most browsers): Cookies are sent in same-site requests and top-level navigations using safe HTTP methods (like GET)
  • SameSite=None: Cookies are sent in all contexts (requires Secure attribute)

While SameSite=Lax offers substantial protection against CSRF attacks, it's not a complete solution:

  1. It doesn't protect against attacks using GET requests (if they're state-changing, which is bad practice but happens)
  2. Older browsers may not support this attribute, leaving some users vulnerable
  3. Some complex applications need cross-site functionality that Strict would break

For these reasons, implementing CSRF tokens alongside SameSite cookies provides defense-in-depth protection.

CSRF vs. XSS (Cross-Site Scripting)

It's important to understand the relationship between CSRF and XSS:

  • CSRF tricks the user's browser into making unwanted requests with their credentials
  • XSS injects malicious scripts into your website that run in the user's browser

A successful XSS attack can often defeat CSRF protection. If an attacker can run JavaScript on your site's origin, they can read CSRF tokens from non-HttpOnly cookies or intercept them from API responses, then use those tokens to make authenticated requests.

This highlights the importance of protecting against both vulnerabilities:

  1. Prevent XSS by avoiding dangerouslySetInnerHTML, validating user input, and implementing Content Security Policy (CSP)
  2. Implement CSRF tokens for cookie-based authentication
  3. Consider using HttpOnly cookies for sensitive data to prevent JavaScript access (but remember this requires CSRF protection)

Defense in depth is key to web security. Each layer provides protection if another fails.

A Clear Decision Framework

To summarize when you need CSRF protection in your React application:

You NEED CSRF Protection When:

  • You use cookies for authentication (session cookies or JWTs in cookies)
  • You implement "Remember Me" functionality with persistent cookies
  • Your API endpoints process requests with automatically attached cookies

You DON'T Need CSRF Protection When:

  • You use token-based authentication with tokens stored in memory
  • Your authentication tokens are sent exclusively via the Authorization header
  • You manually attach authentication with each request (not using cookies)

Here's a simple decision tree:

  1. Are you using cookies for authentication?
    • Yes: You need CSRF protection. Implement the Double Submit Cookie pattern.
    • No: Continue to next question.
  2. How are you storing authentication tokens?
    • In memory or localStorage/sessionStorage (sent via Authorization header): No CSRF protection needed.
    • In cookies: You need CSRF protection.

Practical Security Recommendations

Beyond CSRF, here are some additional security best practices for your React applications:

  1. Protect against XSS:
    • Avoid using dangerouslySetInnerHTML unless absolutely necessary
    • Validate user input on both frontend and backend
    • Implement proper Content Security Policy headers
    • Use environment variables for sensitive configuration, not source code
  2. Secure your authentication:
    • Use HTTPS with proper SSL configuration
    • Set appropriate cookie flags (Secure, HttpOnly, SameSite)
    • Consider using a key vault service for storing secrets rather than environment variables
    • Implement proper token expiration and rotation
  3. Implement proper API security:
    • Validate all user-supplied values on the backend, never trust frontend validation alone
    • Return generic error messages that don't reveal implementation details
    • Use proper CORS configuration to restrict which origins can access your API
    • Consider implementing rate limiting to prevent abuse
  4. Protect your source code:
    • In production, use minification and disable source maps (or keep them private)
    • Don't store sensitive data or API keys in your React code
    • Use sandboxing techniques when rendering user-generated content

Conclusion

The confusion around CSRF protection in React applications is understandable, especially with conflicting advice online. The key takeaway is that CSRF protection is not universally required—it depends on your authentication mechanism.

If you use cookie-based authentication, you need CSRF protection. If you use token-based authentication with tokens sent via the Authorization header, you generally don't.

Understanding the underlying authentication flow is crucial to implementing the right security measures. Don't blindly follow tutorials without understanding why certain security measures are (or aren't) needed for your specific architecture.

Modern browsers provide some built-in protections like SameSite cookies, but a defense-in-depth approach is always best practice for applications handling sensitive data or actions.

By making informed decisions about your security architecture, you can protect your users without implementing unnecessary complexity—and that's a win for both security and developer experience.

Frequently Asked Questions

When do I absolutely need CSRF protection in a React app?

You absolutely need CSRF protection if your application uses cookies for authentication. This includes traditional session cookies or if you choose to store JWTs in cookies. Because browsers automatically send cookies with every request to your domain, a malicious site can exploit this behavior. If you use token-based authentication where the token is sent in an Authorization header, you generally do not need separate CSRF protection.

Why don't I need CSRF tokens with JWTs in the Authorization header?

You don't need CSRF tokens in this scenario because, unlike cookies, browsers do not automatically attach the Authorization header to cross-site requests. A malicious website cannot force a user's browser to send your API a request with the correct Authorization header. Your client-side JavaScript code must explicitly retrieve the token (from memory or local storage) and attach it to the request, and this manual step is what breaks the CSRF attack vector.

Is setting SameSite=Lax on my cookies enough for CSRF protection?

No, relying solely on SameSite cookies is not a complete solution, although it provides significant protection. The SameSite attribute is a powerful first line of defense and is enabled by default in modern browsers. However, it may not be supported by older browsers, and certain types of attacks can still bypass it. For robust security, especially in applications handling sensitive data, you should use CSRF tokens as an additional layer of protection in a defense-in-depth strategy.

What is the most common way to implement CSRF protection in React?

The most common and recommended method for a React SPA using cookie-based authentication is the Double Submit Cookie pattern. In this pattern, the server sets two cookies: an HttpOnly authentication cookie and a readable CSRF token cookie. Your React application reads the CSRF token from its cookie and sends it back in a custom HTTP header (e.g., X-CSRF-Token) with every state-changing request. The server then verifies that the token in the header matches the one in the cookie.

How is a CSRF attack different from an XSS attack?

A CSRF (Cross-Site Request Forgery) attack tricks a user's browser into making an unwanted request, while an XSS (Cross-Site Scripting) attack injects malicious code that runs in the user's browser. In short, CSRF exploits the trust a server has for a user's browser by hijacking its authenticated session. XSS exploits the trust a user has for your website by running malicious scripts. A successful XSS attack can often be used to defeat CSRF protection, which is why it's crucial to protect against both.

If I store my JWT in localStorage, isn't it vulnerable to XSS?

Yes, storing JWTs in localStorage or sessionStorage makes them accessible to JavaScript, and therefore vulnerable if an XSS attack occurs. This is a key security trade-off: storing tokens in localStorage protects you from CSRF but exposes you more to XSS. Storing them in HttpOnly cookies protects from XSS but exposes you to CSRF (requiring token protection). This is why a comprehensive security strategy includes robust XSS prevention, such as input sanitization and a Content Security Policy, regardless of where you store your tokens.

Further Resources

toaster icon

Thank you for reaching out to us!

We will get back to you soon.