blog-hero-background-image
Cyber Security

How to Handle Vendor Breach Denials in Your IR Process

backdrop
Table of Contents

Join thousands of professionals and get the latest insight on Compliance & Cybersecurity.


You've just received an alert about suspicious activity from one of your critical vendors. Your threat intelligence feeds are lighting up, and you're seeing indicators of compromise that match the patterns associated with this provider. But when you reach out to the vendor for confirmation, their response is immediate and decisive: "We have no evidence of a breach."

Sound familiar?

If you've been in cybersecurity long enough, you've experienced the frustrating dance with vendors who initially deny security incidents only to later acknowledge them with the infamous phrase, "Upon further investigation..." As one security professional put it, "It's always 'no there is no breach' and after a while 'upon further investigation...'"

This denial isn't just annoying—it's dangerous. It creates an information vacuum that paralyzes your incident response process, leaving your organization exposed while your vendor manages their PR and legal concerns.

The Anatomy of a Denial: Why Vendors Say "No"

Before diving into the action steps, it's important to understand why vendors initially deny breaches. This isn't usually malicious—it's business.

It's Not Personal, It's Legal (and PR)

When a vendor first receives notification of a potential breach, their initial communications are typically crafted by legal and PR teams, not security engineers. As one cybersecurity professional noted, "It's always a PR stunt at first... Deny until you are forced or until you have data that can prove you wrong."

Vendors are managing multiple concerns:

  • Legal exposure and potential regulatory fines
  • Stock price and shareholder confidence
  • Competitive positioning
  • Customer retention

The Ripple Effect is Real

The impact of vendor breaches nearly doubled year-over-year, with an average of 4.73 companies affected per vendor breach according to Black Kite's 2022 report. Major incidents illustrate the potential scale:

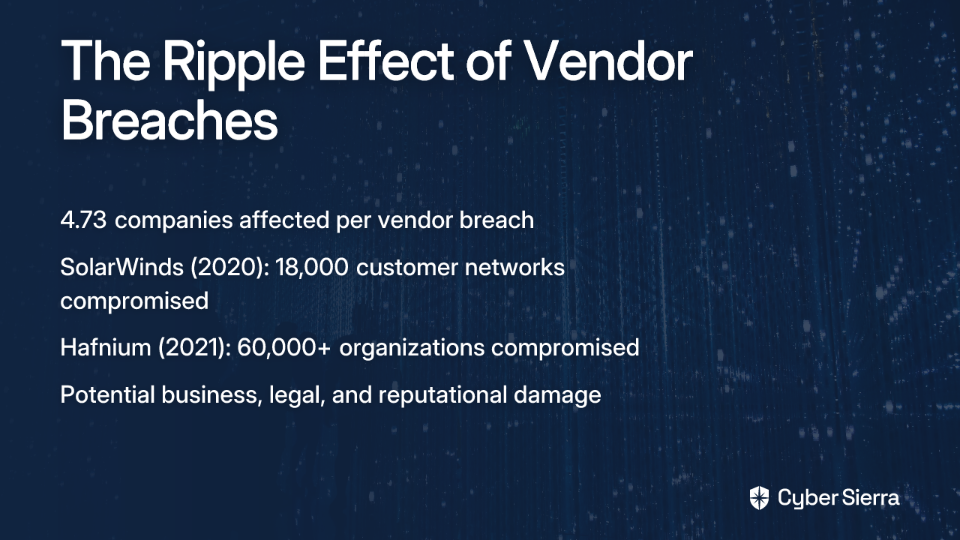
  • SolarWinds (2020): Malicious code injected into updates affected approximately 18,000 customer networks
  • Hafnium (2021): Exchange server attacks compromised at least 60,000 organizations

This is why you can't afford to wait for a vendor to confirm what your threat intelligence is already telling you.

Your Playbook for the First 24 Hours: Assume Breach, Act Decisively

When facing a potential vendor breach with initial denial, adopt this guiding principle: "Assume a breach until proven otherwise." The first 24 hours are critical for setting the tone of your response. Do not wait for vendor confirmation.

Step 1: Isolate & Contain

Break Connectivity
As one security professional bluntly advised, "If your engagement requires network connectivity, probably worth breaking it until the breach is understood." Immediately:

  • Sever VPN connections to the vendor
  • Disable API integrations
  • Block network traffic to and from the vendor's IP ranges
  • Lock down vendor service accounts

This may cause business disruption, but the alternative—allowing a breach to spread through your network—is far worse.

Isolate Systems
Implement containment strategies tailored to the specific vendor relationship:

  • Apply additional local host restrictions
  • Segment any potentially affected parts of your network
  • Prepare backup systems if the vendor provides critical services

Step 2: Communicate & Gather Intelligence (The Right Way)

Establish Formal Contact
Immediately open a formal line of communication with the vendor's designated security point of contact—not just your account manager. Document all communications.

Conduct a Mini-Assessment
Go beyond asking "Have you been breached?" Ask pointed questions to gather facts:

  • "What is the nature of the potential impact on your environment?"
  • "What specific data or systems of ours could have been accessed?"
  • "What immediate remediation steps have you taken on your end?"
  • "Who is your designated point of contact for this incident, and what is the communication cadence?"
  • "Can you provide logs, IoCs, or any technical data that led you to conclude there was no breach?"

Step 3: Trigger Internal Forensics & Threat Hunting

Don't rely solely on the vendor's investigation. Launch your own:

Check Threat Intelligence
Use threat intelligence feeds to identify internal Indicators of Compromise (IoCs) related to the vendor or the suspected threat actor.

Review Logs
Look for:

  • Unusual activity from vendor accounts
  • Anomalous data flows to vendor IP ranges
  • Signs of unauthorized access or data exfiltration
  • Suspicious authentication events

Monitor Behavior
Actively watch for unusual remote access behavior and check the integrity of systems connected to the vendor.

Step 4: Engage Legal & Review Contracts

This is not just an IT issue. Your legal and compliance teams must be involved immediately.

Alert Your Counsel
Brief your legal team on the situation and potential implications.

Locate the Contract
As one cybersecurity professional wisely advises, "Look at your contract to see what their breach reporting requirements are." This is critical, as it establishes the vendor's obligations to you.

Identify Key Clauses
Scrutinize the contract for specifics on:

  • Breach notification timelines and methods
  • Data security commitments and liability allocation
  • Right-to-audit clauses
  • Cybersecurity insurance requirements

Understand Your Obligations
Remember that state and federal laws may require you to notify affected individuals, regulators, or law enforcement, regardless of the vendor's stance. According to Sands Anderson, the obligation to notify often falls on your organization as the original data collector, not the vendor.

Pushing Past the Denial: How to Force Transparency

If the vendor continues to deny despite your evidence, it's time to shift from informal inquiry to formal demands.

Demand Evidence, Not Assurances
Move the conversation from vague assurances to concrete evidence:

  • Request a formal security attestation, preferably signed by the IR firm they used
  • Ask for redacted copies of forensic reports or relevant SOC reports
  • Insist on seeing logs or other technical evidence that supports their "no breach" conclusion

Leverage Your Contractual Rights
Formally invoke any relevant clauses your legal team identified, such as the right to audit. This escalates the issue from a request to a contractual obligation.

Place the Vendor on a "Watch List"
Document the incident, the vendor's response, and your findings. This places the vendor under closer scrutiny, more frequent reviews, and potential escalation up to contract termination if necessary.

Proactive Defense: Building Resilience Before the Next Denial

While you're dealing with the current situation, take steps to prevent future problems:

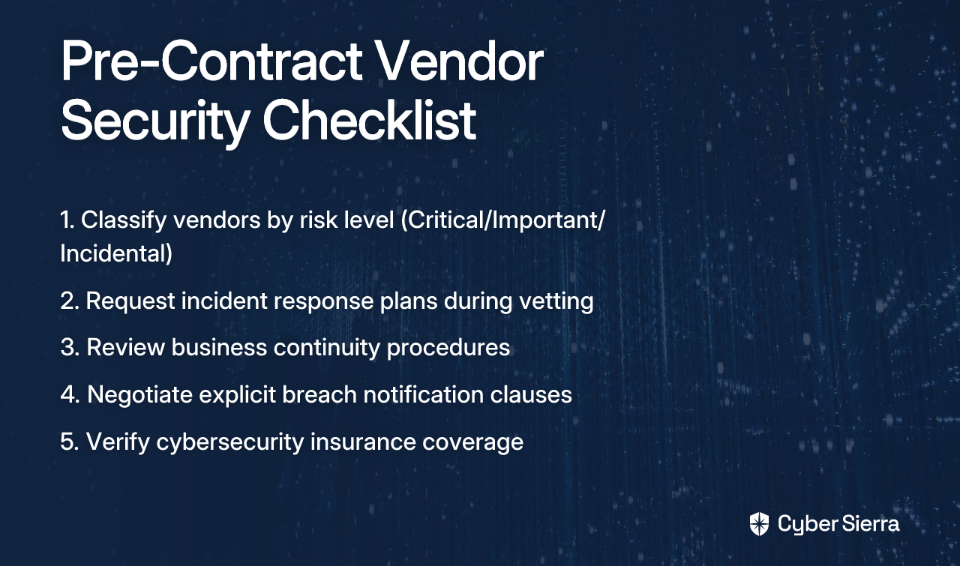
Pre-Contract Due Diligence is Non-Negotiable

  • Classify vendors as Critical, Important, or Incidental to determine scrutiny levels
  • Request their incident response and business continuity plans during vetting
  • Negotiate explicit breach notification clauses before signing

Implement Layered Technical Controls

  • Enforce multi-factor authentication on all vendor access points
  • Implement network segmentation for vendor-accessible systems
  • Deploy egress filtering to detect and prevent data exfiltration
  • Maintain robust data backups following the 3-2-1 strategy

Test Your Plan with Realistic Scenarios
Run tabletop exercises that specifically model a critical vendor breach where the vendor is uncooperative or in denial. Validate all contact lists to ensure you have up-to-date technical and legal contact information.

You Can't Outsource Responsibility

Trust is not a control. While vendors are essential partners, your organization retains the ultimate responsibility for protecting its data and complying with regulations.

A vendor's denial should be the starting point of your incident response process, not the end of it. By following this playbook, you can protect your organization even when faced with the all-too-common "no breach" response that later becomes "upon further investigation..."

Frequently Asked Questions

What is the first thing I should do if a vendor denies a security breach?

Your immediate priority is to isolate and contain the potential threat. This means you should sever all network connectivity to the vendor, including VPNs, API integrations, and network traffic, and lock down any vendor-related service accounts. This action, guided by the principle "assume a breach until proven otherwise," is critical to prevent a potential compromise from spreading into your own network while you investigate.

Why do vendors initially deny data breaches?

Vendors often deny data breaches at first to manage business risks, not necessarily to deceive. Their initial responses are typically controlled by legal and public relations teams focused on mitigating legal exposure, protecting their stock price, maintaining shareholder confidence, and preventing customer churn. The confirmation of a breach often comes later, "upon further investigation," once they have a clearer picture of the incident and a communication strategy in place.

How can I force a vendor to be more transparent about a potential breach?

You can force transparency by shifting from informal requests to formal, evidence-based demands rooted in your contract. Start by requesting concrete evidence like forensic reports or security attestations, not just verbal assurances. If the vendor remains uncooperative, formally invoke your contractual rights, such as a "right-to-audit" clause, with the help of your legal team. This elevates the request to a legal obligation.

Who is responsible for notifying customers if a vendor loses our data?

Your organization, as the original collector of the data, is almost always legally responsible for notifying affected customers and regulators. This obligation remains with you even if the breach occurred on a third-party vendor's system. You cannot outsource this responsibility, so it is crucial to engage your legal and compliance teams immediately to understand your specific notification duties under laws like GDPR, CCPA, and others.

What are the most critical clauses to include in a vendor contract for security?

To protect your organization, every critical vendor contract should include explicit clauses covering breach notification timelines and methods, specific data security commitments, clear liability allocation, and right-to-audit provisions. These clauses provide the legal framework to hold your vendors accountable and give you the leverage needed to demand transparency and cooperation during a security incident.

How do I balance business disruption with the need to isolate a vendor?

Balancing business continuity with security requires a risk-based decision. The potential damage from a widespread data breach spreading through your network is almost always far greater than the temporary disruption caused by isolating a vendor. Prioritize containment first. Mitigate the business impact by having pre-planned incident response steps, such as preparing backup systems or activating alternative service providers if the vendor provides a critical function.

Take two immediate actions today:

  1. Update your IR plan to include a specific protocol for "uncooperative vendor breach" scenarios
  2. Schedule a meeting with your legal team to review the breach notification clauses in your top 10 most critical vendor contracts

Remember: When a vendor denies a breach, your response shouldn't be relief—it should be verification.

blog-hero-background-image
Cyber Security

How to Integrate Risk Registers in Scrum Teams Without Resistance

backdrop
Table of Contents

Join thousands of professionals and get the latest insight on Compliance & Cybersecurity.


You've been assigned to lead a Scrum team that's delivering mission-critical software. Your organization requires a risk register, but when you mention it in your first team meeting, you're met with crossed arms and frowns.

"That's waterfall thinking. We're Agile," says one developer. "Risk registers are just bureaucratic overhead," adds another.

This scenario plays out in countless organizations where traditional project management practices meet Agile methodologies. The development team considers the risk register a "predictive process" that contradicts their Scrum mindset. Meanwhile, you're caught between organizational requirements and team resistance.

Sound familiar? You're not alone.

The root of this conflict isn't about tools or processes—it's about perception and knowledge gaps. Your team isn't resistant to managing risks; they're resistant to what they perceive as outdated, bureaucratic documentation that adds no value to their sprint work.

In this guide, you'll discover how to bridge this gap not by forcing compliance, but through coaching your team to see the risk register as what it truly is: a powerful enabler of Agile values that can prevent sprint derailments and enhance predictability. We'll transform the risk register from a source of friction to a catalyst for team success.

Why the Resistance? Unpacking the "Anti-Risk Register" Mindset

Before you can overcome resistance, you need to understand its origins. Why do Scrum teams often push back against risk registers?

The Knowledge Gap

According to discussions in project management communities, the primary reason for resistance is simply that "the team doesn't know this". Many developers have never been properly introduced to risk management concepts or have only seen them implemented poorly.

Cultural Misalignment

Risk registers can feel like artifacts of command-and-control management, clashing with Agile's collaborative values. According to research on Agile transformations, teams fear losing autonomy when faced with what they perceive as top-down processes.

The Bureaucracy Perception

When a team has embraced Agile's principle of "simplicity—the art of maximizing the amount of work not done," a risk register can appear to be unnecessary administrative overhead that distracts from delivering value.

Comfort in Existing Practices

Teams comfortable with their Scrum rituals may see the introduction of a "PMP-style" tool as a threat to their established workflow or even as a sign the organization is retreating from its Agile commitment.

Interestingly, many of the challenges Scrum teams regularly face—such as mid-sprint emergencies, unavailable Product Owners, or stakeholder access issues—are precisely the kinds of risks a well-maintained register could help anticipate and mitigate. The irony is that these common Scrum challenges often derail sprints precisely because they weren't identified as risks early enough.

Reframing the Risk Register as an Agile Enabler

The key to integration lies in reframing how the team perceives the risk register—not as a static document created at project inception and then forgotten, but as a dynamic, living artifact that supports Scrum's core values.

What Exactly Is a Risk Register?

At its simplest, a risk register is "a tool for identifying potential risks in project execution." (Source: ProjectManager.com). Note the word "tool"—not process, not bureaucracy, but a tool that serves the team.

From Predictive to Adaptive

In traditional project management, risk registers might be created upfront and revisited infrequently. In Agile, they become living documents that evolve sprint by sprint. As ISACA notes, "Agile's iterative approach allows for adaptive risk management, where risks are tackled incrementally during sprints."

This aligns perfectly with the Agile principle of responding to change, as risk management is fundamentally about anticipating change. It's worth noting that according to the Standish Group's Chaos Study, "Agile projects are three times more likely to succeed than Waterfall projects," and effective risk management contributes significantly to this success rate.

Lightweight and Value-Focused

An Agile-friendly risk register doesn't need every field from a traditional template. It can be streamlined to include only:

That's it—no complexity, no bureaucracy, just information the team needs to work more effectively.

The Coaching Playbook: Weaving Risk Management into Scrum Events

The most successful integrations of risk management into Scrum don't create new meetings or processes; they weave risk activities into existing Scrum events. Here's how:

1. During Backlog Refinement & Sprint Planning

As the team discusses Product Backlog Items (PBIs), the Scrum Master or Project Manager can ask simple questions:

  • "What might slow us down on this story?"
  • "Are there any external dependencies we're assuming will be ready?"
  • "What technical unknowns could impact our delivery?"

These questions naturally surface risks without ever using "risk management" terminology that might trigger resistance. Add identified risks to your lightweight register.

2. Risk Assessment in Sprint Planning

Once the Sprint Backlog is formed, take 15 minutes to quickly review risks associated with the selected PBIs. Ask the team to rank them based on probability and impact (High/Medium/Low). This tells you where to focus your attention without extensive analysis.

3. Making Risk Responses Actionable

For high-priority risks, convert the response plan into a concrete task in the Sprint Backlog. For example:

Risk: "The new payment API might not handle our expected transaction volume."

Sprint Task: "Create a load-testing script to verify API performance under peak conditions."

This approach transforms risk management from an abstract concept to tangible work that delivers value. Assign an owner to each key risk—someone who'll keep an eye on warning signs.

4. Monitoring Throughout the Sprint

  • Daily Scrum: When appropriate, risks can be mentioned as impediments. "The risk of a delayed server deployment is now high; I'm coordinating with DevOps."
  • Sprint Review: When demonstrating the increment, briefly mention how risks were handled. "We successfully mitigated the performance risk by implementing caching, which allowed us to complete the feature on time."
  • Sprint Retrospective: This is your key feedback loop. Ask: "How did our risk identification help this sprint? Were there surprises we should have anticipated? How can we improve our risk awareness?"

By embedding risk discussions into these existing ceremonies, you make risk management a natural part of the team's rhythm rather than an imposed process.

Practical Strategies for Overcoming Resistance

Even with a thoughtfully designed approach, you may still encounter resistance. Here are strategies for fostering adoption:

1. Co-create the Process

Don't impose a template. Instead, involve the team in designing their own lightweight risk register. Ask what information they think would be valuable to track and what format would be least intrusive. When the team builds the tool, they're more likely to use it.

2. Educate Through Benefits, Not Compliance

Host a short workshop that focuses on the "why" before the "how." Frame the benefits in terms the team values:

  • Fewer sprint disruptions
  • More predictable delivery
  • Reduced technical debt from emergency fixes
  • Greater stakeholder confidence

Use real examples from past sprints where early risk identification could have prevented problems. Listen empathetically to concerns and address them honestly.

3. Start Small and Celebrate Wins

Begin with a simple approach—perhaps just identifying the top three risks for each sprint. When the team successfully mitigates a risk, celebrate it: "Great job identifying that dependency risk early—it saved us from a major delay!" These positive experiences build momentum.

4. Lead by Example

As the project manager or Scrum Master, demonstrate vulnerability by openly discussing risks you see without blame or judgment. When leaders model risk awareness as a positive behavior, teams are more likely to follow suit.

5. Connect to Agile Values

Consistently tie risk management back to Agile principles:

  • Transparency: The risk register makes potential obstacles visible to all.
  • Inspection: Regular risk reviews help the team inspect their assumptions.
  • Adaptation: Early risk identification allows for proactive adaptation.

From Resilient Code to Resilient Teams

Successfully integrating risk registers into Scrum isn't about forcing compliance with organizational requirements. It's about coaching your team to see risk management as an enabler of Agile values that helps them deliver more predictably and with fewer disruptions.

Remember, as the Reddit discussion highlighted, "you have to teach/coach/mentor the team in the purpose of a risk register." This coaching approach transforms resistance into understanding and eventually into ownership.

When implemented thoughtfully, risk management doesn't contradict Scrum—it enhances it. Your team will become not just creators of resilient code, but a more resilient, confident, and successful Scrum team capable of navigating uncertainty with ease.

By bridging the gap between traditional project management wisdom and Agile practices, you create a stronger, more adaptable approach that draws from the best of both worlds.

Frequently Asked Questions

What is an Agile risk register?

An Agile risk register is a simple, dynamic tool used by Scrum teams to identify, track, and manage potential issues that could impact their sprints. Unlike traditional, static registers, an Agile version is a living document that evolves with the project, helping the team adapt to change and prevent disruptions.

Why do Scrum teams often resist using a risk register?

Scrum teams often resist risk registers because they perceive them as bureaucratic, non-Agile "waterfall" tools that contradict their collaborative and autonomous culture. This resistance typically stems from a knowledge gap about modern risk practices, a fear of losing autonomy, or the perception that it is unnecessary administrative overhead that distracts from delivering value.

How can I introduce a risk register without disrupting my team's workflow?

The best way to introduce a risk register is to seamlessly integrate risk discussions into your existing Scrum events. During Sprint Planning, ask what could slow the team down. In the Sprint Retrospective, discuss what surprises could have been anticipated. By weaving these conversations into the team's natural rhythm and co-creating a simple register, you make risk management a supportive tool rather than an imposed process.

What should an Agile-friendly risk register include?

An Agile-friendly risk register should be lightweight and focus only on essential, actionable information. A simple and effective format includes just five key fields: a unique Risk ID, a clear Description of the potential issue, a simple Probability and Impact rating (e.g., High/Medium/Low), a concrete Response Plan, and an Owner responsible for monitoring the risk.

Isn't risk management just waterfall thinking?

No, while traditional risk management can be a rigid, upfront process, Agile risk management is fundamentally different. In a waterfall model, risk registers are often created once and rarely updated. In an Agile context, risk management is an adaptive and continuous activity. The register is a living document that is reviewed and updated iteratively, aligning perfectly with the Agile principle of responding to change.

blog-hero-background-image
Cyber Security

How to Stop Context Switching From Destroying Your Cybersecurity Projects

backdrop
Table of Contents

Join thousands of professionals and get the latest insight on Compliance & Cybersecurity.


You're deep in analyzing a new zero-day vulnerability, finally making progress after hours of focused work. Suddenly, your concentration shatters as Slack notifications flood in, your phone rings with an urgent request, and three new tickets hit your queue—all marked "high priority."

Sound familiar? For cybersecurity professionals, this constant whiplash between tasks isn't just annoying—it's destroying your productivity, compromising your security posture, and driving you toward burnout.

As one security analyst put it: "Things I could finish in 1 or 2 days extend to 2 to 3 weeks because I have to be putting out fires constantly, and getting back into the flow is not easy." This frustrating reality is all too common in our field.

Context switching—the mental shift required when moving between unrelated tasks—has become the silent killer of cybersecurity projects. But it doesn't have to be this way. This article will give you concrete, actionable strategies to reclaim your focus, protect your time, and finally drive those critical security initiatives to completion.

The Hidden Tax on Cybersecurity: Understanding the True Cost of Context Switching

Context switching is the mental process where you stop focusing on one task to engage in another, similar to how a computer's operating system switches between application threads. But unlike computers, humans incur significant overhead during this process.

The statistics are shocking:

  • It takes an average of over 20 minutes to regain deep focus after a single interruption (Reclaim.ai)
  • Shifting between tasks can reduce productivity by as much as 40%, with only 2.5% of people able to multitask effectively (Reclaim.ai)
  • Each context switch consumes up to 20% of your cognitive capacity, leaving behind "attention residue" that impairs performance on subsequent tasks (Reclaim.ai)
  • After just 20 minutes of interruptions, individuals report significantly increased stress and frustration levels (University of California, Irvine study via Asana)

Impact on Cybersecurity Projects

For security professionals, these costs are magnified. Research from Carnegie Mellon University's Software Engineering Institute found that professionals juggling just two projects can only dedicate about 40% of their effort to each. When managing five projects, this plummets to less than 10% per project due to context-switching overhead (SEI @ Carnegie Mellon University).

Imagine trying to conduct a thorough threat hunt while simultaneously being on a support rota. The constant switching doesn't just slow you down—it fundamentally changes what you can accomplish.

This cognitive tax manifests in three critical ways:

  1. Reduced Focus & Effort Allocation: Your attention becomes fragmented across multiple initiatives, with each receiving a fraction of your capability.
  2. Compromised Quality and Increased Risk: Context switching directly correlates with increased bugs, missed tasks, and quality degradation. In cybersecurity, this means misconfigured security controls, overlooked alerts, or improperly patched vulnerabilities—mistakes with potentially catastrophic consequences.
  3. Brain Overload & Professional Burnout: The constant demand for attention is overwhelming. With 56% of workers feeling compelled to respond to notifications immediately, and the average worker switching between nine different apps per day (Asana), it's no wonder burnout rates are skyrocketing in our field.

Why Cybersecurity is a Perfect Storm for Context Switching

The cybersecurity field creates a uniquely challenging environment for maintaining focus, due to several factors:

The Reactive Firefight

The nature of cybersecurity work is inherently reactive. As one professional lamented: "Every day is a new problem. Just finished remediating a big vuln in your environment? Cool here's a new zero-day." (Reddit)

This constant state of "firefighting" makes it nearly impossible to carve out time for proactive, deep work on long-term projects.

The Deluge of Data and Distractions

Cybersecurity professionals face an overwhelming flood of information:

  • Alert fatigue from SIEMs and vulnerability scanners
  • Constant communication across team chats and emails
  • Never-ending ticketing queues requiring attention

This barrage has only intensified, with 42% of workers spending more time on email and 40% more time on video calls than a year ago (Asana).

The "Top Priority" Shuffle

Many security teams suffer from constantly shifting project priorities, where leadership redirects entire teams without acknowledging the cognitive cost of these pivots. This environment makes sustained progress on any initiative nearly impossible.

The Collaboration Paradox

While collaboration is essential in cybersecurity, unstructured collaboration becomes a primary source of interruption. The "quick question" on Slack can completely derail an hour of focused analysis.

Reclaiming Your Focus: Actionable Strategies to Combat Context Switching

Let's break down a comprehensive strategy to combat context switching across three pillars:

Pillar 1: Individual Discipline & Time Mastery

1. Engineer Your Environment for Deep Work

Use 'Do Not Disturb' (DND) Religiously: Don't just activate the feature; communicate it effectively. Set your Slack status to "Deep Work: Please message only if urgent" with a specific time when you'll be available again.

Practice Time Blocking: Block out 90-120 minute chunks of focus time in your calendar with clear labels (e.g., "Focus Time: Q3 Firewall Rule Review"). This makes your unavailability visible and defends your time from meeting requests (Reclaim.ai).

2. Implement the Pomodoro Technique

This technique is specifically recommended by cybersecurity professionals for regaining focus:

  1. Choose a single task to work on
  2. Set a timer for 25 minutes
  3. Work on the task without interruption until the timer rings
  4. Take a short 5-minute break
  5. After four "pomodoros," take a longer break of 15-30 minutes

This method builds focus endurance and helps combat the learned habit of self-interruption (Asana).

3. Prioritize Ruthlessly with the Eisenhower Matrix

Manage incoming requests and "fires" using these four quadrants:

  • Urgent & Important (Do First): Critical vulnerabilities, active security incidents
  • Important, Not Urgent (Schedule): Proactive project work, policy development, strategic planning—this is your focus time
  • Urgent, Not Important (Delegate): Some meeting requests, non-critical alerts that can be handled by others
  • Neither Urgent Nor Important (Delete): Time-wasting activities, unnecessary notifications

(Reclaim.ai)

4. Batch Similar Tasks

Dedicate specific blocks of time for similar, low-concentration tasks. For example, "11:00-11:30 AM: Triage Ticketing Queue & Respond to Non-Urgent Emails." This prevents these small tasks from fragmenting your entire day (Reclaim.ai).

Pillar 2: Optimizing Tools & Team Workflows

5. Consolidate and Integrate Your Tools

The average worker switches between nine apps per day—a recipe for context switching disaster. Work to:

  • Advocate for a centralized work management platform
  • Use integrations to bring notifications and actions into one place (e.g., Jira tickets in Slack)
  • Reduce the number of tools you actively monitor throughout the day

6. Leverage DevOps Practices for Automation

Automation can significantly reduce the manual burden and interruptions:

  • Automate Code Reviews & Security Scanning: Implement tools that automatically check for standards and vulnerabilities in committed code
  • Use Continuous Integration (CI) Monitoring: Set up automated alerts for build failures or security issues
  • Create Runbooks for Common Issues: Document repeatable processes to reduce the cognitive load of handling routine incidents

(SEI @ Carnegie Mellon University)

Pillar 3: Fostering a Culture of Focus

7. Improve Collaboration and Communication

Default to Asynchronous Communication: Encourage the use of email, project comments, or detailed Slack messages for non-urgent matters instead of instant DMs that demand immediate responses (Asana).

Schedule Coworking Sessions: Host virtual coworking sessions where team members work on their individual tasks in a shared video call (mics off). This provides accountability without interruption.

8. Cut Unnecessary Meetings

Before scheduling a meeting, ask: "Can this be a status update report, a shared document, or an email?"

Champion the idea of "No-Meeting Days" (e.g., No-Meeting Wednesdays) to guarantee at least one day of uninterrupted deep work for the entire security team.

9. Limit Concurrent Project Assignments

This point is crucial for team leads and managers:

  • The evidence is clear from the SEI study: assigning an analyst to more than one project drastically reduces their effective output on all of them
  • Track team workload using issue trackers to identify who is overloaded across multiple business-critical projects
  • Rebalance assignments to protect focus and prevent burnout

Taking Back Control of Your Cybersecurity Work

Context switching isn't a personal failing but a systemic problem that's especially rampant in cybersecurity. It's a silent killer of productivity, project success, and team morale.

The antidote is a conscious, multi-layered strategy combining:

  • Individual habits (Pomodoro technique, time blocking)
  • Smarter team workflows (asynchronous communication, tool integration)
  • Strong management support (limiting WIP, cutting meetings)

By deliberately engineering an environment that values and protects deep focus, cybersecurity teams can shift from a constant state of reaction to one of proactive defense. This not only delivers better security outcomes but prevents the burnout that plagues our industry.

Remember what one security professional shared: "The interruptions and constantly shifting what tasks/projects take priority" is at the heart of what makes cybersecurity work frustrating. By implementing these strategies, you can break that cycle and finally make meaningful progress on the projects that matter most.

Start small—even implementing just one or two of these strategies can dramatically reduce your context switching tax and help you reclaim your focus, your productivity, and ultimately, your job satisfaction.

Frequently Asked Questions

What is context switching and why is it a problem in cybersecurity?

Context switching is the mental effort required to shift your focus from one unrelated task to another. It's a significant problem in cybersecurity because the field's reactive nature, constant alerts, and shifting priorities create an environment of perpetual interruption, which degrades focus, increases the risk of errors, and leads to burnout. Every time a security professional is pulled from a deep task like vulnerability analysis to answer a "quick question," they incur a cognitive "tax," and it can take over 20 minutes to regain deep focus.

What are the biggest impacts of context switching on security teams?

The biggest impacts of context switching on security teams are reduced productivity, compromised work quality leading to increased security risks, and high rates of professional burnout. Frequent task switching can cut productivity by up to 40%, causing projects to stall. The "attention residue" left after an interruption makes mistakes more likely, such as misconfiguring a firewall or overlooking a critical alert. Over time, this constant mental strain is a primary driver of burnout.

How can I immediately reduce interruptions during my workday?

You can immediately reduce interruptions by using your communication tools' "Do Not Disturb" (DND) status and practicing time blocking. Set your Slack or Teams status to "Deep Work" or "Focusing" for a set period and communicate when you'll be available again. More importantly, block out 90-120 minute "Focus Time" slots directly in your calendar. This makes your unavailability visible to colleagues and discourages them from scheduling meetings or expecting immediate responses.

What is the Pomodoro Technique and how does it help with focus?

The Pomodoro Technique is a time management method that uses a timer to break work into focused 25-minute intervals separated by short breaks. It helps combat context switching by training your brain to maintain deep focus on a single task and resist the urge for self-interruption. The process is simple: choose a task, work on it for 25 minutes without distraction, take a 5-minute break, and repeat. After four cycles, you take a longer break.

How can managers protect their teams from the negative effects of context switching?

Managers can protect their teams by limiting the number of concurrent projects assigned to each individual, championing asynchronous communication, and actively reducing unnecessary meetings. Research shows an analyst's effectiveness plummets when assigned to more than one or two major projects simultaneously. Managers should use workload tracking tools to prevent overload and foster a culture of focus by implementing "no-meeting days" to guarantee uninterrupted time for deep work.

Isn't constant multitasking just part of the job in cybersecurity?

While responding to urgent threats is a key part of the job, the belief that constant multitasking is effective is a myth. The human brain doesn't truly multitask; instead, it engages in rapid, inefficient context switching. The goal is not to eliminate all interruptions but to control them. By separating reactive "firefighting" roles from proactive project work and protecting focus time, teams can manage urgencies without the massive productivity loss and burnout caused by chaotic multitasking.

blog-hero-background-image
Cyber Security

How to Price MDR and SOC Services for SMBs Without Breaking the Bank

backdrop
Table of Contents

Join thousands of professionals and get the latest insight on Compliance & Cybersecurity.


You've been approached by several small business clients asking about enhanced cybersecurity protection. They're worried about ransomware and data breaches, but when you quote them for Managed Detection and Response (MDR) or Security Operations Center (SOC) services, they experience immediate sticker shock.

You're caught in a painful dilemma: How do you deliver enterprise-grade security at SMB-friendly prices while still running a profitable MSP business?

If you're asking yourself, "How can I price these security services competitively without taking on massive responsibility or investment?" – you're not alone.

The Build vs. Partner Question: Solving the Infrastructure Challenge

Before discussing pricing models, let's address the elephant in the room. As one MSP bluntly put it on Reddit: "Are you really going to take that responsibility without having a SOC, SIEM or other solution already developed?"

It's a valid concern. Building an in-house SOC is a massive undertaking:

  • Staggering Costs: A full SOC implementation easily exceeds $1 million annually
  • Talent Requirements: A 24/7 SOC requires at least 9 full-time security engineers, plus management and threat researchers
  • Expertise Gap: The 2024 ISC2 Cybersecurity Workforce Study found a global shortage of over 4.76 million security professionals

For most MSPs serving the SMB market, building an in-house SOC simply isn't viable. As one experienced MSP advised: "You are talking about a large investment, so just buy until you can make it yourself."

The practical solution? Partner with a reputable MDR provider that includes SIEM capabilities and SOC services. This allows you to deliver enterprise-grade security with minimal upfront investment.

Core Pricing Models That Work for SMBs

The pricing question generates significant confusion among MSPs. As one Reddit user asked: "Is everyone selling at retail price or value based? There are a lot of different pricing strategies."

Let's break down the most effective models for the SMB market:

1. Per-Device/Per-Asset Pricing

This is the most straightforward approach and aligns with how many MSPs already price other services.

Real-world pricing examples:

  • Standard MDR services typically range between $10-30 per endpoint monthly
  • More comprehensive solutions that include network and cloud protection can reach $40-50 per endpoint

One MSP shared their experience: "Managed IDS/MNDR would be another 3-5 per device. All together would be 30ish per device."

This model works well because:

  • It's easy for clients to understand
  • It scales predictably with client size
  • It aligns with how many MSPs already price other services

2. Tiered Service Plans

Offering different service tiers (e.g., Basic, Standard, Premium) allows SMBs to select the protection level that fits their budget and risk profile.

Example tier structure:

  • Basic Tier: Endpoint protection and monitoring only
  • Standard Tier: Endpoint plus email security and basic log monitoring
  • Premium Tier: Comprehensive protection including endpoint, email, network, cloud resources, and active threat hunting

The tiered approach provides a clear upgrade path as clients' security maturity grows.

3. Fixed-Price (All-Inclusive) Model

Many SMBs prefer predictable costs without surprises. As one provider noted on their blog, "SOC, MDR and SOAR have to be a fixed price, right?"

This approach bundles all security services into a single monthly fee, often based on company size or employee count. The advantage is simplicity – clients know exactly what they're paying each month without concern for device counts or usage fees.

4. Value-Based Pricing

This advanced approach shifts the conversation from cost to value by focusing on the risk reduction provided.

When a client balks at a $2,000/month security service, remind them that the average cost of a cyberattack on an SMB ranges from $25,000 to as much as $3 million. Suddenly, that monthly fee looks like an insurance policy with an excellent return on investment.

As one MSP wisely noted: "Cybersecurity isn't another tool to sell to clients - it's part of an overall business risk mitigation strategy for the client and should be treated as such."

Critical Factors That Should Influence Your Final Price

The "Response" is Critical

One of the most important warnings from experienced MSPs: "Be sure to understand what the 'response' part means."

Some lower-priced MDR offerings only provide alerts, leaving the actual remediation work to you or the client. Others offer "guided response" where they provide instructions but don't take action themselves.

The highest-value services (which command premium prices) include active threat remediation, where the provider contains and resolves threats without requiring your intervention. Some providers claim to resolve over 90% of incidents without customer intervention – a significant value differentiator worth paying for.

Vendor Lock-In vs. Integration Flexibility

Does your MDR provider force clients to switch their entire security stack, or can they integrate with existing tools? The latter approach typically offers better value and less friction for clients, allowing you to charge accordingly.

Data Volume Restrictions

Beware of providers who price based on data ingestion volume. This creates a perverse incentive where you want to limit data to control costs, but more data leads to better security. Look for providers with unlimited or generous data allowances.

Your Labor Costs and Markup

A common question from MSPs: "Are you charging extra for labor?"

Even with a third-party MDR provider, you'll still invest time in:

  • Managing the relationship with the security provider
  • Reviewing alerts and reports
  • Communicating with clients about security issues
  • Coordinating remediation efforts

Your pricing must account for this labor. A typical approach is to start with your vendor's suggested retail price and add your markup based on the value you provide and your market conditions.

Selling the Value to SMB Clients

When presenting security services to SMBs, focus on translating technical capabilities into business outcomes:

1. Make the Risk Tangible

Use compelling statistics to make the threat real:

  • In 2023, there were 2,365 cyberattacks affecting over 343 million victims, a 72% increase from 2021
  • 90% of cyberattacks targeted cloud environments in 2023
  • There was a 64% increase in double extortion ransomware attacks from 2022 to 2023

2. Focus on Business Problems Solved

Explain how MDR solves challenges specific to SMBs:

  • Talent Gap: "You can't hire a team of security experts, but for a predictable monthly fee, you can rent ours."
  • Compliance Requirements: "Our service helps you meet regulatory requirements for data protection."
  • Business Continuity: "We minimize downtime from security incidents that could cripple your operations."

3. Use Cost Comparison Tools

Tools like the Armature Systems SOC Cost Calculator can visually demonstrate how much clients save compared to building an in-house security team.

Practical Steps and Pitfalls to Avoid

Action Steps for MSPs:

  1. Partner strategically: Choose an MDR provider that offers flexible pricing models you can adapt for your clients.
  2. Create clear SLAs: Develop crystal-clear agreements that outline what is included vs. what costs extra.
  3. Test before you commit: Leverage free trials from MDR providers to evaluate their effectiveness before presenting to clients.
  4. Require cyber insurance: Consider making adequate cyber insurance a requirement for all clients using your security services.

Common Pitfalls:

  1. Underpricing your services: A race to the bottom damages perceived value and creates unsustainable margins.
  2. Overlooking hidden vendor fees: Scrutinize MDR contracts for data overage charges, onboarding fees, or other hidden costs.
  3. Neglecting legal protections: Consult with legal professionals about fiduciary responsibilities, especially if offering vCISO services.
  4. Creating complex pricing: Overly complicated pricing models confuse clients and slow the sales cycle.

Conclusion: Balancing Security and Affordability

By leveraging partnerships with established MDR providers, choosing the right pricing model, and clearly communicating the value proposition to your clients, you can deliver enterprise-grade security at SMB-friendly prices while maintaining healthy margins.

Remember that effective cybersecurity isn't just another tool to sell – it's a critical component of your clients' overall risk management strategy. When priced and positioned correctly, advanced security services like MDR and SOC can become one of the most profitable and sticky offerings in your MSP portfolio.

The key is finding the sweet spot where your SMB clients receive the protection they need at a price they can afford, and you generate the margins required to sustain and grow your security practice.

Frequently Asked Questions

What is the difference between MDR and traditional antivirus?

The primary difference is that Managed Detection and Response (MDR) provides 24/7 human-led threat hunting and response, while traditional antivirus software primarily focuses on automatically blocking known malware. Antivirus is a passive tool that prevents known threats, whereas MDR is an active service that detects, investigates, and neutralizes sophisticated attacks, including new or unknown threats that might bypass automated defenses.

Why should MSPs partner with an MDR provider instead of building their own SOC?

MSPs should partner with an MDR provider primarily due to the prohibitive costs and resource requirements of building an in-house Security Operations Center (SOC). A self-built SOC can cost over $1 million annually and requires a team of at least nine full-time security experts. Partnering allows MSPs to offer enterprise-grade security to their clients with minimal upfront investment and access to specialized expertise.

What is the most effective pricing model for selling security services to SMBs?

The most effective pricing model depends on your clients, but per-device and tiered plans are the most common and easiest for SMBs to understand. Per-device pricing scales predictably, while tiered plans offer flexibility for different budgets and security needs. For clients who prioritize predictable costs, a fixed-price, all-inclusive model can also be very effective.

How can I justify the cost of MDR services to a small business client?

Justify the cost by framing it as a risk mitigation strategy rather than a technical expense. Compare the monthly service fee to the potentially devastating average cost of a cyberattack for an SMB, which can range from $25,000 to over $3 million. Emphasize that the service solves key business problems like the cybersecurity talent gap, compliance requirements, and business continuity.

What does the 'Response' in Managed Detection and Response (MDR) actually mean?

The 'Response' in MDR refers to the active remediation actions taken by the security provider once a threat is detected. This is a critical differentiator, as lower-cost services may only provide alerts, leaving the actual cleanup to you. High-value MDR services include active threat containment and resolution, often without requiring any intervention from you or your client.

How much should an MSP mark up MDR services from a partner?

There is no single correct markup, but a common approach is to start with the vendor's suggested retail price and then add a margin that reflects the value you provide. Your markup should account for your labor costs in managing the vendor relationship, client communication, and coordinating any necessary remediation efforts. Consider your market and the level of service you are wrapping around the partner's offering.

blog-hero-background-image
Cyber Security

How to Build a Password Management Strategy That Actually Works

backdrop
Table of Contents

Join thousands of professionals and get the latest insight on Compliance & Cybersecurity.


Is your company's master password list a Google Sheet? Or worse, an Excel file saved on a shared drive called passwords.xlsx? Maybe you've spotted sticky notes with login credentials decorating monitor bezels around the office?

You're not alone.

The reality is that most organizations—from nimble startups to established enterprises—are navigating a password nightmare. IT professionals confess, "I have so many things to fix that I do not even know where to start," while security nightmares like "An excel as password manager (plaintext passwords)" continue to be standard practice.

The stakes couldn't be higher. The global cost of cybercrime is projected to hit $6 trillion annually, with about 50% of data breaches involving stolen credentials. Your spreadsheet of plaintext passwords isn't just an organizational weakness—it's potentially an existential threat to your business.

This guide provides a clear, actionable framework to replace those dangerous ad-hoc methods with a robust, scalable password management strategy that actually works. No security jargon, no unrealistic expectations—just practical steps that any organization can implement starting today.

The Anatomy of a Broken Password Strategy: Recognizing the Red Flags

Before we build something better, let's identify what's broken. Here are the most dangerous password mistakes that organizations make daily:

1. Insecure Storage and Sharing

The most prevalent issue is how passwords are stored and shared. If any of these sound familiar, your organization is at serious risk:

  • Spreadsheets with plaintext passwords
  • Shared documents on cloud drives
  • Passwords saved in "Windows Notes" or "electronic sticky notes"
  • Printed password lists kept by HR or admin staff
  • Sharing credentials via email, chat, or text messages

One Reddit user described their workplace horror story: "All users were instructed to give all passwords to a lady in HR, who kept them printed out in her office. In the event someone was out sick or on break and their password was needed, employees would just call her and ask for the person's password."

These methods are dangerous because they lack encryption, create multiple points of vulnerability, leave no audit trail, and are easily copied or accessed by unauthorized parties.

2. Weak Password Hygiene

Even if you nail the storage solution, poor password creation and management practices will undermine your security:

  • Password reuse: Two-thirds of internet users reuse the same password across multiple accounts, according to Keeper Security. This enables devastating credential stuffing attacks where breached passwords from one service are tried across other platforms.
  • Weak creation practices: Using personal information, short passwords (anything under 16 characters is increasingly vulnerable), or predictable substitutions like "P@55w0rd" that modern cracking tools easily defeat.
  • Everyone has admin rights: As one IT professional observed, a common practice is making "all admins domain admins," dramatically expanding your attack surface.

3. Lack of Formal Policies and Controls

Many organizations operate without written password policies, leading to inconsistent practices and security gaps. This includes:

  • No guidance on password creation or storage
  • No protocols for handling employee departures
  • No enforcement of basic security measures like locking computers
  • No training on recognizing phishing or other social engineering attacks

One user lamented finding "the keepass vault and the password in a clear text file in the same directory" during a penetration test—a stark example of how even security-minded tools fail without proper policies.

Your 4-Step Action Plan to a Working Password Strategy

Now that you understand what's broken, here's a systematic approach to fixing it:

Step 1: Assess Your Current Reality

Before implementing solutions, you need a clear picture of your current password landscape:

Actionable Task: Conduct a comprehensive audit to identify all current password management practices. Document:

  • Where passwords for privileged accounts are stored
  • How service, system, and application credentials are managed
  • Who has access to shared accounts
  • What password-related policies (if any) currently exist

Don't be afraid of what you'll find—this isn't about blame but establishing a baseline for improvement. As BeyondTrust notes, you must "catalog every spreadsheet, sticky note, and hardcoded password" to understand the scope of what needs fixing.

Step 2: Define a Strong, Modern Password Policy

Your password policy is the rulebook for your entire organization. It must be clear, simple, and enforceable. Based on current best practices, include these key elements:

  • Length Trumps Complexity: Following NIST guidelines, mandate long passphrases instead of short, complex passwords. A minimum of 16 characters is a strong starting point, with support for up to 64 characters.
  • Uniqueness is Mandatory: Every account and service must have a unique password. Period.
  • Multi-Factor Authentication (MFA) is Non-Negotiable: Implement MFA for all critical systems. According to Spiceworks, this is one of the most effective security controls available.
  • Smart Password Rotation: Move away from arbitrary 90-day password changes. The modern best practice is to change passwords only when a breach is suspected or an employee with access leaves the organization.
  • Immediate Revocation: Ensure a process exists to change all relevant passwords when an employee departs, ideally automated through your identity management system.

Step 3: Implement an Enterprise Password Manager (EPM)

This is the central technology that makes your policy enforceable and usable. A proper EPM should offer:

  • Centralized Encrypted Vault: A single, secure place to store all credentials
  • Strong Password Generator: To help users create policy-compliant passphrases
  • Secure Sharing: Allow teams to share access without revealing the actual password
  • Audit and Compliance Reporting: Track who accessed what and when
  • Cloud Sync: Secure access across multiple devices and locations

Phase out insecure methods like browser-based password saving and personal password managers that don't integrate with your security ecosystem.

Step 4: Train, Onboard, and Empower Your Team

A tool is only as good as its adoption. Develop a continuous training program that:

  • Teaches employees why these changes protect both them and the company
  • Provides hands-on training for your new EPM tool
  • Conducts ongoing education on threats like phishing, using real-world examples
  • Offers clear escalation paths when users encounter security concerns

Remember that resistance often comes from fear of additional complexity. Show users how a proper password management system actually makes their lives easier while increasing security.

Advanced Tactics for a Mature Security Posture

Once you've implemented the foundational steps, consider these advanced strategies to further strengthen your organization's password security:

Enforce the Principle of Least Privilege (PoLP)

The Principle of Least Privilege means users should only have the minimum level of access necessary to perform their job functions. StrongDM recommends:

  • Implementing Role-Based Access Control (RBAC) to systematically limit access
  • Regularly reviewing and pruning unnecessary permissions
  • Creating separate accounts for administrative vs. regular tasks
  • Eliminating shared accounts wherever possible

This prevents a single compromised account from giving attackers extensive access to your systems.

Secure Privileged and Non-Human Accounts

Admin accounts, service accounts, and API keys are your crown jewels—and prime targets for attackers. Consider using a Privileged Access Management (PAM) solution that offers:

  • Session Management: Recording, monitoring, and controlling privileged sessions in real-time
  • Credential Injection: Automatically injecting credentials without exposing them to users
  • Just-In-Time Access: Providing elevated privileges only when needed and for limited durations

These accounts often have the broadest access to your systems, making their protection critically important.

Implement Continuous Monitoring and Auditing

Your password strategy should be a living process, not a one-time setup. Regularly:

  • Review access logs and audit trails from your EPM
  • Monitor for suspicious login patterns or unusual access attempts
  • Conduct periodic security assessments of your password infrastructure
  • Test your team with simulated phishing exercises

As one Reddit user painfully discovered: "Working at an MSP, one of our clients received a phishing email to the accounts payable department... Without even looking up the 'company' requesting it they just casually sent a wire for 40k." Regular training and monitoring could have prevented this $80,000 mistake.

It Starts with a Single, Secure Step

A successful password management strategy isn't about having perfect passwords; it's about creating a holistic system built on:

  • A strong, modern policy that balances security with usability
  • The right tools (EPM) that make compliance easy
  • Continuous employee education that builds security awareness
  • Regular monitoring to catch issues before they become breaches

The journey from password chaos to security doesn't happen overnight, but it does start with a single step. Take 30 minutes today to identify just one place where passwords are being stored insecurely in your organization. Acknowledging the problem is the first step to fixing it.

Remember what one overwhelmed IT professional confessed: "I have so many things to fix that I do not even know where to start." Start here, with your password strategy. It's a foundational investment that protects your organization from data breaches, financial loss, and the devastating consequences of credential compromise.

Your future self—and your organization—will thank you.

Frequently Asked Questions

What is the first step to creating a secure password management strategy?

The first and most critical step is to conduct a thorough audit of your current password practices. Before you can implement new tools or policies, you need to understand the full scope of the problem. This means identifying every place where passwords are stored—from spreadsheets and shared documents to sticky notes—to establish a baseline for improvement.

Why is a long password or passphrase better than a short, complex one?

A long password or passphrase is significantly harder for modern computers to crack than a short, complex one due to the exponential increase in possible combinations. Modern password-cracking tools can easily guess common substitutions like "@" for "a" or "1" for "i". However, adding just one character to a password's length increases its strength exponentially. NIST guidelines now recommend focusing on length (e.g., 16+ characters) over forced complexity, as it's both more secure and easier for users to remember.

Should we still force employees to change their passwords every 90 days?

No, modern security best practices recommend moving away from mandatory, arbitrary password expirations like the 90-day rule. Frequent forced changes often lead to users creating weak, predictable password variations (e.g., "Password2024!") that are less secure. The current recommendation is to require a password change only when there is evidence of a compromise or when an employee with access leaves the company. This should be paired with strong MFA implementation.

What is the most important tool for a company's password security?

The most important tool is an Enterprise Password Manager (EPM). An EPM provides a centralized, encrypted vault for all company credentials. It solves the core problems of insecure storage (like spreadsheets) and sharing. Key features include a strong password generator, secure sharing capabilities without revealing the actual password, and detailed audit logs to track access.

How can we get employees to actually adopt the new password policy and tools?

Successful adoption relies on continuous training and demonstrating how the new system makes employees' jobs easier and more secure. Don't just roll out a new tool and policy. You must provide hands-on training for the EPM, explain the "why" behind the security changes, and show users how features like auto-fill and secure sharing save them time. Ongoing education about threats like phishing is also crucial to build a security-conscious culture.

What is Multi-Factor Authentication (MFA) and why is it essential?

Multi-Factor Authentication (MFA) is a security measure that requires users to provide two or more verification factors to gain access to an account, and it's essential because it can block the vast majority of account compromise attacks. Even if a criminal steals a password, MFA prevents them from accessing the account without the second factor (like a code from a phone app or a physical security key). Implementing MFA across all critical systems is one of the single most effective security controls an organization can deploy.


For more resources on implementing robust password management, check out the NIST guidelines on digital identity and BeyondTrust's enterprise password management solutions.

blog-hero-background-image
Cyber Security

Why PCI Compliance Tools Fail at Real-Time JavaScript Monitoring

backdrop
Table of Contents

Join thousands of professionals and get the latest insight on Compliance & Cybersecurity.


You've invested in a top-rated PCI compliance solution with a flashy dashboard, AI-powered features, and impressive marketing claims about real-time JavaScript protection. The dashboard shows all green checkmarks. Your quarterly reports look pristine. But behind this façade of security lies a disturbing truth: your payment pages remain vulnerable to the very attacks these tools promise to prevent.

"I have now POC'ed five of the 'top' products... I honestly don't know how they sleep at night selling this garbage," laments one security professional on Reddit. "Every single one of them promised PCI compliance, real-time protection, detection of script changes, the whole nine yards. And every single one of them failed when it came to doing the one thing they are supposed to do."

This isn't just frustration—it's a critical warning. As PCI DSS 4.0 introduces stringent requirements for JavaScript security, the limitations of conventional compliance tools have become dangerously apparent. The evolution of client-side attacks, particularly Magecart, has rendered traditional, checkbox-oriented compliance tools not just inadequate—but actively dangerous in the false security they provide.

The New Mandate: Understanding PCI DSS 4.0's Client-Side Focus

PCI DSS 4.0, launched March 31, 2022, represents a fundamental shift in payment security requirements. While organizations must implement most requirements by March 31, 2024, two critical JavaScript-focused requirements become mandatory by March 31, 2025:

  • Requirement 6.4.3: Mandates a complete inventory of all payment page scripts with written justification for each script and methods to assure their integrity.
  • Requirement 11.6.1: Requires change- and tamper-detection mechanisms that alert personnel to unauthorized modifications of HTTP headers and payment page contents as received by consumer browsers.

These requirements weren't created arbitrarily. They directly respond to the surge in client-side attacks that have devastated major retailers. The British Airways breach alone exposed 380,000 card details through a Magecart attack, resulting in a staggering $230 million fine, according to DataStealth.

With potential PCI non-compliance fines reaching $100,000 monthly and the average data breach cost hitting $4.88 million according to IBM's Data Breach Report, organizations can't afford to rely on compliance tools that provide only an illusion of security.

The Adversary: How Modern Attacks Bypass Traditional Defenses

To understand why conventional tools fail, we must first understand the adversary. Magecart attacks—digital skimming operations that inject malicious JavaScript to steal payment data—have evolved far beyond what most compliance tools can detect.

Modern attackers employ sophisticated evasion techniques:

  • Supply Chain Attacks: Rather than targeting your site directly, attackers compromise third-party services you already trust (analytics, chatbots, marketing pixels).
  • Script Obfuscation: Malicious code is disguised through encoding, encryption, or dynamic generation to evade pattern matching.
  • Domain Shadowing: Attackers host malicious scripts on hijacked subdomains of legitimate websites, making them appear trustworthy.
  • Conditional Execution: Perhaps most insidiously, attacks may only activate for specific users, locations, or user agents—completely invisible to security crawlers.

As Indusface notes, these attacks follow a sophisticated process: first exploiting vulnerabilities in plugins or security settings, then injecting malicious JavaScript into payment pages, and finally capturing and exfiltrating payment data to attacker-controlled servers.

Five Critical Failures of Modern PCI Compliance Tools

Failure 1: The Crawler Charade - Superficial Scanning vs. Real User Monitoring

"Several tools just crawl your site like a bot and claim that's good enough... You don't care what a bot sees—you care what your users are getting served," explains the Reddit user.

Crawler-based tools provide only a static snapshot of your site from a predictable source. They completely miss conditional attacks that target specific users while remaining invisible to security tools. Think of it like having a security guard who only checks the front door once an hour on a predictable schedule—any thief would simply wait for them to pass before breaking in.

Failure 2: The Sampling Fallacy - "Real-Time" Monitoring That Isn't

"One product bragged about monitoring in 'real-time' but turned out it was only sampling 10% of sessions... If you are not watching every session... you are just gambling," continues the security professional.

A 10% sampling rate means a 90% chance of missing targeted attacks. This approach fundamentally violates the intent of PCI DSS 11.6.1, which requires alerting on unauthorized modifications to payment pages. Sampling inherently accepts massive risk by design, offering a false sense of security while leaving most user sessions completely unprotected.

Failure 3: The Static Blind Spot - Hashing vs. Runtime Payload Analysis

"You can't secure what you don't inspect and hash alone won't cover dynamic runtime behavior," the post emphasizes. "Most solutions focus on static script inventory and metadata, not true runtime payload analysis."

Many tools rely on hash checking to validate script integrity. While useful for detecting changes to source files, hash checking is blind to:

  • In-memory script mutations
  • Code dynamically injected after the initial page load
  • Malicious behavior triggered by dynamic content

Failure 4: The "Alert-Only" Trap - Detection Without Prevention

Even when tools correctly detect an unauthorized script, many can only alert after the attack has already occurred. By then, payment data may already be compromised. This reactive approach conflicts with the preventative spirit of requirement 6.4.3, which aims to ensure unauthorized code isn't executed in the first place.

DataStealth highlights this critical limitation: script-based solutions that only detect changes after they happen provide little real protection for customers' payment data.

Failure 5: The Compatibility Gap - Leaving Users Unprotected

Many client-side security scripts don't work consistently across all browsers. Users on Samsung Internet, Opera, or older browser versions may remain completely unprotected, creating significant security gaps that attackers can exploit. A truly comprehensive solution must work across 100% of your user base, not just the most common browsers.

Beyond the Checkbox: What Effective Real-Time Monitoring Requires

To meet both the letter and spirit of PCI DSS 4.0, organizations need solutions that go far beyond checkbox compliance. Effective JavaScript security requires:

Comprehensive Script Inventory and Continuous Validation

Start by using automated tools to run a full JavaScript inventory on payment pages, as recommended by Feroot. Map all script dependencies and classify them by risk level. But don't stop there—implement continuous validation that monitors actual script behavior, not just static files.

100% Session Monitoring and Behavioral Analysis

Reject solutions that only sample a portion of user sessions. Effective monitoring must observe every user interaction to detect behavioral anomalies associated with formjacking and unauthorized script activity—such as unexpected network calls or suspicious DOM manipulation patterns.

Proactive Blocking with Content Security Policy (CSP) and Subresource Integrity (SRI)

Move beyond detection to prevention. A well-configured Content Security Policy can block unauthorized scripts from executing by restricting the sources of executable content. Feroot's DomainGuard and similar tools can automate CSP configuration, while Subresource Integrity (SRI) ensures that fetched script files haven't been tampered with.

Demand More Than a "Pretty PDF"

"As long as you check the boxes, pass the scans, and generate the pretty PDF, they consider their job done," laments the security professional. "PCI is supposed to be about protecting customers, but in practice, it has become a checkbox exercise."

Security leaders must demand more. When evaluating JavaScript security solutions, ask tough questions:

  • Does the tool monitor actual user sessions or just crawl the site?
  • What percentage of sessions does it analyze—100% or just a sample?
  • Does it analyze runtime behavior or just static script sources?
  • Can it prevent attacks, not just detect them after the fact?

As one security professional suggests, "Write a malicious script, see what happens. None of those [tools] will catch it… it doesn't take much."

The goal isn't just compliance—it's genuine security. Don't settle for tools that provide pretty dashboards but fail at their fundamental purpose. Your customers' data—and your organization's reputation—depend on it.

Frequently Asked Questions

What are the new PCI DSS 4.0 requirements for JavaScript security?

PCI DSS 4.0 introduces two critical requirements for JavaScript security that become mandatory on March 31, 2025. Requirement 6.4.3 mandates a complete inventory of all payment page scripts with justification for their purpose, while Requirement 11.6.1 requires mechanisms to detect any unauthorized changes or tampering of payment page content as it is rendered in the consumer's browser.

Why do traditional PCI compliance tools fail against modern attacks?

Traditional PCI compliance tools often fail because they rely on superficial methods like crawler-based scanning, partial session sampling, and static file hashing. These methods are easily bypassed by modern, sophisticated attacks that use techniques like conditional execution (activating only for real users), script obfuscation, and compromising third-party supply chains.

How do Magecart attacks steal payment data?

Magecart attacks steal payment data by injecting malicious JavaScript into a website's payment pages. This malicious script, often delivered through a compromised third-party service, secretly captures credit card details as customers type them and exfiltrates the information to an attacker-controlled server, all without being noticed by the user or basic security tools.

What is the difference between crawler-based scanning and real user monitoring?

Crawler-based scanning provides a static, one-time snapshot of your website as seen by a bot, which cannot detect threats that only activate for actual users. In contrast, real user monitoring analyzes the code and behavior experienced by every single user in their browser in real-time, making it essential for detecting the conditional and evasive attacks that PCI DSS 4.0 aims to prevent.

What should I look for in an effective JavaScript security solution for PCI DSS 4.0?

An effective solution must go beyond simple scanning and provide 100% real-time session monitoring, runtime behavioral analysis, and proactive prevention capabilities. Look for tools that can analyze the behavior of scripts as they execute, detect anomalies, and automatically block unauthorized scripts using technologies like a properly configured Content Security Policy (CSP).

blog-hero-background-image
Cyber Security

How to Tame the Vulnerability Beast in PCI DSS 4.0.1 Authenticated Scans

backdrop
Table of Contents

Join thousands of professionals and get the latest insight on Compliance & Cybersecurity.


You've set up your authenticated vulnerability scans as required by the new PCI DSS 4.0.1 standards, and now you're staring at a report with hundreds—maybe thousands—of findings. Your heart sinks as you scroll through page after page of vulnerabilities, each one flagged with technical jargon and severity ratings that don't seem to align with your actual business risk.

"Is this normal?" you wonder. "How is anyone supposed to address all of these findings before our next assessment?"

If this scenario sounds painfully familiar, you're not alone. Across forums and industry discussions, compliance professionals are voicing the same frustration: authenticated vulnerability scans are creating an overwhelming flood of findings that's nearly impossible to manage effectively.

The culprit? PCI DSS Requirement 11.3.1.2—a new mandate taking effect on March 31, 2025, that requires authenticated internal vulnerability scans. While this requirement strengthens security, it's also generating an unprecedented volume of vulnerabilities that teams must verify, prioritize, and remediate.

This article will provide you with practical strategies to tame this compliance beast. You'll learn how to filter the noise, efficiently handle false positives, and create realistic remediation timelines that satisfy both auditors and your security team.

The New Mandate: Deconstructing PCI DSS Requirement 11.3.1.2

Before diving into solutions, let's understand exactly what's required. Requirement 11.3.1.2 mandates authenticated internal vulnerability scans with specific components:

  • Frequency: Internal scans must be performed at least every three months
  • Remediation: All high-risk and critical vulnerabilities must be addressed according to your organization's risk ranking policy
  • Rescanning: Follow-up scans are required to verify remediation
  • Tooling: Scanning tools must be kept up-to-date with the latest vulnerability signatures
  • Personnel: Scans must be performed by qualified individuals with a clear separation of duties

This represents a significant shift from previous requirements, which primarily focused on unauthenticated scans. The difference? Unauthenticated scans only see what's visible from outside a system, like open ports or services. Authenticated scans, however, log into systems with credentials, revealing a much deeper layer of potential vulnerabilities—including missing patches, misconfigurations, and vulnerable software versions.

"Is This Normal?" – Why Authenticated Scans Feel Overwhelming

Yes, it's entirely normal to feel overwhelmed by authenticated scan results. As one compliance professional noted on Reddit, "Auth Vuln Scans cause more problems than other area in 4.0.x." Another lamented, "running these scans often results in an overwhelming number of vulnerabilities, making it nearly impossible to verify false positives efficiently."

Here's why this happens:

  1. Deeper visibility equals more findings: Authenticated scans see everything a logged-in user can see—installed software versions, patch levels, detailed configurations—resulting in exponentially more data than unauthenticated scans.
  2. Scanners are designed for strict compliance: Vulnerability scanners must report software with known vulnerable version numbers as findings, even if a mitigating configuration or workaround is in place, leading to numerous potential false positives.
  3. Severity ratings lack context: Most scanners use generic CVSS scores that don't account for your specific environment, potentially flagging low-risk systems with high-severity ratings.

A Strategic Framework: Adopting the Vulnerability Management Lifecycle (VMLC)

Rather than drowning in a sea of vulnerabilities, successful organizations adopt a structured approach—the Vulnerability Management Lifecycle (VMLC). This framework, outlined by security professionals, transforms vulnerability management from a reactive firefighting exercise into a systematic, sustainable process.

The VMLC consists of four key stages:

  1. Identify: Use authenticated scans to discover vulnerabilities within the Cardholder Data Environment (CDE).
  2. Investigate: Assess the scope and impact of findings, determining actual risk to cardholder data.
  3. Address: Implement patches or mitigating controls based on prioritization.
  4. Maintain: Continuously monitor, rescan to verify fixes, and adapt to new threats.

With this framework in mind, let's explore specific strategies for each stage that address the most pressing pain points compliance professionals face.

Taming the Beast: Actionable Strategies for Scan Results

Step 1: Prioritize Ruthlessly - Filtering the Noise

"If you're dealing with an overload of vulns, then you should filter down to just those high and critical and get them addressed," advised one Reddit user in a discussion about vulnerability management. This approach aligns with PCI DSS requirements while making the workload manageable.

PCI DSS requires remediation of all vulnerabilities, but it allows for prioritization based on risk. Requirement 6.3.1 mandates that organizations identify vulnerabilities and assign risk rankings, while Requirement 11.4.4 states that all identified "exploitable vulnerabilities" must be remediated.

Here's how to prioritize effectively:

  1. Filter by Severity First: Begin by focusing exclusively on vulnerabilities rated as critical or high. These represent your most urgent compliance concerns.
  2. Define Your Risk Ranking: Don't rely solely on the scanner's generic CVSS score. Your organization must have a documented standard for what qualifies as "critical" or "high" that considers:
    • Is the system internet-facing?
    • Does it store, process, or transmit cardholder data?
    • Are there mitigating controls in place?
    • Is there a known public exploit for the vulnerability?
  3. Perform a Targeted Risk Analysis: As one compliance professional advised, "Do your own Targeted Risk Analysis to determine your risk rating. Be mindful of a realistic patch timeline." This analysis should consider both the technical severity and the business context.

Step 2: Conquer False Positives - The Art of Documentation

One of the most frustrating aspects of authenticated scans is the prevalence of false positives—vulnerabilities that are technically present but pose no actual risk due to mitigating controls or configurations.

According to Tenable, vulnerability scanners must report known vulnerable software versions as vulnerable, even if a workaround or mitigating configuration exists. This compliance-focused approach creates noise but can be managed with proper documentation.

Here's how to handle false positives effectively:

  1. Establish a Validation Process: Don't accept scan results at face value. Create a documented process for technical teams to verify each finding and determine if it's a true vulnerability or a false positive.
  2. Document Everything: For each identified false positive, maintain detailed documentation explaining:
    • Why it's considered a false positive
    • Specific technical details of any mitigating controls in place
    • References to vendor documentation if applicable (e.g., a Microsoft bulletin stating a patch is not needed if a certain registry key is set)
  3. Prepare for the Auditor: This documentation isn't just for your internal team—it's essential evidence to present to your PCI QSA (Qualified Security Assessor) during an audit. Having thorough, technical explanations ready will streamline the assessment process.

Step 3: Build a Realistic Timeline - From Panic to Plan

The pressure to remediate vulnerabilities immediately can lead to burnout and hasty actions. Instead, create a structured remediation plan that aligns with PCI requirements while remaining realistic for your team.

PCI DSS Requirement 6.3.3 mandates that critical or high-security patches must be installed within one month of release. Use this as a foundation for your timeline, but develop a comprehensive schedule based on your risk rankings.

Here's how to build an effective remediation timeline:

  1. Plan Ahead: Don't wait until your quarterly scan to start planning. Schellman recommends scheduling vulnerability scans at least six months before your audit to allow ample time for remediation.
  2. Create a Risk-Based Schedule: Use your risk rankings to set clear remediation deadlines:
    • Critical: Within 30 days (as per Req 6.3.3)
    • High: Within 60 days
    • Medium: Within 90 days
    • Low: Within 180 days or at the next scheduled maintenance window
  3. Document Your Policy: Formalize these timeframes in a written policy. Your auditor will expect to see documentation of your remediation approach, not just the results.
  4. Verify with Rescans: After implementing patches or mitigating controls, always conduct a follow-up scan to confirm the vulnerability has been addressed. This verification step is explicitly required by PCI DSS 11.3.1.2.
  5. Show Progress: As one compliance professional noted, "Keep on patching...this is important, it demonstrates commitment to reducing the number of vulns." Even if you can't remediate everything immediately, showing consistent progress will satisfy most auditors.

Moving from Reactive to Proactive

Taming the vulnerability beast created by PCI DSS 4.0.1's authenticated scan requirement isn't about eliminating every finding at once. It's about implementing a structured, documented, and risk-based process that manages vulnerabilities effectively over time.

By adopting the Vulnerability Management Lifecycle framework, ruthlessly prioritizing based on risk, systematically documenting false positives, and creating realistic remediation timelines, you can transform an overwhelming flood of findings into a manageable compliance program.

Remember that while authenticated scans create challenges, they also provide unprecedented visibility into your security posture. Embracing this requirement isn't just about checking a compliance box—it's about enhancing your overall security and protecting cardholder data more effectively.

The March 31, 2025 deadline for implementing Requirement 11.3.1.2 gives organizations time to prepare. Start building these processes now, and you'll be well-positioned to maintain continuous compliance without the panic that comes from reactive approaches.

As your vulnerability management process matures, you'll likely find that what once seemed like an overwhelming beast becomes a valuable tool in your security arsenal—one that helps you identify and address risks before they can be exploited.

Frequently Asked Questions

What is the new authenticated scanning requirement in PCI DSS 4.0?

PCI DSS Requirement 11.3.1.2 mandates that organizations conduct internal vulnerability scans with authenticated credentials at least once every three months. Unlike unauthenticated scans that only see a system's exterior, authenticated scans log in to provide a much deeper view of potential vulnerabilities, such as missing patches and software misconfigurations.

Why do authenticated vulnerability scans find so many issues?

Authenticated scans find more issues because they have deeper visibility into a system's configuration. By logging in with credentials, they can see all installed software, patch levels, and detailed settings, similar to what a logged-in user would see. This comprehensive view naturally uncovers exponentially more potential findings compared to unauthenticated scans, which only inspect for open ports and services from the outside.

How should we prioritize vulnerabilities to meet PCI DSS requirements?

You should prioritize vulnerabilities based on risk, starting with those rated as "critical" and "high." PCI DSS allows for this risk-based approach. To do this effectively, create a documented risk-ranking policy that considers factors beyond the scanner's generic CVSS score, such as whether the system is internet-facing, if it handles cardholder data, and if mitigating controls are in place.

What is a false positive and how do we document it for an auditor?

A false positive is a finding reported by a scanner that does not pose an actual risk in your specific environment, often due to a mitigating control or a unique configuration. To handle these for an audit, you must maintain detailed documentation for each one explaining why it is not a threat, referencing the specific mitigating controls, and including vendor documentation if available. This documentation serves as crucial evidence for your PCI QSA.

What is a realistic timeline for remediating vulnerabilities?

A realistic timeline is based on your organization's risk rankings. According to PCI DSS Requirement 6.3.3, critical and high-risk security patches must be installed within one month of release. You can use this as a baseline to create a documented policy with tiered deadlines, such as 30 days for critical, 60 for high, 90 for medium, and 180 for low-risk vulnerabilities.

When does the authenticated scanning requirement (11.3.1.2) become mandatory?

The requirement for authenticated internal vulnerability scans, PCI DSS Requirement 11.3.1.2, becomes effective on March 31, 2025. Until this date, it is considered a best practice, giving organizations time to implement the necessary processes and tools to manage the findings effectively.

blog-hero-background-image
Cyber Security

Master Raw Log Analysis Like a Pro Security Engineer

backdrop
Table of Contents

Join thousands of professionals and get the latest insight on Compliance & Cybersecurity.


You've been staring at your SIEM dashboard for hours, scrolling through normalized alerts and color-coded metrics. The senior manager wants the incident closed quickly, but something doesn't feel right. Your gut says there's more to this story, but the SIEM isn't showing it. This is the moment that separates security operators from true threat hunters.

Too many security professionals look for reasons to dismiss alerts instead of running investigations to ground. They rely on SIEM dashboards that present a neat, filtered version of reality—while sophisticated attackers exploit the blind spots those systems create.

It's time to go beyond the dashboard and master the art of raw log analysis.

The SIEM's Blind Spot: Exploiting Normalization and Default Detections

SIEMs are powerful tools, but they're not infallible. They rely on parsers that normalize data to fit expected formats, and when log entries don't match these expectations, critical information can be dropped or misinterpreted.

Consider this real-world example: During the infamous Equifax breach, attackers operated undetected for 76 days, affecting 147 million people. One factor that contributed to this extended dwell time was a failure to thoroughly analyze raw logs that contained evidence of the intrusion. With the average data breach now costing $4.45 million according to BuiltIn, these blind spots are expensive.

Attackers have developed numerous techniques to bypass SIEM detections:

  1. Policy Wildcards & Case-Insensitivity: AWS API permissions like s3:ListBucket can be manipulated with case variations or wildcards that evade detections which don't properly normalize these details.
  2. User-Agent Header Manipulation: As detailed in research on SIEM bypasses, attackers easily spoof User-Agent HTTP headers to masquerade as legitimate traffic, evading rules that rely on exact string matches.
  3. Cloud Obfuscation: Cross-account role chaining in AWS can complicate detection, as temporary access keys can be reused, making it difficult to trace the origin identity in normalized data.

Even sophisticated tools like Azure Sentinel have loopholes that can be exploited by attackers who understand how they work. This is why raw log analysis isn't just a nice-to-have skill—it's essential for uncovering what your SIEM might be missing.

The Digital Crime Scene: A Pro's Guide to Critical Log Sources

Before diving into search techniques, you need to know where to look. Think of log sources as a digital crime scene—each containing potential evidence that can reveal the attacker's story.

According to forensic analysis research, logs fall into two main categories:

  1. Network & Security Devices: Routers, Firewalls (like Azure Firewall), IDS/IPS
  2. Endpoint Logs: Servers, Desktops (OS, application, database logs)

Windows Operating System Critical Logs

When investigating Windows systems, commit these locations to memory:

  • Primary Location: Access .evtx files directly at C:\Windows\System32\winevt\Logs\
  • Key Event Logs:
    • Security (4xxxxx IDs): Contains authentication events, privilege use, and policy changes
    • System: Records service starts/stops, driver loading, and system events
    • Application: Tracks application errors and other application-defined events
    • PowerShell/Operational: Records PowerShell script execution and commands
    • Microsoft-Windows-Sysmon/Operational: If Sysmon is installed, provides detailed process and network activity

The Malware Archaeology Cheat Sheets offer excellent mapping of Windows log events to the MITRE ATT&CK Framework.

Linux Operating System Critical Logs

For Linux environments, focus on these key files:

  • /var/log/auth.log or /var/log/secure: Authentication and authorization logs (logins, sudo usage)
  • /var/log/messages or /var/log/syslog: General system activity and messages
  • /var/log/kern.log: Kernel logs, useful for driver or hardware issues
  • /var/log/apache2/access.log or /var/log/nginx/access.log: Web server access logs
  • /var/log/utmp or /var/log/wtmp: Records of user logins and sessions

Hunting for Malicious Activity

When analyzing these logs, focus on these key attacker behaviors:

  • Persistence: Look for service creation, installation, or modification events (EventIDs 4697, 7045 in Windows)
  • Defense Evasion: Watch for Event Log clearing (EventID 1102), disabling of security services
  • Privilege Escalation: Monitor for account additions to admin groups (EventID 4728, 4732, 4756)
  • Lateral Movement: Examine Terminal Service sessions, remote login records
  • Data Exfiltration: Check USB device logs, unusual outbound connections

The exact events will differ between platforms, but the attack patterns remain consistent. For Windows-specific Event IDs, Ultimate Windows Security provides an invaluable reference.

The Investigator's Toolkit: Practical Raw Log Search Techniques

Once you've identified your target log sources, you need effective techniques to extract the needle from the haystack. Here's how to search raw logs like a pro security engineer:

The Raw Operator: Your Direct Line to Unparsed Data

Most modern security platforms provide a way to search unparsed data. In Google Security Operations, for example, this is done using the raw= operator as outlined in their official documentation.

The basic syntax looks like this:

raw = "suspicious_string"  // Basic substring search
raw = /regex_pattern/i     // Regular expression search with case insensitivity

This bypasses all normalization and searches the original, unaltered log data.

Mastering Regular Expressions for Surgical Searches

Regular expressions (regex) are the scalpel in your surgical toolkit. They allow for precise pattern matching that can identify signs of compromise that normalized fields might miss.

Here are some practical regex patterns you can use immediately:

Windows Security Event Examples

// User Account Created
raw = /\"EventID\":\s*4720/

// User Account Deleted
raw = /\"EventID\":\s*4726/

// Successful Logon
raw = /\"EventID\":\s*4624.*\"LogonType\":\s*10/  // Type 10 is RDP

// Failed Logon
raw = /\"EventID\":\s*4625/

// PowerShell Command Execution with Encoded Commands
raw = /powershell.*\s+-enc|\s+-encodedcommand/i

Linux Log Examples

// Failed SSH Authentication
raw = /Failed password for .* from .* port \d+ ssh2/

// Successful SSH Login
raw = /Accepted password for .* from .* port \d+ ssh2/

// Sudo Command Execution
raw = /sudo:.*COMMAND=/

// Attempts to Access Sensitive Files
raw = /cat.*\/etc\/(passwd|shadow)/

Common Pitfalls and Limitations

When working with raw logs, be aware of these common challenges:

  1. Character Limits: Many platforms restrict search field length (e.g., 150 characters in Google SecOps)
  2. Special Characters: Remember to escape special characters in regex patterns (e.g., \ becomes \\)
  3. Performance Implications: Raw searches are often more resource-intensive than normalized field searches
  4. Time Range Considerations: Always specify a narrow time range for raw searches to improve performance

Beyond Simple Searches: Advanced Techniques

For more complex investigations, combine raw searches with other techniques:

  • Proximity Searches: Find events that occurred close together in time
  • Context Enrichment: After finding suspicious events in raw logs, pivot to normalized data for context
  • Pattern Extraction: Use regex capturing groups to extract specific details like IP addresses or usernames

From Data to Narrative: Structuring Your Investigation

Finding suspicious log entries is just the beginning. The real skill lies in transforming these isolated data points into a coherent narrative that reveals the attacker's actions. Here's how to structure your investigation like a professional security engineer:

Event Correlation: Connecting the Dots

Start by manually linking disparate events across different log sources. For example:

  1. A failed logon (EventID 4625) from an unfamiliar IP address
  2. Followed by a successful logon (EventID 4624) for the same user
  3. Creation of a new scheduled task (EventID 4698)
  4. Outbound network connections to an unknown domain

Together, these events tell a story: an attacker brute-forced credentials, gained access, established persistence via a scheduled task, and initiated command-and-control communication.

As noted in SalvationData's analysis techniques, effective correlation requires understanding the relationships between different log types and the ability to see patterns across them.

Timeline Construction: Establishing the Sequence

Chronology is critical in security investigations. Create a timeline that arranges all relevant events in sequence:

02:03:45 - Failed login attempt from IP 198.51.100.x (user: admin)
02:05:12 - Successful login from IP 198.51.100.x (user: admin)
02:10:37 - New service created "SysUpdater" with binary path "C:\Windows\Temp\svc.exe"
02:11:05 - Outbound connection to domain malicious-c2.example

This timeline approach transforms isolated log entries into a narrative that clearly shows the attack progression. It also helps identify gaps where additional investigation is needed.

Anomaly Detection: Recognizing What Doesn't Belong

Developing an eye for anomalies is perhaps the most valuable skill in raw log analysis. Train yourself to spot what's out of place:

  • A developer account accessing financial records
  • Logins outside of business hours
  • Processes running from unusual locations (/tmp/, %TEMP%)
  • Unexpected parent-child process relationships

Often, the most telling indicators are subtle deviations from normal patterns rather than obvious red flags. This is where your experience and institutional knowledge become invaluable.

From Analysis to Action: Communicating Your Findings

As one security professional noted on Reddit, "No matter how good your work, if you can't document or discuss, you're not adding much to the team as a whole."

Structure your findings in a clear, logical format:

  1. Executive summary (what happened)
  2. Timeline of key events
  3. Technical details with supporting log evidence
  4. Recommended mitigations or next steps

Include specific log entries as evidence, but translate the technical details into business impact. This approach bridges the gap between technical analysis and actionable intelligence that management can understand.

Frequently Asked Questions

What is raw log analysis in cybersecurity?

Raw log analysis is the process of examining original, unaltered log data directly from its source to uncover security incidents that automated tools might miss. Unlike a SIEM, which normalizes and filters data, raw log analysis allows you to see the complete, unparsed information. This is crucial for finding subtle signs of compromise, investigating complex attacker techniques, and verifying the accuracy of SIEM alerts.

Why is analyzing raw logs a necessary supplement to a SIEM?

Analyzing raw logs is a critical supplement to a SIEM because it helps overcome a SIEM's inherent blind spots, such as data normalization errors and bypassable detection rules. While SIEMs are excellent for aggregating alerts, attackers can exploit how they parse data. By going directly to the raw logs, you can see the unfiltered evidence that the SIEM may have misinterpreted or missed entirely.

What are the first logs a security analyst should check during an investigation?

The first logs to check depend on the system, but you should generally start with authentication logs, system event logs, and web server access logs. For Windows, prioritize the Security, System, and Application event logs. For Linux, start with /var/log/auth.log (or secure), /var/log/syslog (or messages), and web server logs like /var/log/apache2/access.log. These sources provide immediate insight into user activity and potential points of entry.

How do attackers bypass SIEM detections?

Attackers can bypass SIEM detections by manipulating log data in ways that normalization parsers don't expect, using obfuscated commands, or exploiting case-insensitivity and wildcards in system policies. For example, an attacker might spoof a User-Agent header to look like benign traffic or use encoded PowerShell commands that a simple rule won't catch. Because many SIEM rules rely on exact string matching, these techniques can render an attack invisible on a dashboard.

How do I get started with raw log analysis?

To get started, begin by learning the locations of critical log files on your key systems and practicing with search tools like grep or the raw= operators in your security platform. Take an existing SIEM alert, find the corresponding raw log, and compare them. Next, learn basic regular expressions (regex) to search for patterns like IP addresses or specific commands. Building a personal library of common search queries is an excellent way to improve your efficiency.

What are some common challenges when searching raw logs?

Common challenges include performance issues with large datasets, dealing with special character escaping in search queries, and potential character limits imposed by search tools. Raw log searches can be slower and more resource-intensive than searching indexed fields, so you must be precise with your time ranges and search terms. Additionally, you need to be mindful of escaping special characters in your regular expressions to ensure they work correctly.

Become the Go-To Investigator on Your Team

Mastering raw log analysis transforms you from someone who simply responds to alerts into a true threat hunter who can uncover what others miss.

The skills we've covered—understanding SIEM limitations, knowing where to look, using advanced search techniques, and building coherent narratives—address the frustration many security professionals feel when dealing with shallow investigations or overwhelming amounts of data.

As one security expert puts it, "There is a vast difference between being aware of something because you came across the general concept in your studies, and actually knowing how to do it competently." Raw log analysis epitomizes this gap between theory and practice.

Take Action Today

  1. Challenge yourself: Go back to a recent alert from your SIEM and find the corresponding raw log entries. What additional context do they provide?
  2. Practice your regex: Create a small collection of regex patterns for common security events in your environment.
  3. Think like an attacker: Review your organization's detection rules and consider how you might bypass them. Then check if raw logs would catch what your SIEM might miss.
  4. Build your reference library: Bookmark resources like the Malware Archaeology Cheat Sheets and Ultimate Windows Security for quick reference during investigations.

Remember, in the world of security engineering, those who master raw log analysis don't just close tickets—they tell the complete story of what happened and prevent the next chapter from being written.

blog-hero-background-image
Cyber Security

How to Secure API Gateway for Machine-to-Machine Authentication

backdrop
Table of Contents

Join thousands of professionals and get the latest insight on Compliance & Cybersecurity.


You've set up an API Gateway to expose your services, but now you're facing a common challenge: how do you secure endpoints that aren't consistently connected to your corporate network? With no human user to authenticate and unpredictable client IPs, traditional security approaches fall short.

"I want to open this up because we have some endpoints that are not always connected to the corp network or VPN, but I'm not sure the best way to go about securing access," a developer recently shared on Reddit. The challenge intensifies because "there isn't really a 'user' logging in or authenticating" in machine-to-machine (M2M) communication.

This guide will demystify M2M authentication for AWS API Gateway by comparing three robust methods: Mutual TLS (mTLS), OAuth 2.0 with Client Credentials, and AWS IAM. You'll learn when to use each approach and get a practical implementation guide to secure your services effectively.

The Foundations of API Gateway Security

Before diving into specific authentication methods, let's understand what an API Gateway does and why securing it properly is crucial.

The Critical Role of API Gateway

An API Gateway serves as the single entry point for all clients accessing your backend services. It's not just a proxy—it's a crucial middleware component responsible for:

  • Authentication and authorization: Validating that incoming requests come from legitimate clients
  • Traffic management: Rate limiting, throttling, and load balancing requests
  • Request/response transformation: Modifying payloads as needed between client and server
  • Security governance: Implementing consistent security policies across all endpoints

As Solo.io explains, the API Gateway is your first line of defense—if compromised, attackers could gain access to multiple backend systems.

Universal Security Best Practices

Regardless of your chosen authentication method, implement these foundational security practices:

  1. Use HTTPS exclusively: Enforce TLS for all communication to protect data in transit.
  2. Implement rate limiting: Prevent abuse and DDoS attacks by limiting the number of requests any client can make.
  3. Configure request size limits: Block excessively large payloads that could overflow buffers or consume excessive resources.
  4. Enable comprehensive logging: Track all API access for auditing and threat detection.
  5. Regularly rotate credentials: Minimize the impact of potential key compromise.

Now, let's explore the three main approaches to securing machine-to-machine communication on API Gateway.

A Comparative Guide to M2M Authentication Methods

According to AWS's guidance, there's no one-size-fits-all approach to API Gateway security. The best method depends on your API type, identity provider, and client access patterns. Let's examine the three most robust options for machine-to-machine authentication.

Authentication Methods at a Glance

MethodBest ForProsCons
Mutual TLS (mTLS)B2B applications, IoT, financial servicesHighest security level, no shared secretsCertificate lifecycle management complexity
OAuth 2.0 (Client Credentials)Multi-tenant APIs, third-party integrationsIndustry standard, fine-grained scopes, short-lived tokensMore complex initial setup
AWS IAM (SigV4)AWS-native applicationsNative AWS integration, granular IAM policiesAWS-specific, complex client implementation

Let's examine each method in detail.

Method 1: Mutual TLS (mTLS)

Mutual TLS takes standard TLS encryption a step further. In regular TLS, only the server presents a certificate to prove its identity. With mTLS, both the client and server present X.509 certificates to verify each other's identities.

How It Works

  1. The client initiates a connection to the API Gateway
  2. The server presents its certificate
  3. The client verifies the server's certificate
  4. The client presents its certificate
  5. The server verifies the client's certificate against its truststore
  6. If both verifications succeed, a secure connection is established

As one developer noted on Reddit, "Machine to machine is simple to implement with mutual TLS."

When to Choose mTLS

mTLS is ideal when:

  • You need the highest level of security
  • Your clients can manage certificates securely
  • You're building B2B applications or financial services APIs
  • You need to comply with regulations requiring strong authentication

AWS introduced mTLS for API Gateway specifically to address these high-security use cases.

Method 2: OAuth 2.0 with Client Credentials

The OAuth 2.0 Client Credentials grant is designed explicitly for machine-to-machine authentication. It allows a client application to obtain an access token using its client ID and secret.

How It Works

  1. The client application authenticates to an authorization server using its client ID and secret
  2. The authorization server validates these credentials and issues a short-lived JWT access token
  3. The client includes this token in requests to the API Gateway
  4. The API Gateway validates the token and authorizes the request based on scopes contained in the token

As one Reddit user emphasized, "Using the Client Credentials Grant per OAuth 2.0 is the modern and secure way to provide machine-to-machine authorization."

When to Choose OAuth 2.0 Client Credentials

This approach is best when:

  • You need a standards-based solution that works across platforms
  • You want fine-grained access control through scopes
  • You're building a multi-tenant API
  • You already have an identity provider like Amazon Cognito

The security advantage is significant: "The JWT that is issued by the IDP is short-lived, so if it's intercepted in any way, the damage scope is much smaller," notes another Reddit user.

Method 3: AWS IAM with SigV4

AWS Identity and Access Management (IAM) provides a robust mechanism for controlling access to AWS resources, including API Gateway APIs. With this method, clients sign their requests using AWS Signature Version 4 (SigV4) with IAM credentials.

How It Works

  1. The client application obtains AWS credentials (access key ID and secret access key)
  2. The client generates a signature for each request using these credentials
  3. The API Gateway verifies this signature and checks IAM policies to authorize the request

This addresses the question many developers have: "How would IAM integrate into something like this?"

When to Choose IAM Authentication

IAM authentication is best when:

  • Your services are primarily within the AWS ecosystem
  • You can leverage AWS SDK support for signature generation
  • You need granular access control via IAM policies
  • You want to avoid managing an external identity provider

According to AWS Prescriptive Guidance, instead of using static credentials, leverage EC2 Instance Profiles for applications running on EC2, or IAM Roles Anywhere for on-premises systems using X.509 certificates.

Step-by-Step Implementation: Securing API Gateway with Mutual TLS (mTLS)

Given its strong security properties and relative simplicity for machine-to-machine use cases, let's implement mTLS for API Gateway. This addresses the need for securing endpoints that aren't consistently connected to the corporate network.

Prerequisites

Before starting, you'll need:

  • A regional custom domain name for your API
  • A server certificate for your custom domain in AWS Certificate Manager (ACM)
  • Administrator access to your AWS account

Step 1: Create a Certificate Authority (CA) and Client Certificates

First, let's create a root Certificate Authority and client certificates. You can use OpenSSL for this:

# Create Root CA Key and Certificate
openssl genrsa -out RootCA.key 4096
openssl req -new -x509 -days 3650 -key RootCA.key -out RootCA.pem

# Create Client Key and Certificate Signing Request (CSR)
openssl genrsa -out my_client.key 2048
openssl req -new -key my_client.key -out my_client.csr

# Sign the Client Certificate with the Root CA
openssl x509 -req -in my_client.csr -CA RootCA.pem -CAkey RootCA.key -set_serial 01 -out my_client.pem -days 3650 -sha256

These commands create:

  • A root CA (RootCA.key and RootCA.pem)
  • A client private key (my_client.key)
  • A client certificate (my_client.pem) signed by your root CA

Step 2: Upload Your Truststore to S3

Your truststore is the RootCA.pem file that contains the public key of your Certificate Authority. Upload it to S3:

aws s3 cp RootCA.pem s3://your-truststore-bucket/

Make sure your bucket has appropriate access controls and the API Gateway service has permissions to read from it.

Step 3: Create a Custom Domain with mTLS Enabled

Now, configure your API Gateway custom domain with mTLS enabled:

aws apigateway create-domain-name --region us-east-1 \
    --domain-name api.example.com \
    --regional-certificate-arn arn:aws:acm:us-east-1:123456789012:certificate/your-cert-id \
    --endpoint-configuration types=REGIONAL \
    --security-policy TLS_1_2 \
    --mutual-tls-authentication truststoreUri=s3://your-truststore-bucket/RootCA.pem

Step 4: Map Your API Stage to the Custom Domain

Connect your API to the custom domain:

aws apigateway create-base-path-mapping \
    --domain-name api.example.com \
    --rest-api-id your-api-id \
    --stage prod

Step 5: Test Your mTLS-protected API

Clients must now present their certificate and key to make a successful request:

curl -v --key ./my_client.key --cert ./my_client.pem https://api.example.com/your-endpoint

If you receive a 403 Forbidden response, check that:

  • The client certificate is valid and not expired
  • The client certificate is signed by a CA in your truststore
  • The client is correctly presenting the certificate

As the AWS mTLS documentation notes, this approach provides two-way authentication that's ideal for machine-to-machine communication.

Advanced Strategies and Common Pitfalls

Handling Large Payloads: The Presigned URL Pattern

One common challenge with API Gateway is its 30-second timeout limit, as noted by developers: "API gateway times out after 30 seconds." This makes direct file uploads problematic.

The solution? Use a presigned URL pattern:

  1. Client authenticates to your API Gateway using one of the methods above
  2. API Gateway invokes a Lambda function
  3. Lambda generates a presigned S3 URL with limited permissions and lifespan
  4. Client uses this URL to upload directly to S3, bypassing API Gateway

As one developer recommended: "Typically for this kind of workload I will use API gateway to proxy a request to lambda that gets me a presigned upload URL."

This approach has several advantages:

  • Avoids API Gateway timeout limitations
  • Reduces load on your API infrastructure
  • Lets you "limit the file size with presigned URLs if you're worried about someone being able to upload TBs of content"
  • Maintains security through temporary, scoped access

Critical Security Step: Disable the Default Endpoint

When using custom domains with security features like mTLS, a frequently overlooked step is disabling the default API Gateway endpoint. By default, API Gateway provides a public execute-api endpoint that bypasses your custom domain security.

To enforce your security policies consistently, disable this default endpoint:

aws apigateway update-rest-api \
    --rest-api-id your-api-id \
    --patch-operations op=replace,path=/disableExecuteApiEndpoint,value='true'

This ensures all traffic must go through your secured custom domain.

Effective Logging and Auditing

While some developers question using DynamoDB for logs due to searchability concerns, AWS offers better solutions. Enable API Gateway access logging to CloudWatch Logs:

aws apigateway update-stage \
    --rest-api-id your-api-id \
    --stage-name prod \
    --patch-operations op=replace,path=/accessLogSettings/destinationArn,value='arn:aws:logs:region:account-id:log-group:api-gateway-logs'

This provides:

  • Powerful search capabilities via CloudWatch Logs Insights
  • Automated alerting on suspicious patterns
  • Integration with third-party SIEM tools
  • Long-term storage options

Layering Security Methods

For critical systems, consider implementing defense in depth by combining authentication methods:

  1. Use mTLS to verify the client's identity through certificates
  2. Require OAuth tokens to authorize specific actions with fine-grained scopes
  3. Implement rate limiting to prevent abuse
  4. Apply IP-based restrictions where feasible

As AWS advises, layering security controls provides the most robust protection.

Choosing the Right M2M Authentication Method

There is no one-size-fits-all solution for securing machine-to-machine communication. The best approach depends on your specific requirements:

Choose mTLS when:

  • Maximum security is required
  • You're building B2B or financial applications
  • You can manage client certificate lifecycles
  • Regulatory compliance demands strong authentication

Choose OAuth 2.0 Client Credentials when:

  • You need a standards-based approach
  • Fine-grained access control through scopes is important
  • You're building a multi-tenant system
  • Short-lived tokens are preferred for security

Choose AWS IAM when:

  • Your services are primarily within AWS
  • You want to leverage AWS's native security model
  • You need granular IAM policies
  • You're already using AWS SDKs in your clients

Conclusion

Securing API Gateway for machine-to-machine authentication doesn't have to be overwhelming. By understanding the strengths and trade-offs of mTLS, OAuth 2.0, and IAM authentication, you can select and implement the right approach for your specific needs.

Remember these key takeaways:

  1. There's no "perfect" authentication method—choose based on your specific requirements
  2. Implement universal best practices like HTTPS, rate limiting, and comprehensive logging
  3. Consider the presigned URL pattern for large file uploads
  4. Disable the default API Gateway endpoint to enforce your security policies
  5. For critical systems, layer multiple security methods for defense in depth

With these strategies, you can confidently secure your machine-to-machine API communication, even for services that aren't consistently connected to your corporate network.

By implementing proper M2M authentication, you'll protect your services, data, and infrastructure while enabling the seamless integration modern applications require.

Frequently Asked Questions

What is the best authentication method for M2M communication on AWS API Gateway?

There is no single "best" method; the ideal choice depends on your specific requirements. The three primary methods are Mutual TLS (mTLS) for maximum security, OAuth 2.0 Client Credentials for a flexible, standards-based approach, and AWS IAM for applications deeply integrated within the AWS ecosystem.

Why should I use mTLS for securing my API Gateway?

You should use Mutual TLS (mTLS) when you require the highest level of security and non-repudiation. It provides strong, two-way authentication by requiring both the client and server to verify each other's certificates, making it ideal for high-stakes environments like financial services, B2B integrations, and IoT.

How can I securely handle large file uploads through API Gateway?

The best way to handle large file uploads securely is with the presigned URL pattern, which bypasses API Gateway's 30-second timeout limit. In this pattern, an authenticated client requests a temporary, scoped URL from a backend Lambda function and then uploads the file directly to S3.

What is the most common security risk when using a custom domain with API Gateway?

The most common security risk is failing to disable the default execute-api endpoint. Leaving this endpoint active creates a public backdoor that bypasses the security controls you've configured on your custom domain, such as mTLS or WAF rules.

When is it best to use AWS IAM for API Gateway authentication?

AWS IAM is best for authenticating applications that run entirely within the AWS ecosystem (e.g., on EC2 or Lambda). This method leverages native AWS security controls, allows for granular access management via IAM policies, and simplifies client implementation through AWS SDKs that handle request signing automatically.

Can I combine multiple authentication methods on API Gateway?

Yes, layering multiple authentication and authorization methods provides a defense-in-depth strategy for critical systems. For example, you can enforce mTLS to verify the client's identity and also require an OAuth 2.0 token to authorize specific actions, ensuring that a compromised token is useless without the client's certificate.

blog-hero-background-image
Cyber Security

Building Your First Cloud Security Home Lab

backdrop
Table of Contents

Join thousands of professionals and get the latest insight on Compliance & Cybersecurity.


You've got a stack of certifications, but every job posting still asks for "hands-on experience." Sound familiar? You scroll through Reddit cybersecurity forums and see the same story repeated: "I can't get a cloud security job even though I have all these certifications."

The hard truth is that certifications alone won't cut it in cloud security. Employers want proof that you can actually apply your knowledge in real-world scenarios.

But here's the good news: you can build that experience yourself, without waiting for someone to hire you first.

In this guide, I'll walk you through creating your own cloud security home lab—a practical, hands-on environment where you can develop the exact skills employers are looking for. We'll focus on implementing essential cloud security tools like CSPM (Cloud Security Posture Management) and CWPP (Cloud Workload Protection Platform) using free and low-cost resources.

Why a Home Lab is Non-Negotiable for Cloud Security Engineers

When I speak with hiring managers in cloud security, they consistently mention the same thing: they need people who can hit the ground running. A home lab provides several critical advantages:

  • It bridges the gap between theoretical knowledge and practical application
  • It gives you a safe, controlled environment to experiment with security tools
  • It helps you build a portfolio of demonstrable skills you can discuss in interviews
  • It provides deep familiarity with cloud architecture, networking, and security configurations

As one Reddit user put it: "Try labbing and get hands-on practice in home labs... try to get hands-on experience with various cloud security solutions."

The Foundation: Key Cloud Security Concepts to Master

Before we dive into building the lab, let's quickly review the core concepts you'll be putting into practice:

The Shared Responsibility Model

Cloud security is a partnership between providers and customers. According to Check Point's cloud security overview, responsibilities break down as follows:

  • Provider's Responsibility: Securing the underlying infrastructure, physical hosts, and core network
  • Customer's Responsibility: Securing everything they put in the cloud, including identity and access management (IAM), data protection, and workload configurations

Your lab will focus primarily on the customer side of this equation.

Zero Trust Security

The "never trust, always verify" mindset is essential in cloud environments. Every user, device, and application must be verified before being granted access, implementing least privilege access and micro-segmentation to contain potential breaches.

Common Cloud Security Challenges You'll Simulate

Your lab will help you tackle real-world challenges:

  • Increased Attack Surface: Public clouds create more entry points for attackers
  • Lack of Visibility: Tracking all assets and their configurations can be difficult
  • Dynamic Workloads: Traditional security tools struggle with ephemeral cloud resources
  • Granular Privilege Management: Overly broad permissions create significant risks

Blueprint for Your Lab: Two Paths to Hands-On Experience

Let's address another common pain point from the forums: "Lack of knowledge on necessary hardware for setting up a cybersecurity lab." I'll outline two different approaches:

Path A: The Traditional On-Prem Virtual Lab

This approach uses your existing computer to run virtual machines.

Hardware Requirements:

  • Processor: Minimum quad-core CPU (Intel i5/Ryzen 5 or better)
  • RAM: At least 16GB, but 32GB is recommended for running multiple VMs
  • Storage: Minimum 500GB SSD for performance

Some power users on Reddit suggest much higher specs: "You need at least 8/16 cores/threads, 64GB+ RAM, and 2+ NICs for PCAP/management." While these specs are ideal for serious pentesting, you can start with more modest hardware.

Software Stack:

  • Virtualization: VirtualBox (Free), VMware Workstation Pro (Paid), or Proxmox VE (Open-source)
  • Operating Systems: Kali Linux (for pentesting), Windows Server (for Active Directory), Ubuntu (for web servers)
  • Key Tools: Wireshark, Nmap, Metasploit, Snort, Burp Suite

Path B: The Modern, Cost-Effective Cloud-Native Lab (Recommended)

This path addresses the pain of cost while providing a more authentic cloud security experience.

Core Infrastructure: Leverage the Oracle Cloud Free Tier. This provides:

  • 2 AMD-based Compute VMs with 1/8 OCPU and 1 GB memory each
  • A flexible block of 4 Arm-based Ampere A1 cores and 24 GB of memory

This generous free tier lets you run multiple VMs without spending a dime, making it ideal for those who don't want to invest in expensive hardware upfront.

Optional Hybrid Component:

  • A Raspberry Pi can serve as a low-power on-prem server for DNS filtering or code repositories
  • Example use case: Install Pi-hole for network-wide ad-blocking and DNS monitoring
  • Example use case: Deploy Gitea for a self-hosted Git service

Project Walkthrough: Building and Securing Your First Cloud Workload

Now let's get practical with a step-by-step guide to setting up your lab.

Step 1: Provision Your Cloud Infrastructure

  1. Sign up for the Oracle Cloud Free Tier
  2. Create an Ampere A1 VM with Ubuntu, which offers generous memory for running security tools
  3. Configure basic security: SSH keys instead of passwords, and restrict inbound connections

Step 2: Establish Secure Remote Access

Don't expose management ports (like SSH) directly to the internet. Instead:

  1. Set up a VPN server using OpenVPN on a small, dedicated VM
  2. Configure the VPN to allow access to your internal lab network
  3. Ensure all sensitive management interfaces are only accessible via the VPN

The DigitalOcean OpenVPN Guide provides detailed instructions for this process on Ubuntu.

Step 3: Gaining Posture Visibility with CSPM

What is CSPM? Cloud Security Posture Management tools provide visibility into your entire cloud environment, identifying misconfigurations and compliance violations. According to Palo Alto Networks, good security starts with visibility.

Lab Action: Connect a free-tier or trial CSPM tool to your Oracle Cloud account. Options include:

  • Wiz (offers limited free access)
  • Prisma Cloud (trial available)
  • CloudSploit (open-source option)

Run an initial scan to discover assets and identify default misconfigurations (e.g., public storage buckets, overly permissive firewall rules).

Step 4: Protecting Workloads with CWPP

What is CWPP? Cloud Workload Protection Platforms focus on securing individual workloads like VMs, containers, and serverless functions. According to GetGuru, they provide vulnerability management, threat detection, and configuration security at the workload level.

CSPM vs. CWPP Explained: This is a common point of confusion, so let me clarify:

  • CSPM looks at the configuration of your cloud "house" (Are the doors locked? Are the windows shut?)
  • CWPP looks at what's happening inside the rooms (Is there a thief in the living room? Is the oven on fire?)

As one Reddit user recommended: "If you care more about runtime and workload visibility and are willing to install an agent, try Sysdig. If you're looking for more asset discovery and posture stuff and don't care about the runtime agent stuff, try Orca."

Lab Action:

  1. Deploy a lightweight CWPP agent (using a free trial from Sysdig, Trend Micro, or Falco) onto your Ubuntu VM
  2. Perform a vulnerability scan to find outdated packages
  3. Set up runtime monitoring to detect suspicious activities

Putting Your Lab to Use: Practical Scenarios

Now that your lab is set up, here are some exercises to build your skills:

Scenario 1: Misconfiguration Detection and Remediation

  1. Intentionally create a misconfiguration (e.g., open a port in a security group to 0.0.0.0/0)
  2. Use your CSPM tool to detect the issue
  3. Remediate the finding and re-run the scan to confirm the fix

Scenario 2: Vulnerability Management

  1. Use your CWPP agent to scan your Ubuntu VM for vulnerabilities
  2. Practice patching the vulnerability (sudo apt update && sudo apt upgrade)
  3. Verify the fix with another scan

Scenario 3: Network Traffic Analysis

  1. Install tcpdump on your VM and capture traffic while accessing a simple web server
  2. Analyze the PCAP file in Wireshark to understand HTTP requests and responses
  3. Identify potential security issues in the traffic patterns

From Lab to Livelihood

A hands-on lab is the most direct path to a cloud security career. As we've seen from numerous Reddit discussions, the industry values practical experience over paper certifications.

The best part? You can build this experience at minimal to no cost using free-tier cloud services. Start with this basic setup and then expand by adding more services, exploring container security (Kubernetes), or building a SIEM with Security Onion for log aggregation.

Remember what we see time and again in the cybersecurity community: "You will come back a few months later with a new post, 'I can't get a cloud security job even though I have all of these certifications.'" Don't be that person. Stop just collecting certs. Start building. Your future career will thank you.

By creating and maintaining a cloud security home lab, you'll develop the skills, confidence, and portfolio needed to stand out in job interviews. When asked about your experience with CSPM or CWPP tools, you won't just reference a certification—you'll be able to describe how you used these tools to solve real security problems in your lab environment.

And that's exactly what employers are looking for.

Frequently Asked Questions

Why is a cloud security home lab so important for getting a job?

A cloud security home lab is crucial because it provides the hands-on, practical experience that employers demand. While certifications validate theoretical knowledge, a home lab allows you to apply that knowledge by building, configuring, and securing real cloud environments. This demonstrates to hiring managers that you can solve actual security problems, bridge the gap between theory and practice, and discuss your skills with confidence during interviews.

What is the real cost of setting up a cloud security lab?

You can build a fully functional cloud security lab for free. By leveraging generous free-tier offerings like the Oracle Cloud Free Tier, you can provision virtual machines and other cloud resources without any initial investment in hardware or cloud credits. The guide recommends this cloud-native approach specifically because it eliminates the cost barrier, making it accessible to everyone.

What is the main difference between CSPM and CWPP?

The primary difference is their area of focus: CSPM secures your overall cloud environment, while CWPP protects the individual workloads running within it. Think of CSPM as checking the security of your house (Are the doors locked? Are the windows shut?). In contrast, CWPP monitors what's happening inside the rooms (Is there a threat in the living room?). Both are essential for a comprehensive cloud security strategy.

How can I showcase my home lab projects to employers?

The best way to showcase your work is by creating a portfolio. You can document your lab projects on a personal blog, a GitHub repository, or even in a dedicated section of your resume. For each project, describe the architecture you built, the tools you used (like Wiz for CSPM or Sysdig for CWPP), the challenges you overcame, and the skills you learned. This provides tangible proof of your abilities that you can share with recruiters and discuss in detail during interviews.

What should I do after setting up my basic lab?

Once your basic lab is operational, start running practical scenarios to build your skills. Begin with the exercises in this guide, such as detecting and remediating misconfigurations with your CSPM tool and managing vulnerabilities with your CWPP agent. From there, you can expand your lab's complexity by exploring container security with Kubernetes, setting up a SIEM like Security Onion for log analysis, or practicing incident response drills.


Have you built your own cloud security home lab? Share your experiences and tips in the comments below!

toaster icon

Thank you for reaching out to us!

We will get back to you soon.